Old fashioned peanut butter balls – protein-packed, three ingredients, super-simple, and utterly delicious! They’re so easy that they’re perfect for holidays and even a simple treat to go in lunches. You can dip them in chocolate but they’re still good without it. Enjoy!
Jump to Recipe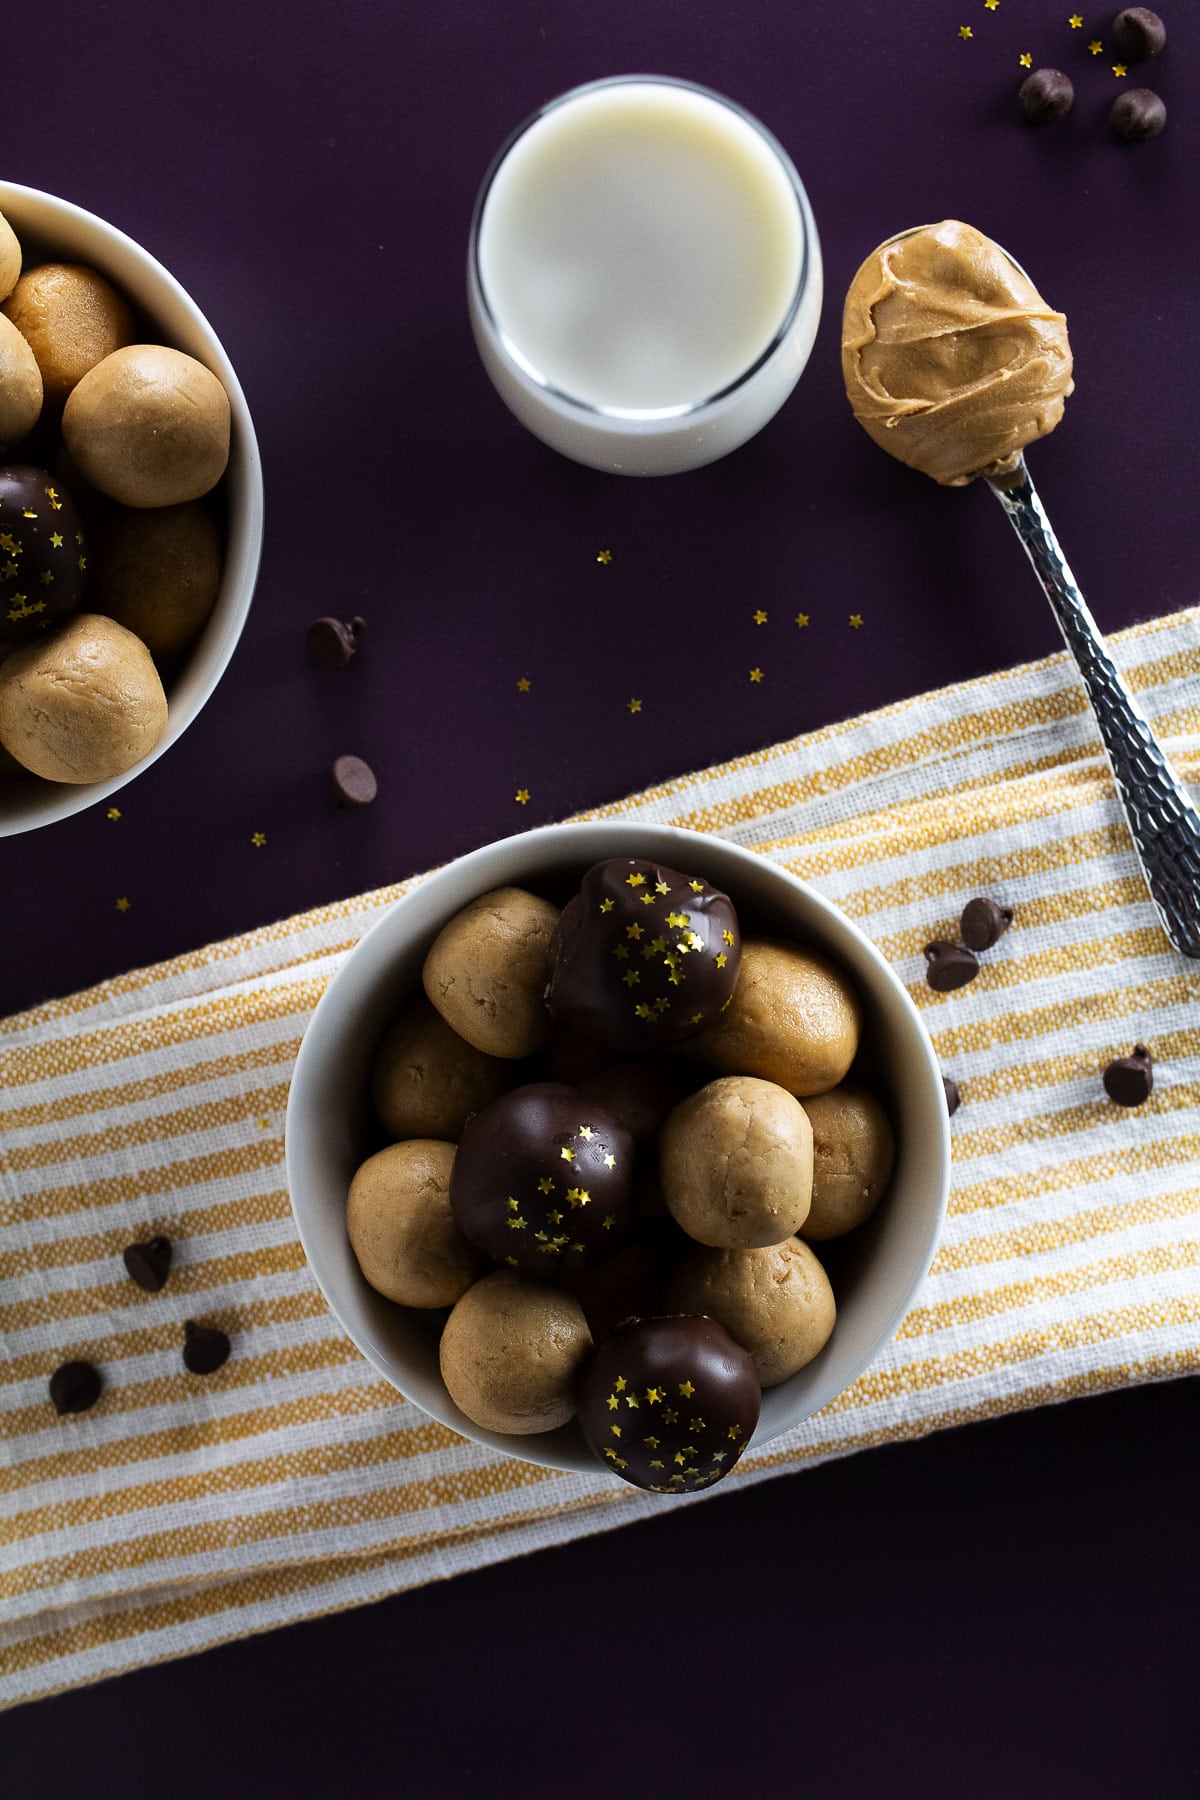
These no-bake, old-fashioned peanut butter balls are too good to be so customizable and straightforward, right? Wrong. Yes, they are simple, and yes, they are delicious. In fact, there are only three ingredients (five if you dip them in chocolate).
They’re so delicious, in fact, that you’ll want them over Reese’s peanut butter cups. Not sorry! They are that good. And they are so, so customizable (we will show you how in the variations section below).
Jump to:
Better Than Reeses Peanut Butter Cups?
So, Sarah loves Reese’s peanut butter cups and pretty much all things peanut butter and chocolate. But for me, I’m not the biggest fan. I don’t hate it. I’m just pretty neutral to them. I would readily trade them for taffy on Halloween.
But these old-fashioned peanut butter balls made me reconsider my stance on chocolate and peanut butter. They are that good!
So, why do these peanut butter balls taste better than Reese’s cups? I think it’s because the peanut butter and chocolate are fresher.
These no-bake peanut butter balls are perfect for Halloween and Valentine’s day but will make a fantastic treat any time of the year. Especially in the summertime when you don’t want to heat the whole house.
Old Fashioned Peanut Butter Balls Ingredients
There are only a handful of ingredients to make the old-fashioned peanut butter balls. However, we showed them in the image below.
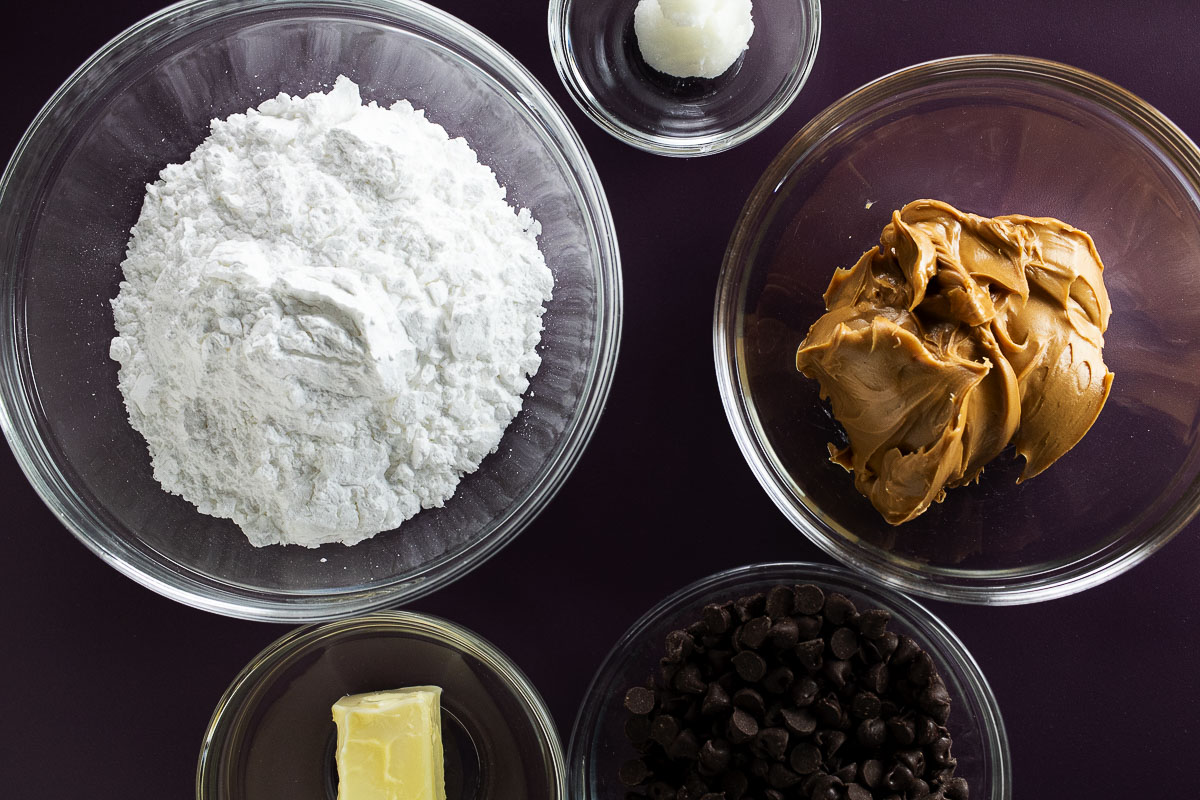
- Peanut butter
- Powdered sugar
- Semi-sweet chocolate chips
- Coconut oil
- Butter
See the recipe card for quantities.
How to Make Peanut Butter Balls
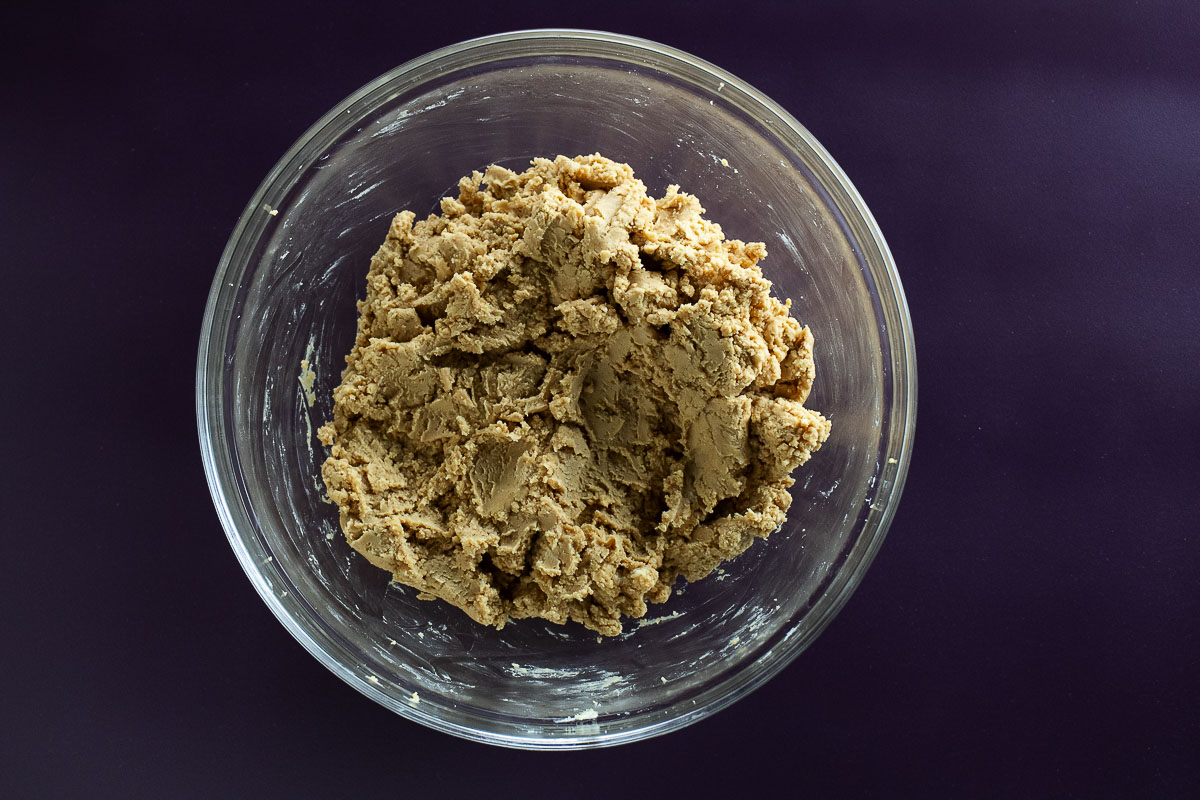
The first thing you need to do is grab a large mixing bowl and add the peanut butter, butter, and powdered sugar.
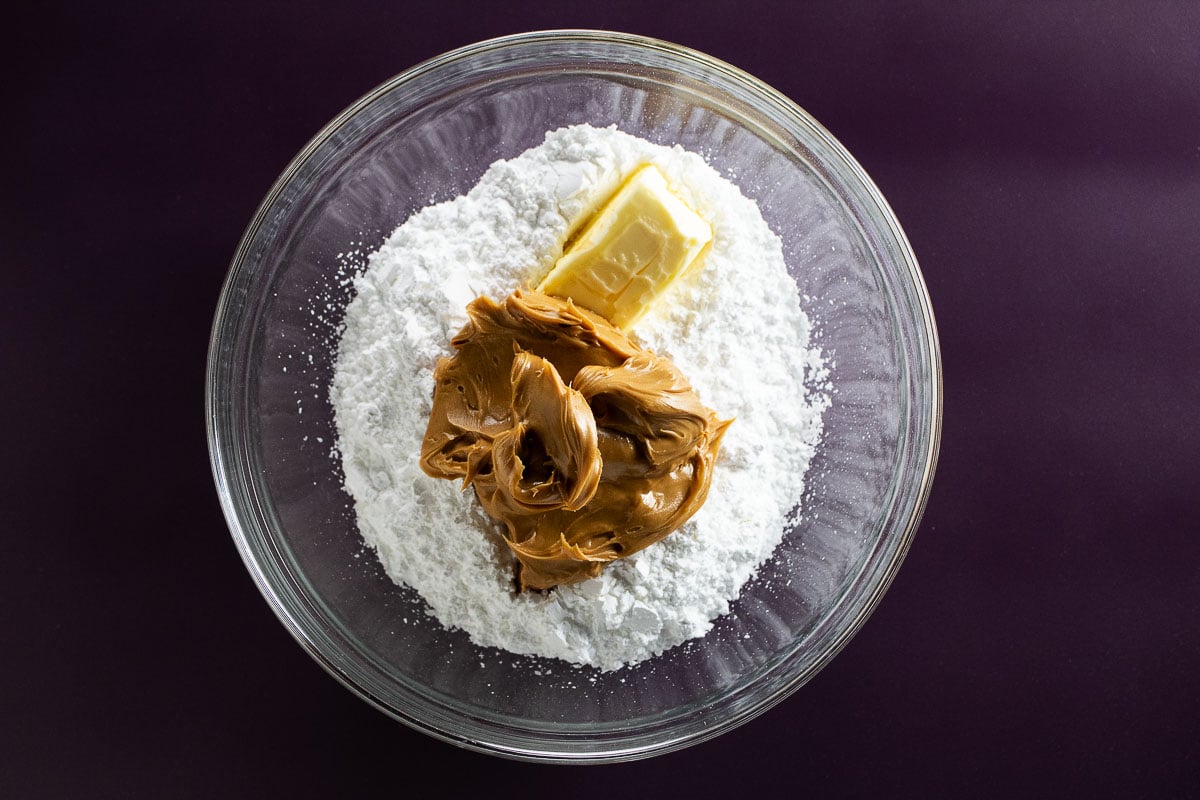
Using a rubber spatula or large spoon, stir to combine the ingredients.
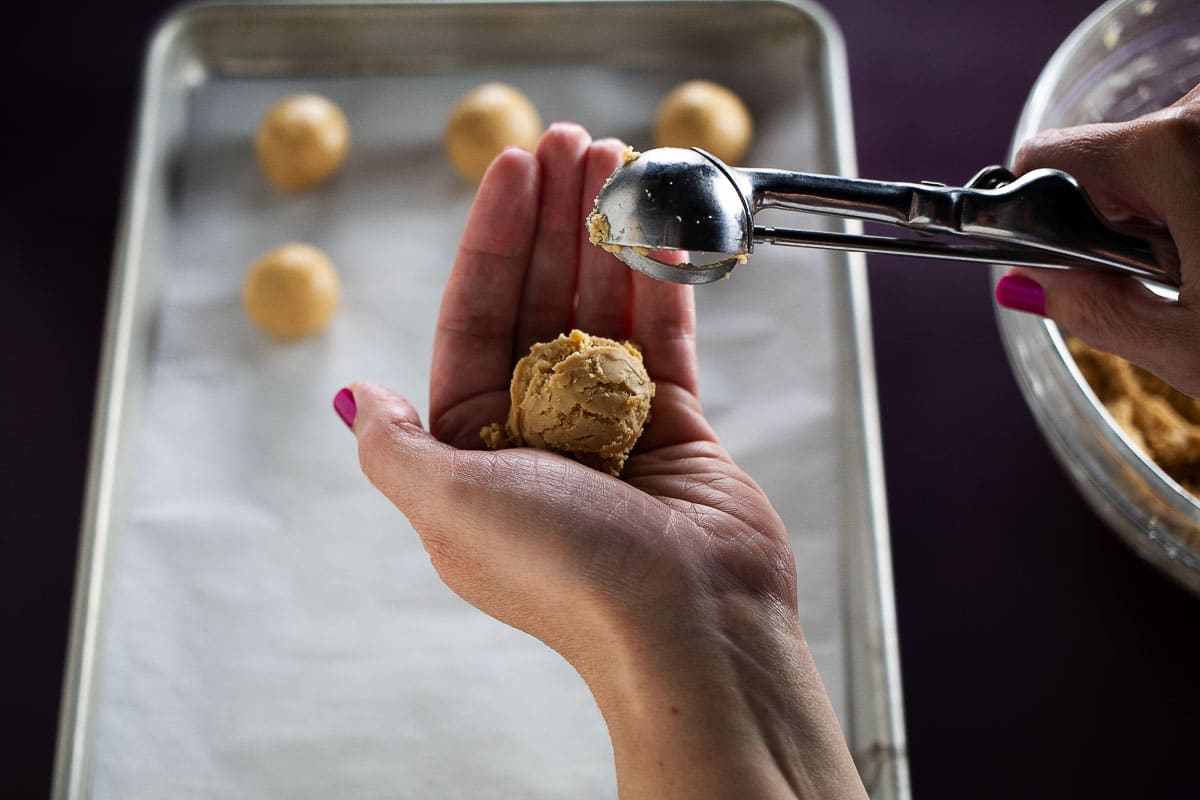
Now, it’s time to form the peanut butter balls. Use your hand, a melon baller, or a teaspoon to grab enough of the peanut butter ball mixture to make 1-inch peanut butter balls.
Roll the mixture in your hands to form balls. The mixture should be firm but pliable. It shouldn’t fall apart when you try to form it into a ball.
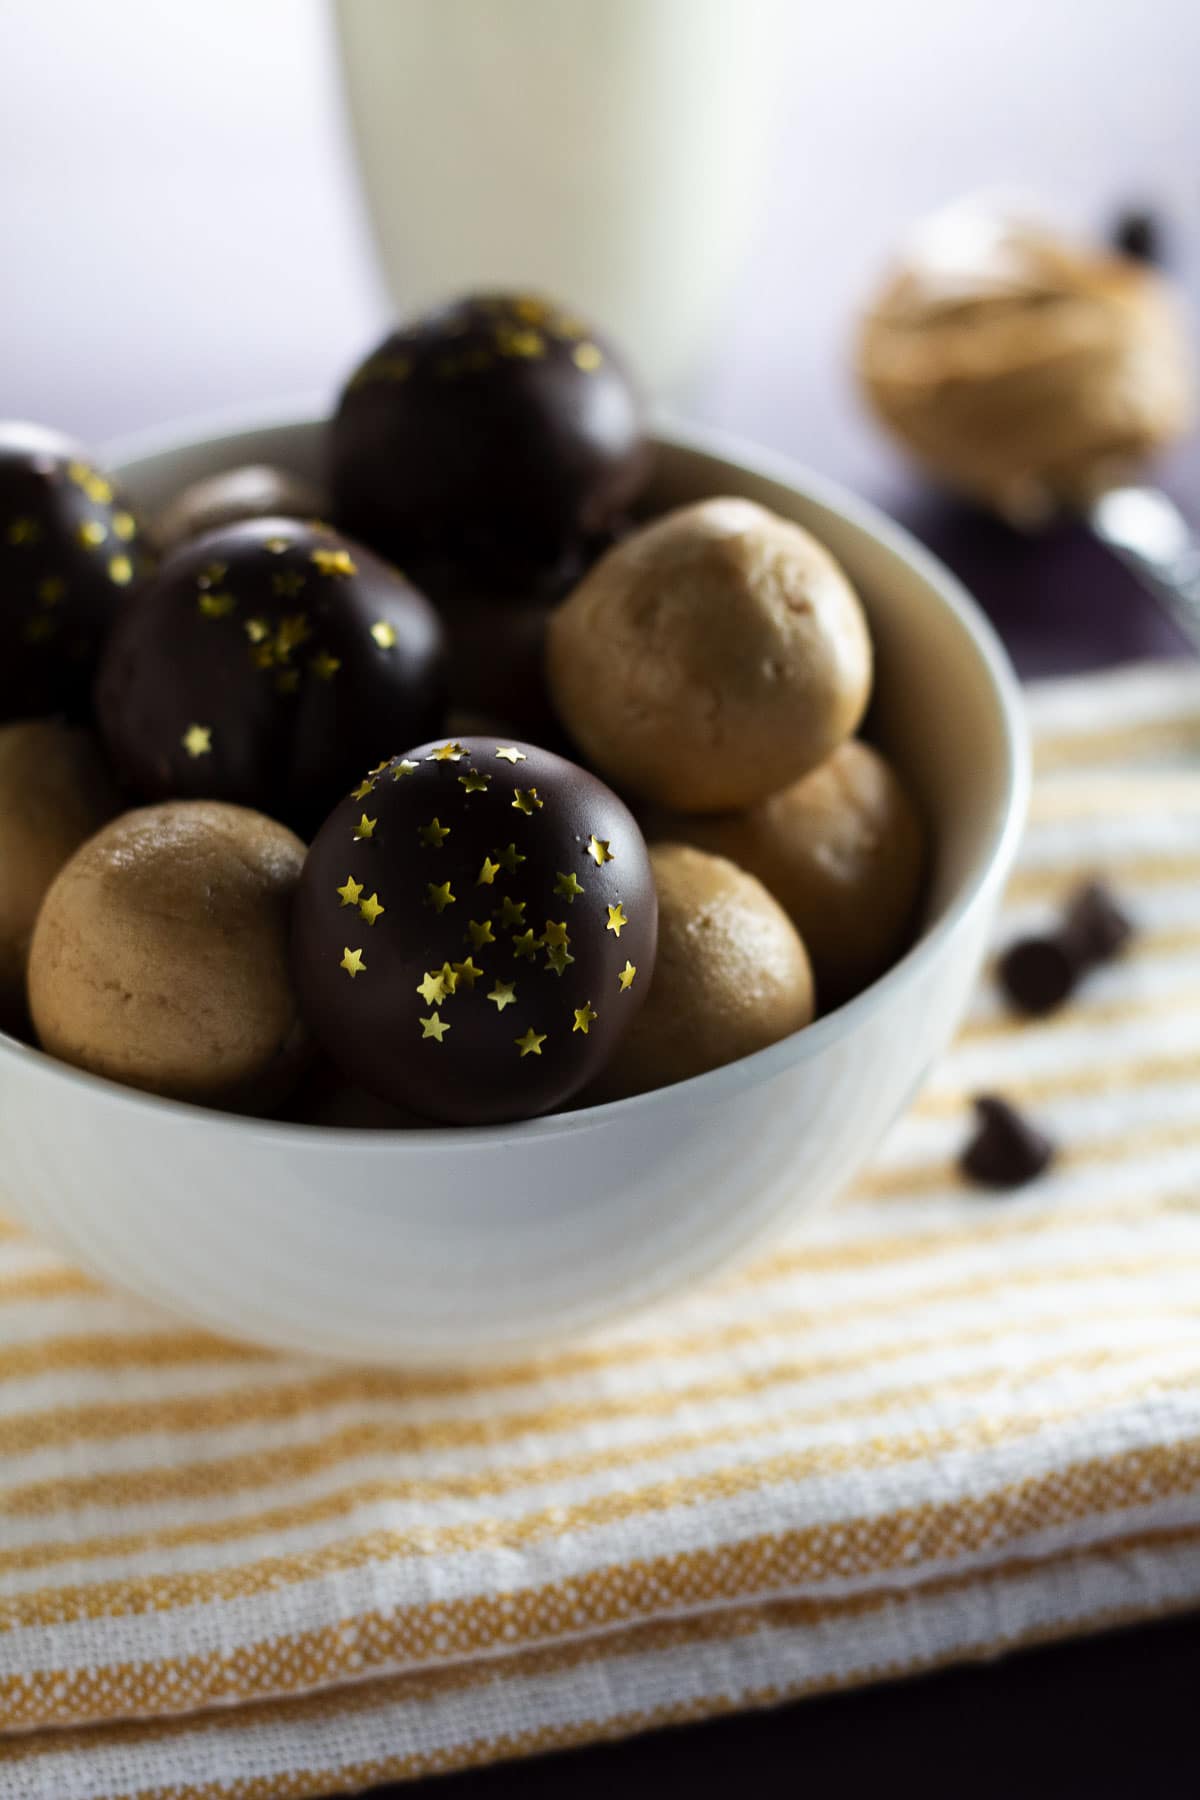
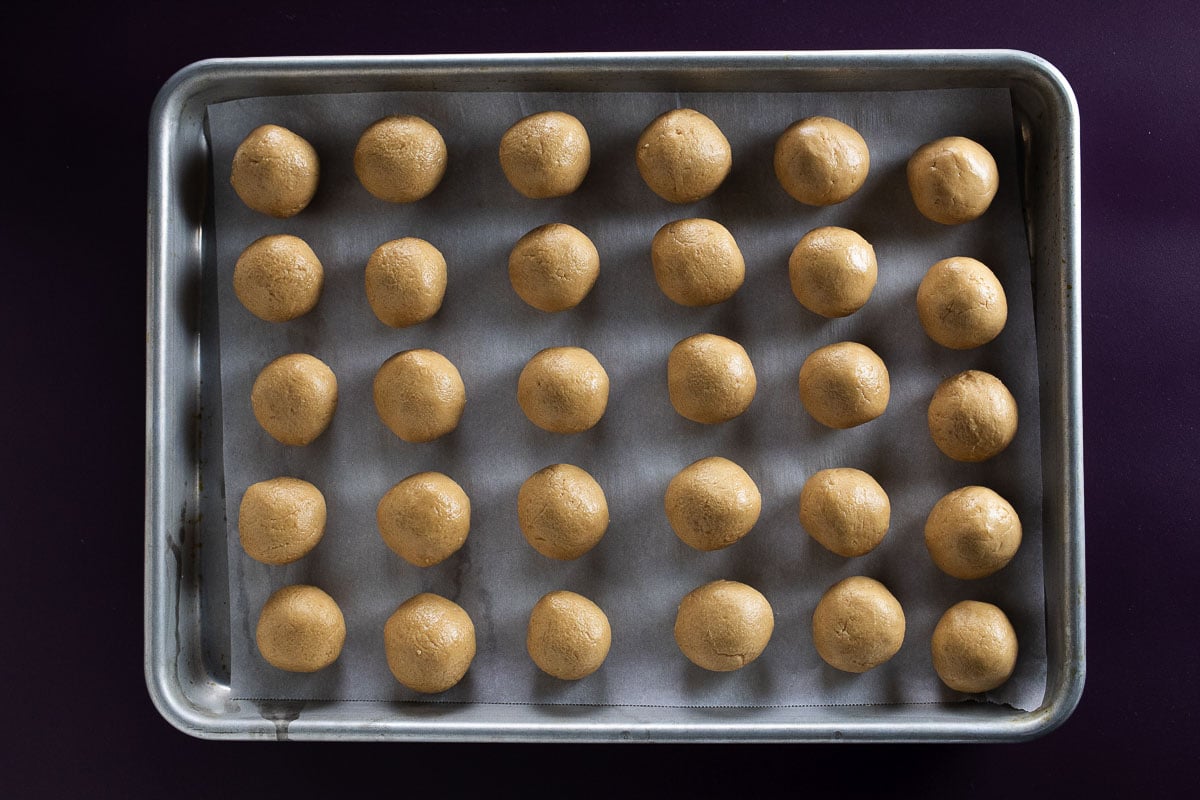
Once you form all of your balls, they should look something like the picture below. Then, place them in the refrigerator for 15 to 30 minutes.
Hint: We had to add extra butter because the mixture was too dry, causing the balls to fall apart.
Variations
Just like our hot cookie dough recipe, this one is so customizable that it is nearly impossible to list all of the possible variations for this recipe.
But, to get the gears turning, we’ve listed some of the ways you can alter it so that you can make it your own.
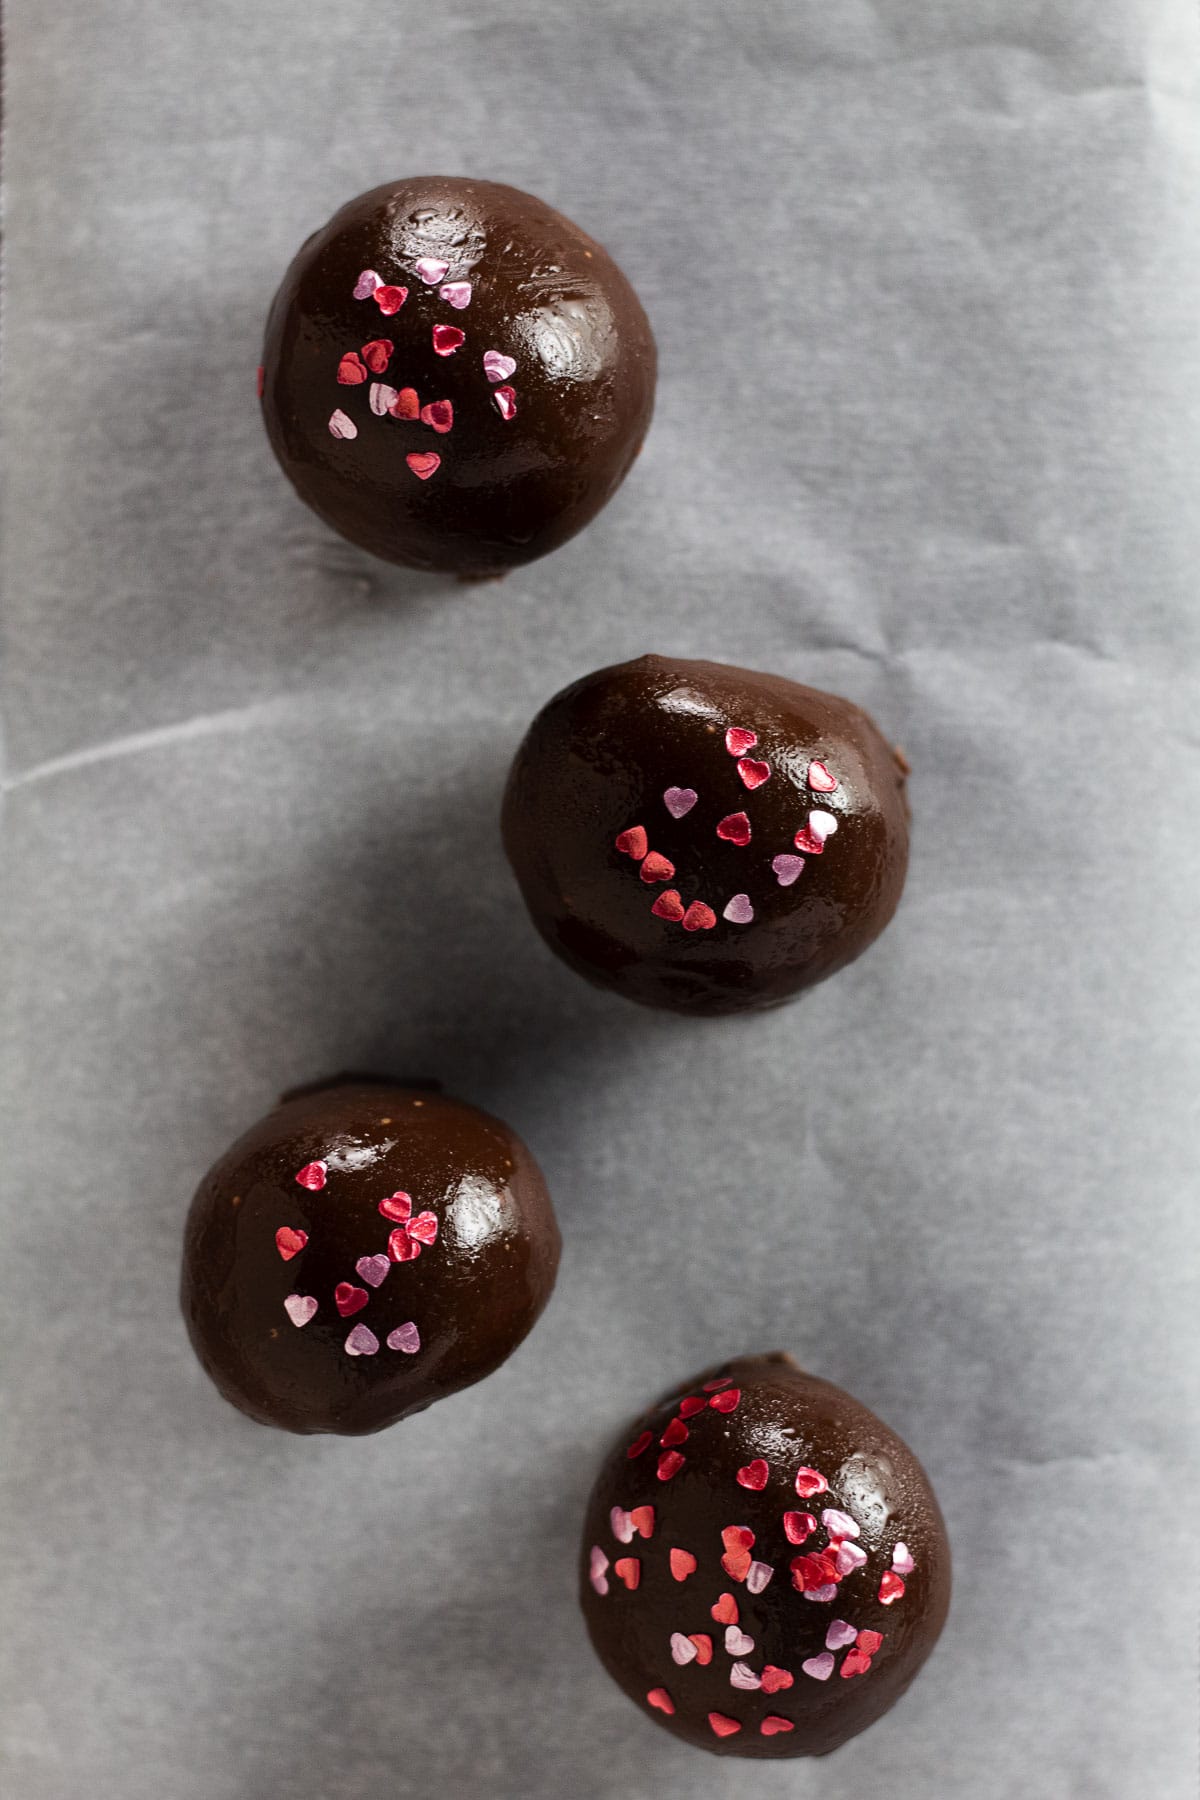
- Sprinkles or edible decorations – As you can see from the pictures, we added edible star decorations to make them a little fancier.
- White chocolate – You probably already know, but there is a white chocolate Reese’s peanut butter cup. You could also drizzle some dark, milk, or semi-sweet chocolate over these once they set.
- Crunchy peanut butter – We’re going to test this out and update this page once we do as the recipe ratio’s will differ.
- Rice cereal – Add some rice cereal to the chocolate before you dip to add a little crunch.
- Nuts – Once you dip the peanut butter balls in chocolate, you could also sprinkle them with nuts.
- Holiday theme – you can drizzle colored candy melts in a nice decorative pattern once your chocolate sets.
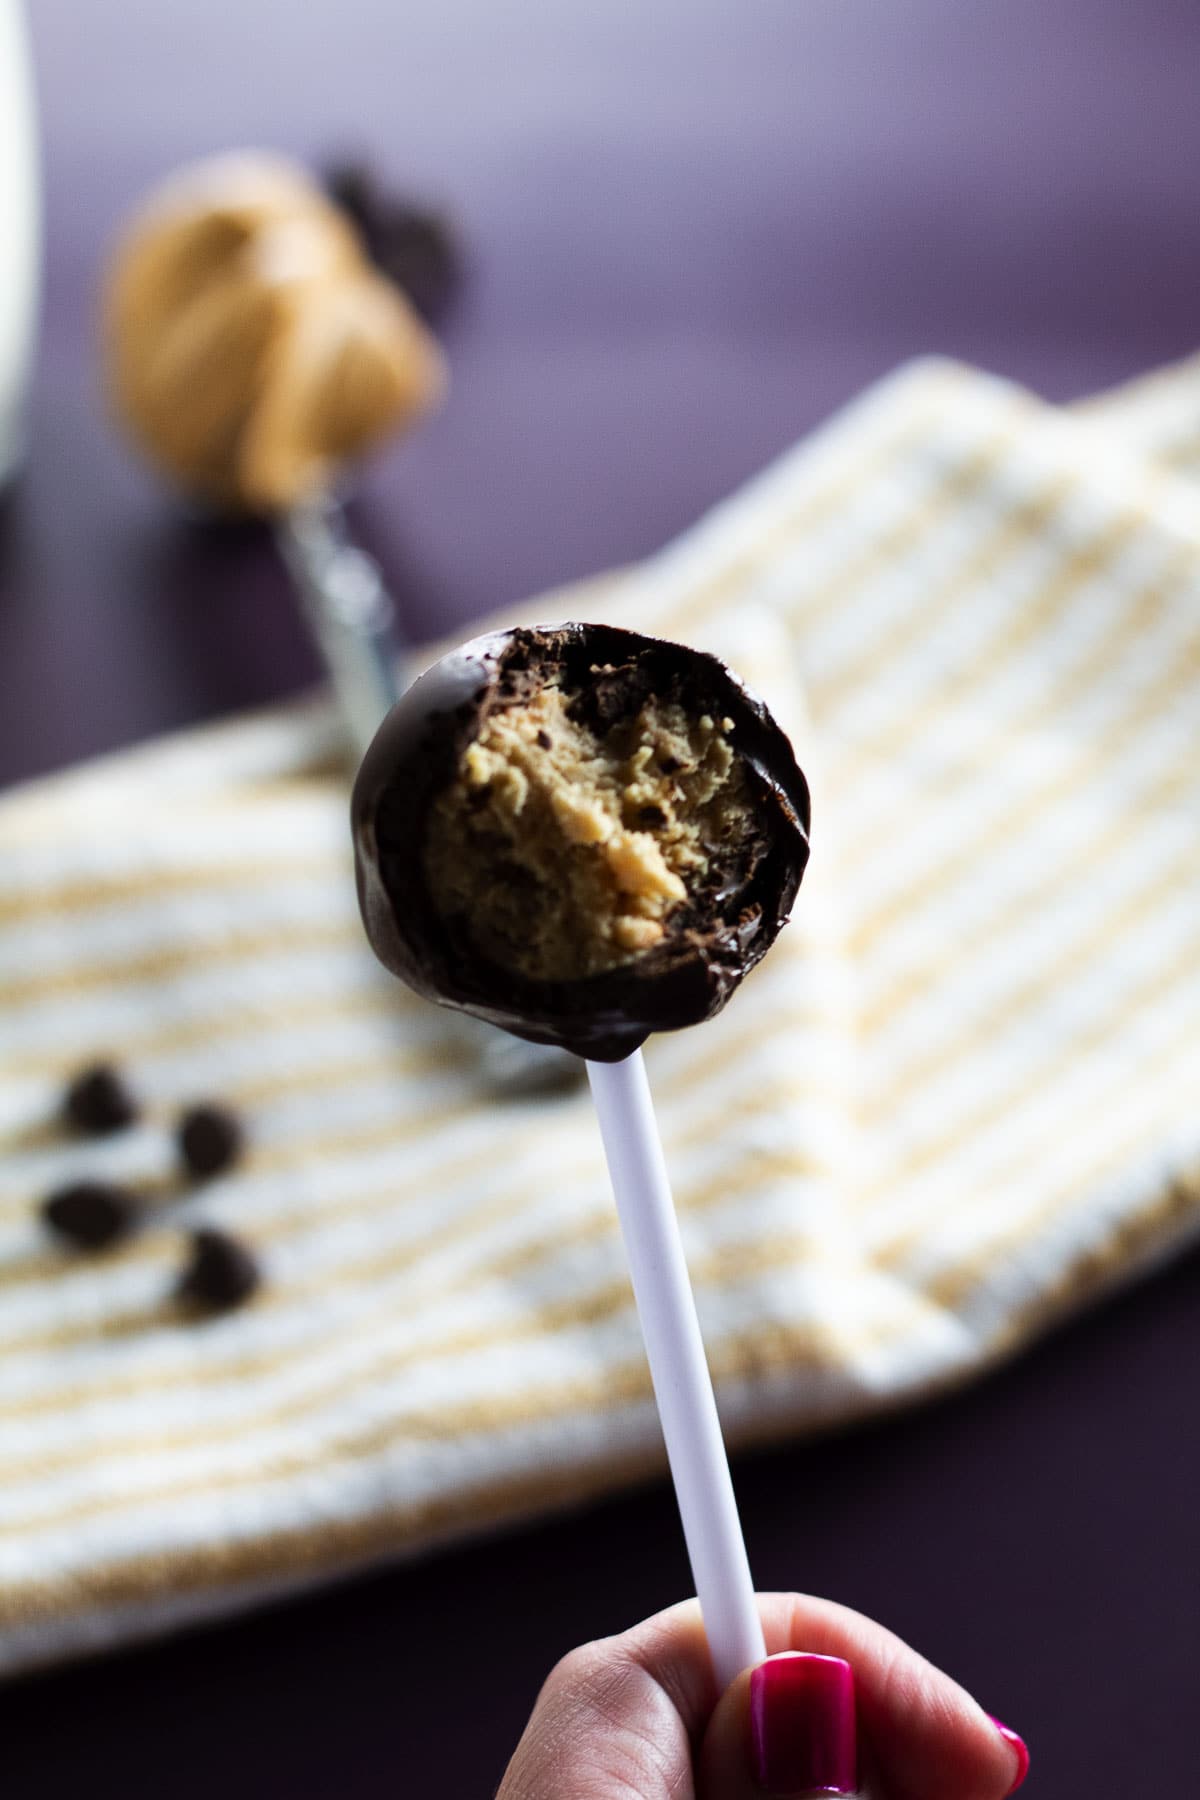
- Peanut butter ball on a stick – This is a simple variation that you can use in addition to other ideas. Just put the sticks into the formed balls prior to freezing or refrigerating.
Equipment
The only special equipment we used was a melon baller. Now, that doesn’t mean that you need one to make this recipe. It was perfect for us because we could scoop the perfect amount of mixture for the peanut butter ball we wanted. But you can use a spoon or even eyeball it.
Storage
You can store your old-fashioned peanut butter balls in an air-tight container on the counter for a few days. Or you can store them in the refrigerator for two weeks. And they’ll last a couple of months in the freezer.
Top tips
Not all peanut butter brands are equal. Because of this, the ratios for this recipe may be different. Also, you may need to add more butter if the mixture is too crumbly.
Another note is that condensation will start to form if you place them in the freezer to speed up the setting process. Now, condensation doesn’t affect the taste, but you can avoid it by putting them instead in the fridge.
If you plan to dip your old-fashioned peanut butter balls in chocolate, place them in the fridge for about 30 minutes to allow the chocolate to set.
However, if the temperature of your house is 70-degrees or lower, you can leave them out of the refrigerator.

Old Fashioned Peanut Butter Balls Recipe
Equipment
- Melon Baller (optional)
Ingredients
- 1 cup Smooth Peanut Butter
- 6 tbsp Unsalted Butter
- 2 cups Powdered Sugar
- 8 ounces Semi-Sweet Chocolate Chips
- 1 tbsp Coconut Oil
Instructions
- In a large bowl, mix the peanut butter, butter, and powdered sugar until thoroughly combined. Shape 1 inch balls and place them on a baking sheet lined with parchment paper. Refrigerate for 30 minutes.
- Place the chocolate chips and coconut oil in a heatproof bowl and set it over a saucepan with 1-2 inches of simmering water. Stir chocolate until melted. It can take about 2 to 3 minutes.
- Using a fork and a toothpick, dip the balls, one at a time, into the melted chocolate until completely coated. Using the toothpick push the coated ball off the form and onto a baking sheet lined with parchment and freeze for 15 minutes for chocolate to set.
Notes
- Spray the measuring cup you use to measure the peanut butter. It helps it come out easier.
- The mixture will look like clusters of wet sand, and if you can pinch the mixture and it holds together, it’s ready. If the mixture seems too dry or when you form a ball it falls apart, add one extra tablespoon of butter and mix it again.
- You can also melt the chocolate by placing the chocolate and coconut oil in a microwave-safe bowl. Microwave at 30-second intervals until chocolate is completely melted. Stir thoroughly in between intervals.
- Store in an airtight container in the fridge for about 2 weeks. You can also freeze them for 2 months but I promise they won’t last that long.
Leave a Reply