On this page you will discover the magical creations that are candy coated Halloween rice Krispie treats. Here is another easy to follow and fun Halloween recipe for you to consider. We had a blast making these silly faced Halloween rice Krispie treats. Omg your family is going to love it, Omg!

We really love making recipes (if it can be called that) like this because they are so easy and carefree that you can just have fun with them without worrying about being all prefect. All it took was for us to make a simple sheet of basic rice Krispie treats, some melt-able candy tablets, candy eyes, and decorative icing. Who hasn’t made rice Krispie treats before?
Although they are very simple to make, there are a few things that you need to consider when making these treats. Firstly, that candy coating requires a trick. At least it did for us. There are a couple of techniques that you can use for melting the candy (white chocolate). You can melt it in the microwave or use a double boil method.

We found that using the microwave kind of sucked for us. But even when using the double boiler method, there was some issues. The candy was still a bit on the thicker side. The instructions on the package don’t mention how to handle this. So, we had to do a google search to find out that we needed to add a little vegetable shortening to thin it out. It’s no big deal.
Another alternative that can work as well is opting to use frosting instead of the candy coating. Although a benefit of using the candy coating is that the candy eyes will stick better to the Krispie treats.
Okay, let’s get you started in the right direction.
Make the rice Krispie treats first. Follow the directions in the recipe section.
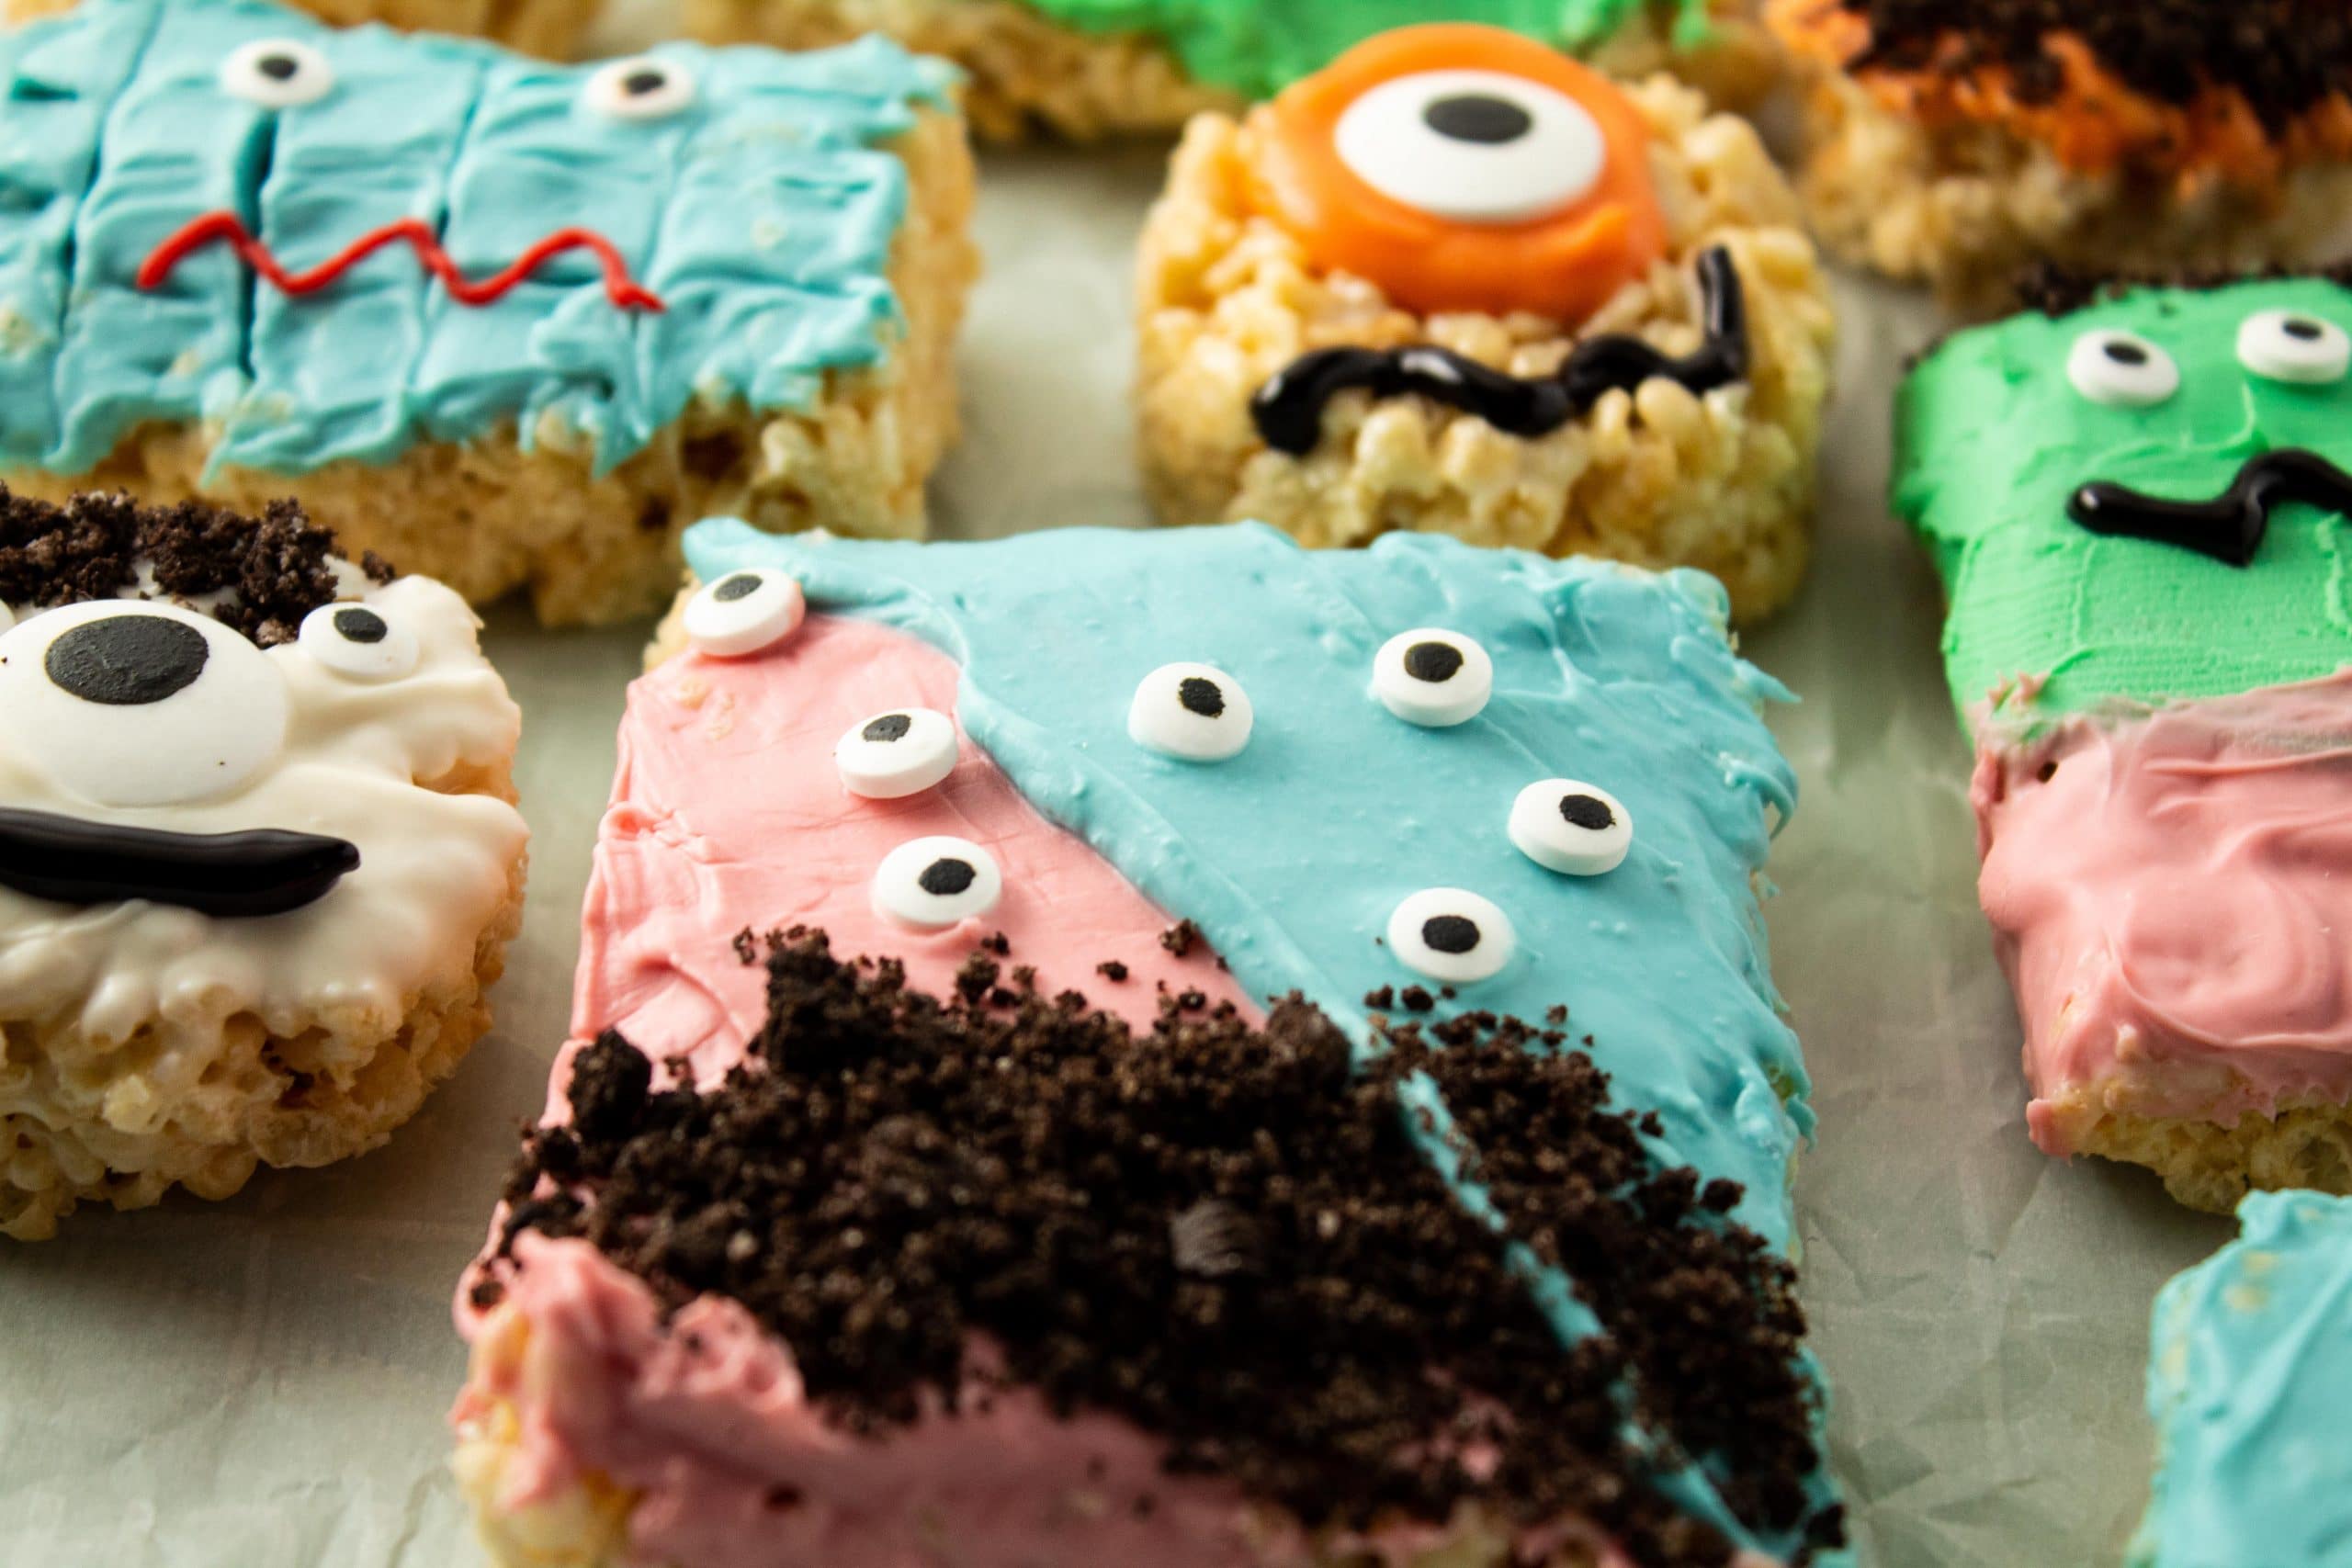
Cut the pan of rice Krispies into the shapes that you want. We make large and small squares and circles. For the circles we used different sized biscuit cutters.
Next, you will want to melt the white chocolate candy. Now the candy coating will stiffen up after a while away from a heat source. So, you may need to reheat it at some point.
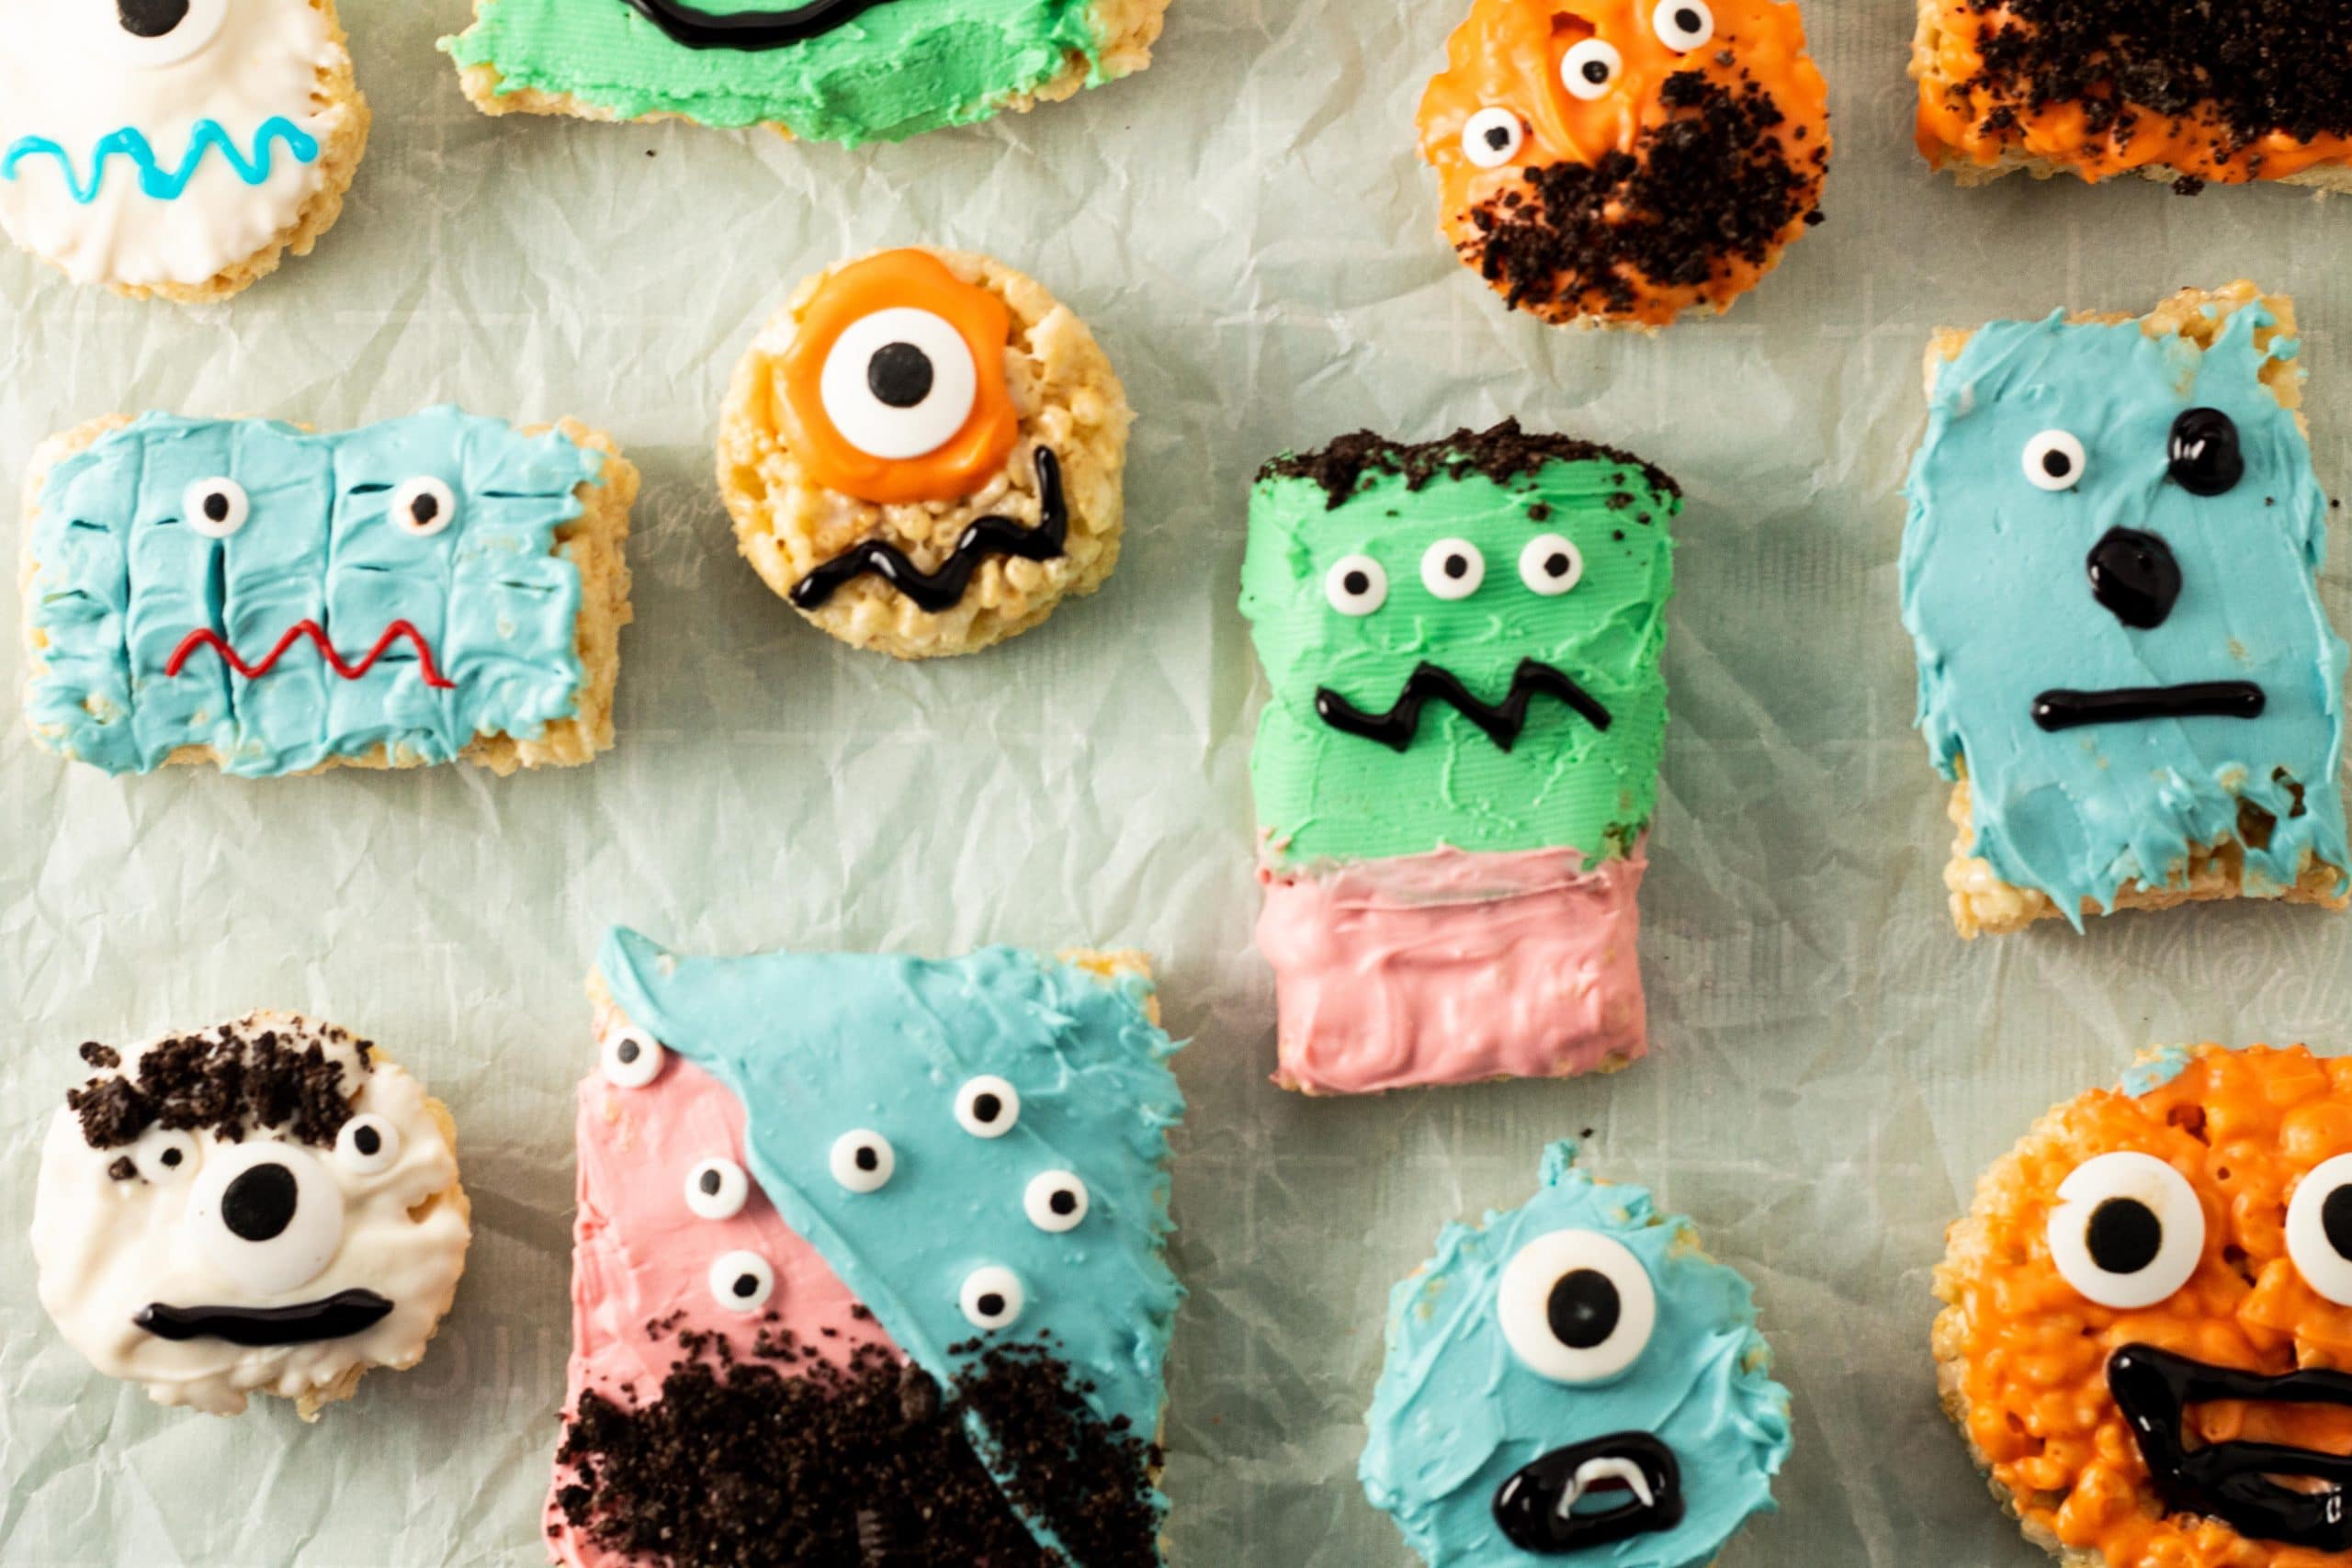
Dip those cuts of rice Krispie treats into that melted candy. Because of the texture of the treats, when you dip the treats into the candy coating, you may find that the surface of the candy coating is textured as well. That is fine. There are no hard and fast rules here.
To spread the candy coating over the entire surface of the treat we used the smooth side of the butter knife. For some we used the toothed side butter knife because we liked the way it looked.
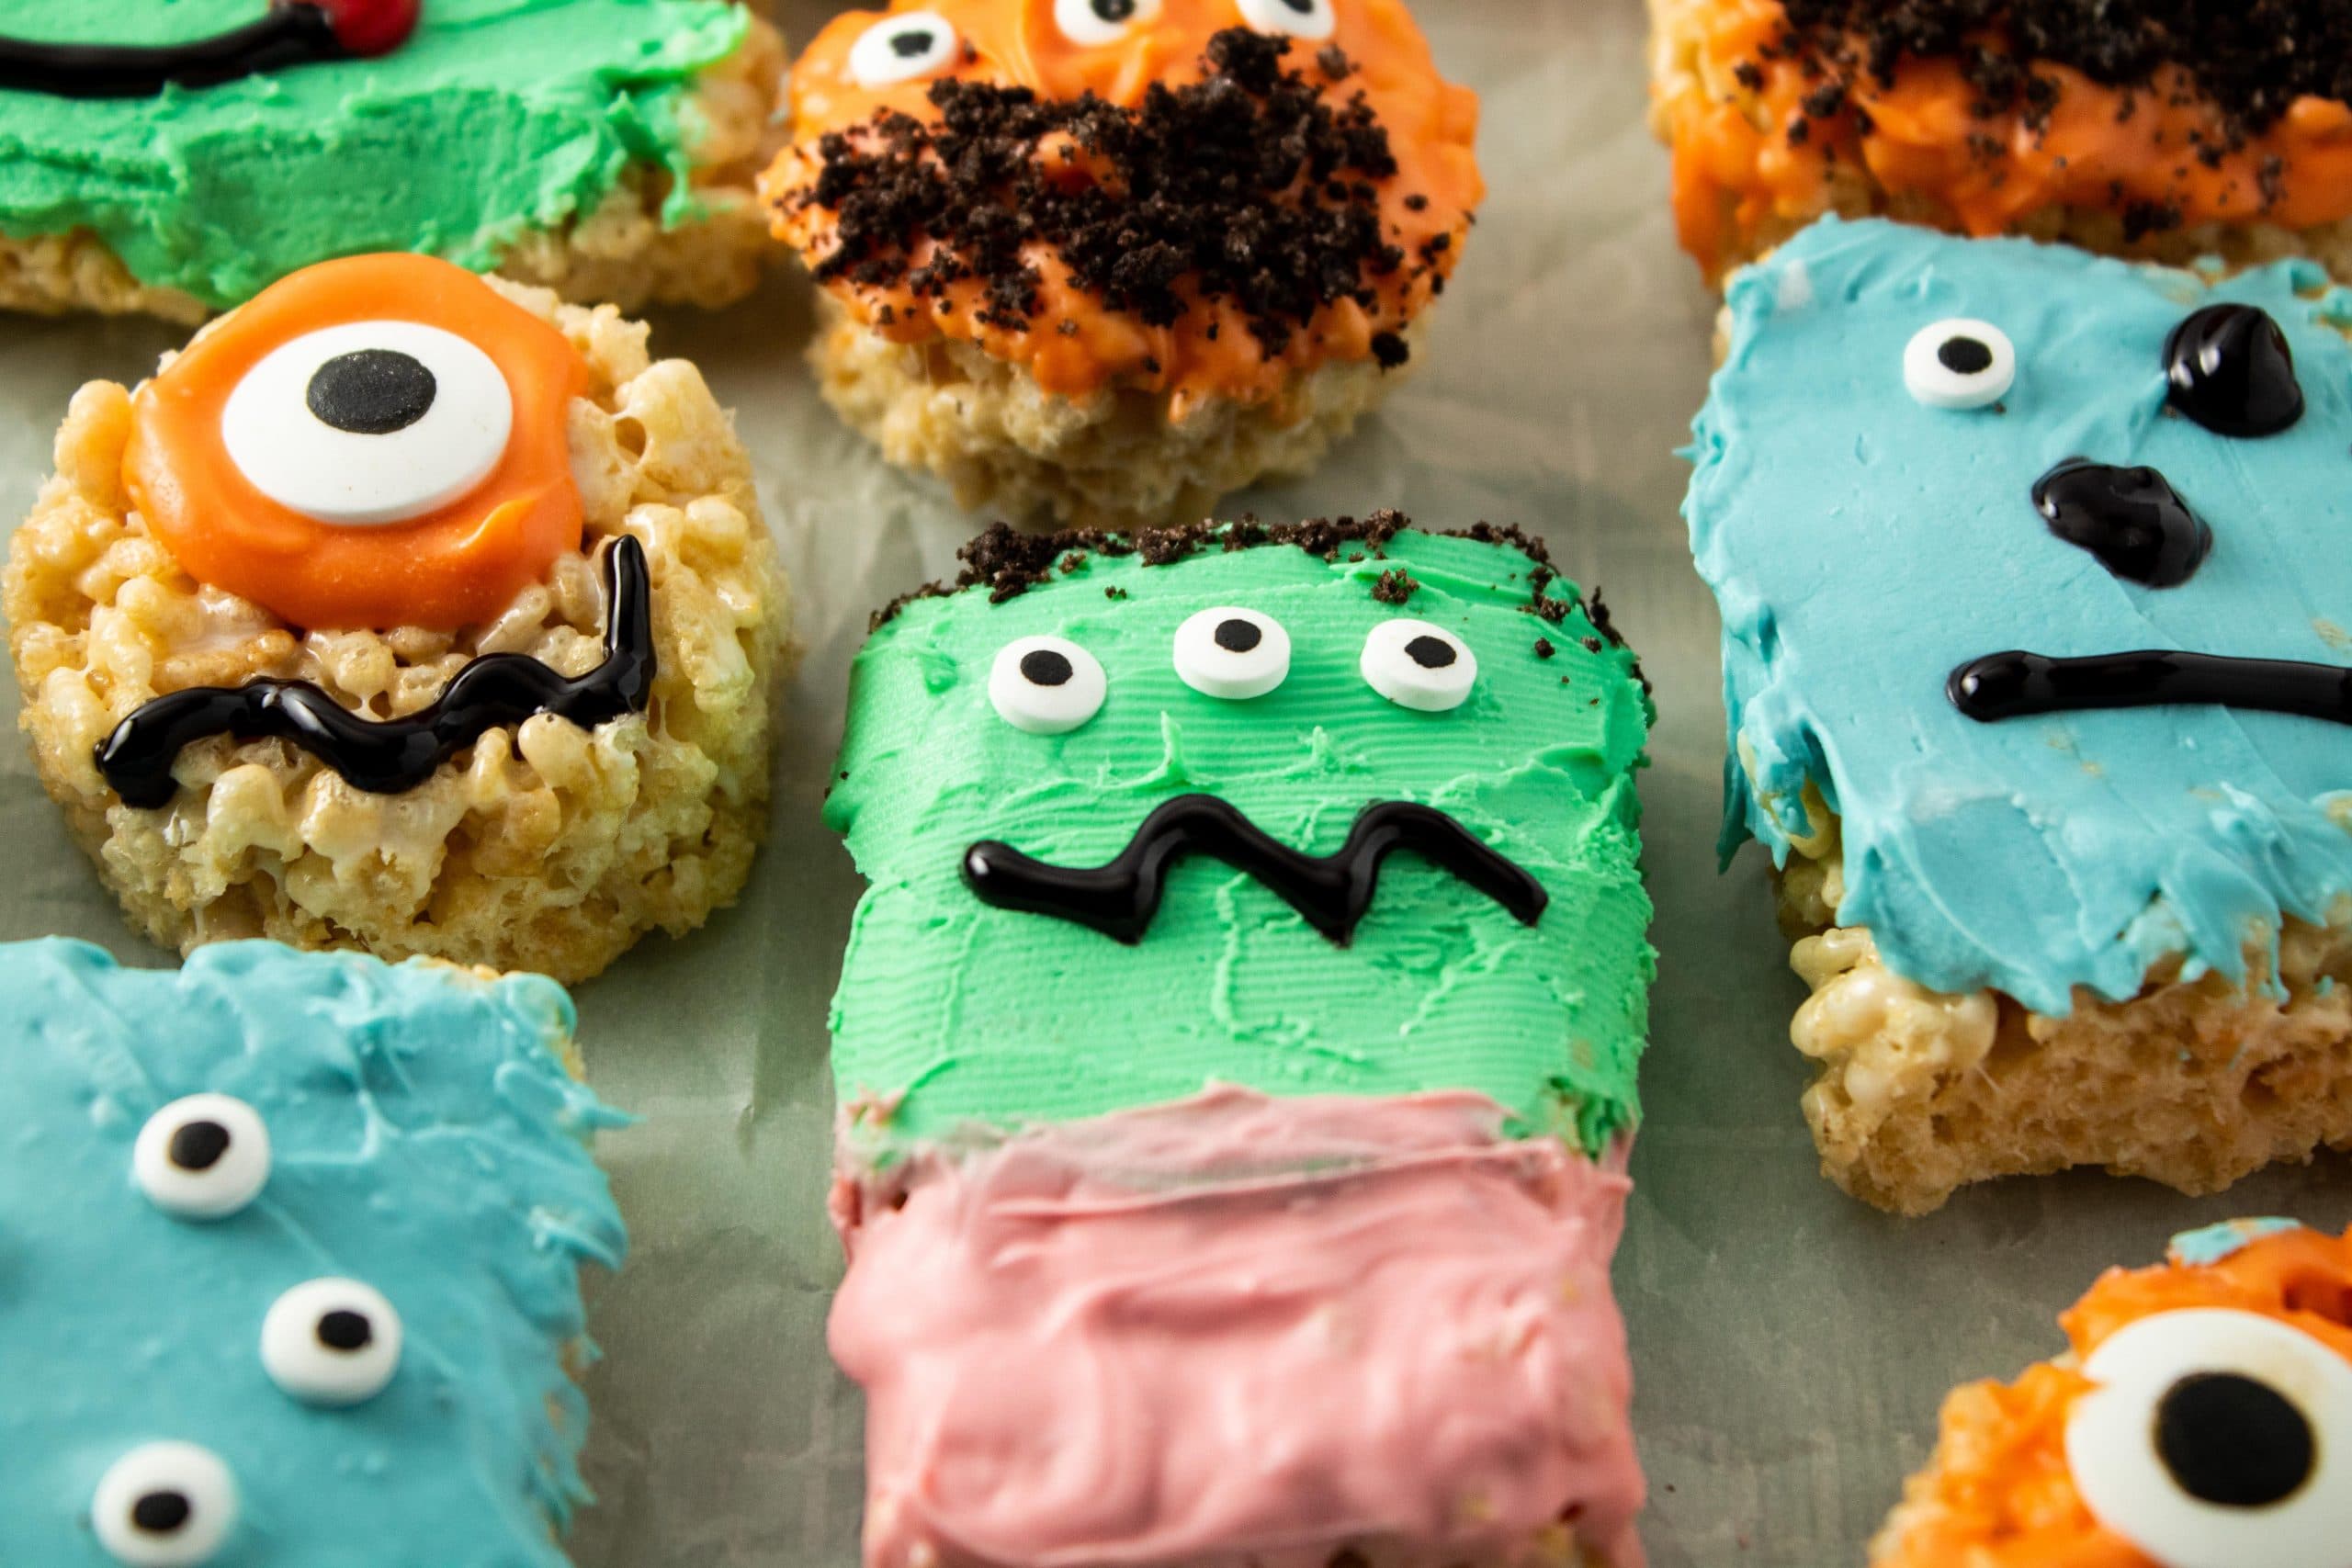
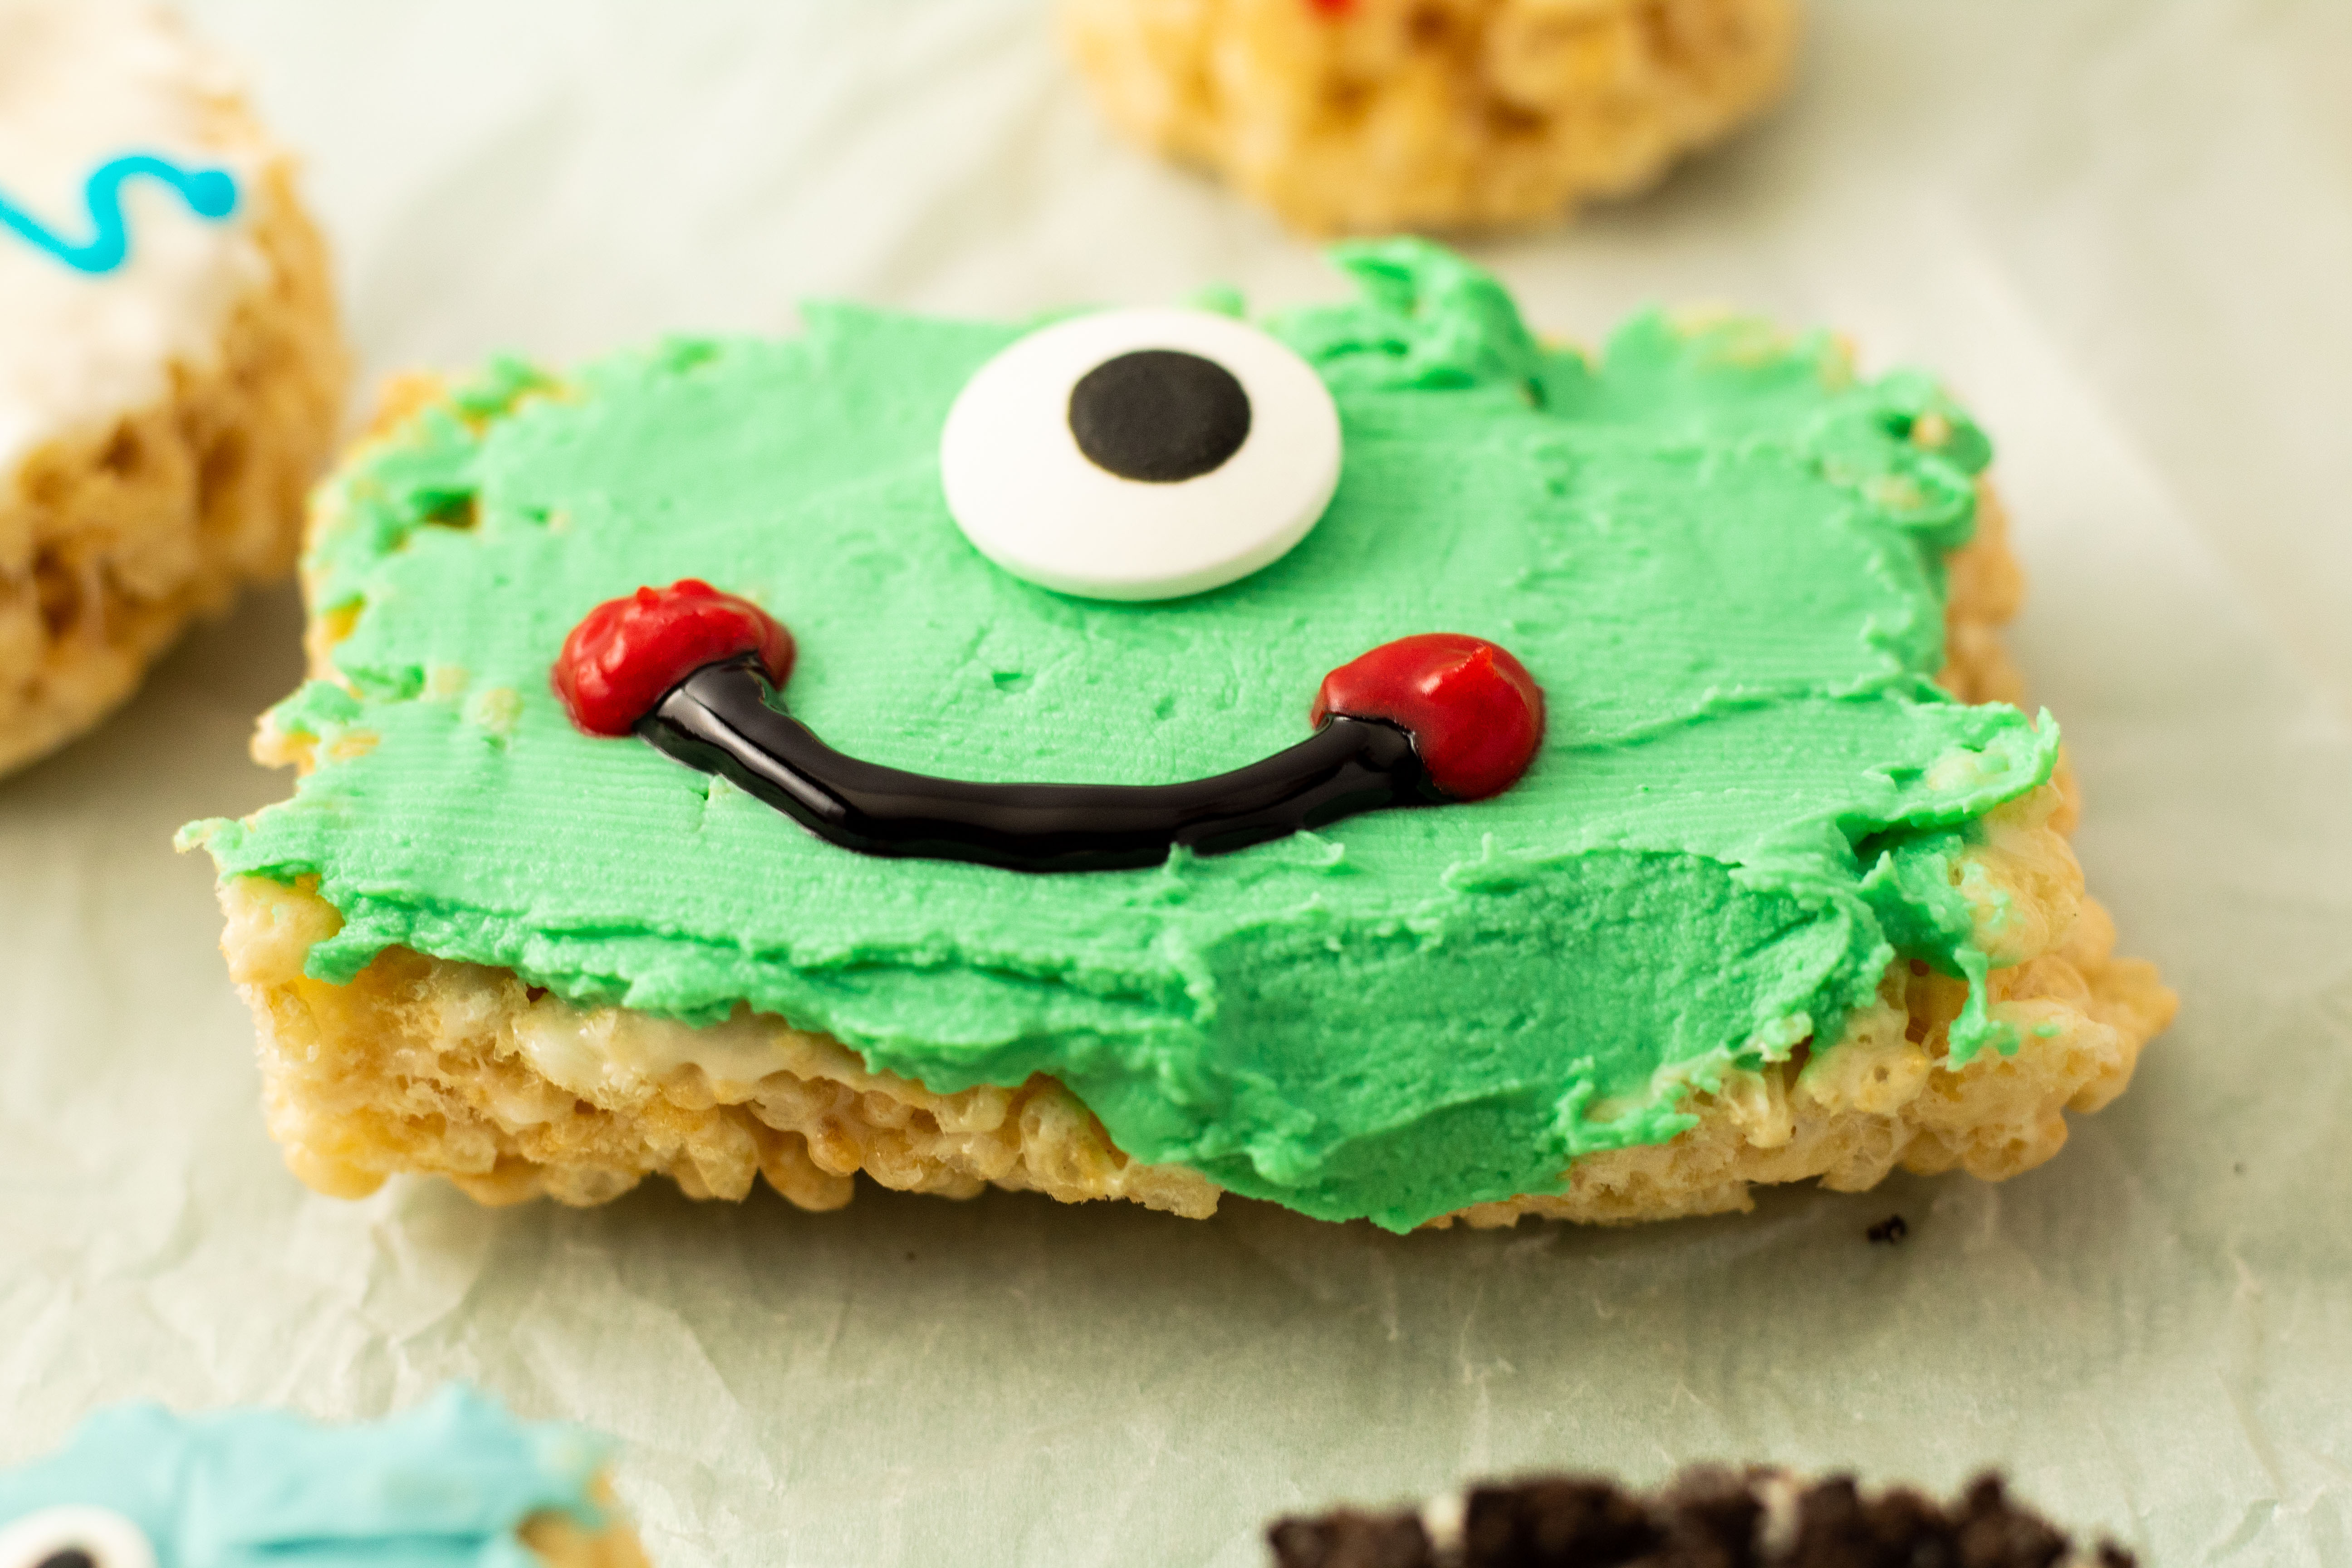
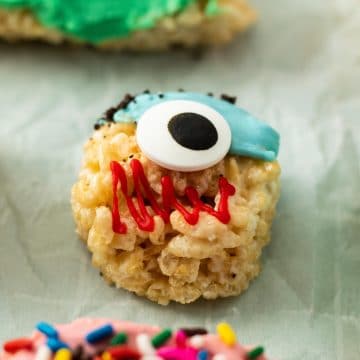
While the candy coating is still wet, decorate. Add the candy eyes and decorative icing.
Make a mess and have fun! This a great kitchen activity to spend time with your kids. That’s what it’s all about. You can even make this into a party! The children of all ages will love it.
Enjoy!
Halloween Candy Coated Rice Krispy Treats
Ingredients
- 6 Cups of Rice Cereal
- 10 Ounce Bag of Mini Marshmallows
- ¼ Cup Unsalted Butter
- Candy Eyes
- Candy Melts Orange, Blue, Pink, and Green
- 2 Tablespoons of Vegetable Shortening
Instructions
- Take a large pot on medium high heat add the butter and marshmallows. Stir until all the marshmallows are melted about 3-5 minutes.
- Pour the 6 cups of cereal into the melted marshmallow and stir. You will need to use a little muscle to make sure all the cereal is coated.
- On a sprayed baking sheet pour the cereal mixture and flatten evenly. Let it cool completely before cutting.
- While the cereal is cooling lets melt the candies. Take a small pot and heat some water to a simmer. Take a glass bowl filled with the candy melts and set it on top of the simmering water. Stir until the candies are completely melted and smooth about 5-7 minutes. To thin the melted candies for dipping add about a ½ teaspoon of vegetable shortening at a time until you have the consistency you want. (See note) Once the candy is completely melted set aside until you are ready to decorate.
- It’s time to cut the treats into any shape you want. We did squares, rectangles, and circles. Take a treat decorate it making them look like monsters or eye balls. This is the fun part for kids to be very creative. We took a treat and dipped it into one of the colored melted candies then added a large eye to create a one eyed monster. Once all treats are decorated let them rest on a cooling rack for about 2 minutes to allow the candy to set. It’s time to eat. Enjoy!
Notes
- You may not use all of the shortening in this recipe but I recommend adding a little at a time until the candy is thin enough to dip the treats in.
- If the candy started to harden just put the glass bowl back on top of the simmering water and it will melt again.
- These treats won’t last but they keep well in an air tight container for about 3 days.

Leave a Reply