Our Easter Bunny Cupcakes are everything you could want in a simple springtime dessert. I’m talking light and airy, fluffy cupcakes topped with our creamy (and colorful) American buttercream frosting. They’re as cute as can be, appearing like a bunny jumping down a rabbit hole. You’ll have a blast making them, and so will the kids!
These cupcakes are not only great for easter, but they make the perfect treat for all springtime celebrations. They beg to be made for Easter brunch, classroom parties, or even as a surprise treat for coworkers, neighbors, and teachers.
I know you’re ready to whip out your mixing bowl and hop to it, but I have a feeling you’ll really love these Easter Cookies, Easter Brownies, and lemon mousse cups. They’re bright, colorful, and perfect for the season.
❱❱ PIN IT OR FORGET IT ❰❰
Jump to:
Why You’ll Love This Recipe…
- Whether you use boxed caked mix or your favorite homemade cake recipe, these Easter cupcakes are easy to make. With our special tips, they come out soft, fluffy, and perfectly delicious every time. They’re perfect when you need something cute, quick, and festive for spring.
- OMG, our American buttercream frosting is sooo good! It’s rich, creamy, and perfectly sweet. You’ll want to eat it by the spoonful.
- We made them look like a bunny jumping down a hole. How cute is that! They’re such a fun and creative way to celebrate the season. And the kids will absolutely LOVE helping you make them!
- After you finish whipping them up, you’ll stand tall and feel proud knowing you made the cutest, most impressive bakery-level dessert ever! But you’ll also know they were almost too easy to make.
Ingredients
- White Cake Cupcakes—store-bought, from a box cake mix, or your favorite homemade recipe.
- Crushed Sandwich Cookies
- Frosting
See the recipe card for quantities.
How to Make Easter Bunny Cupcakes
Make the cupcakes according to the package instructions.
Allow the cupcakes to cool in the pan for 5 minutes. Then transfer them to a wire rack to cool completely.
Divide the vanilla frosting into three bowls, making sure the bowl for the white frosting has the largest amount. In the second bowl, add the pink gel food coloring and mix until you reach your desired color. In the third bowl, add the green gel food coloring and mix until you get the color you want.
Transfer the green frosting into a piping bag fitted with a grass tip #233.
Transfer the pink frosting to a piping bag fitted with a #2 tip. Put the white frosting into a piping bag fitted with a #12 tip. Set aside.
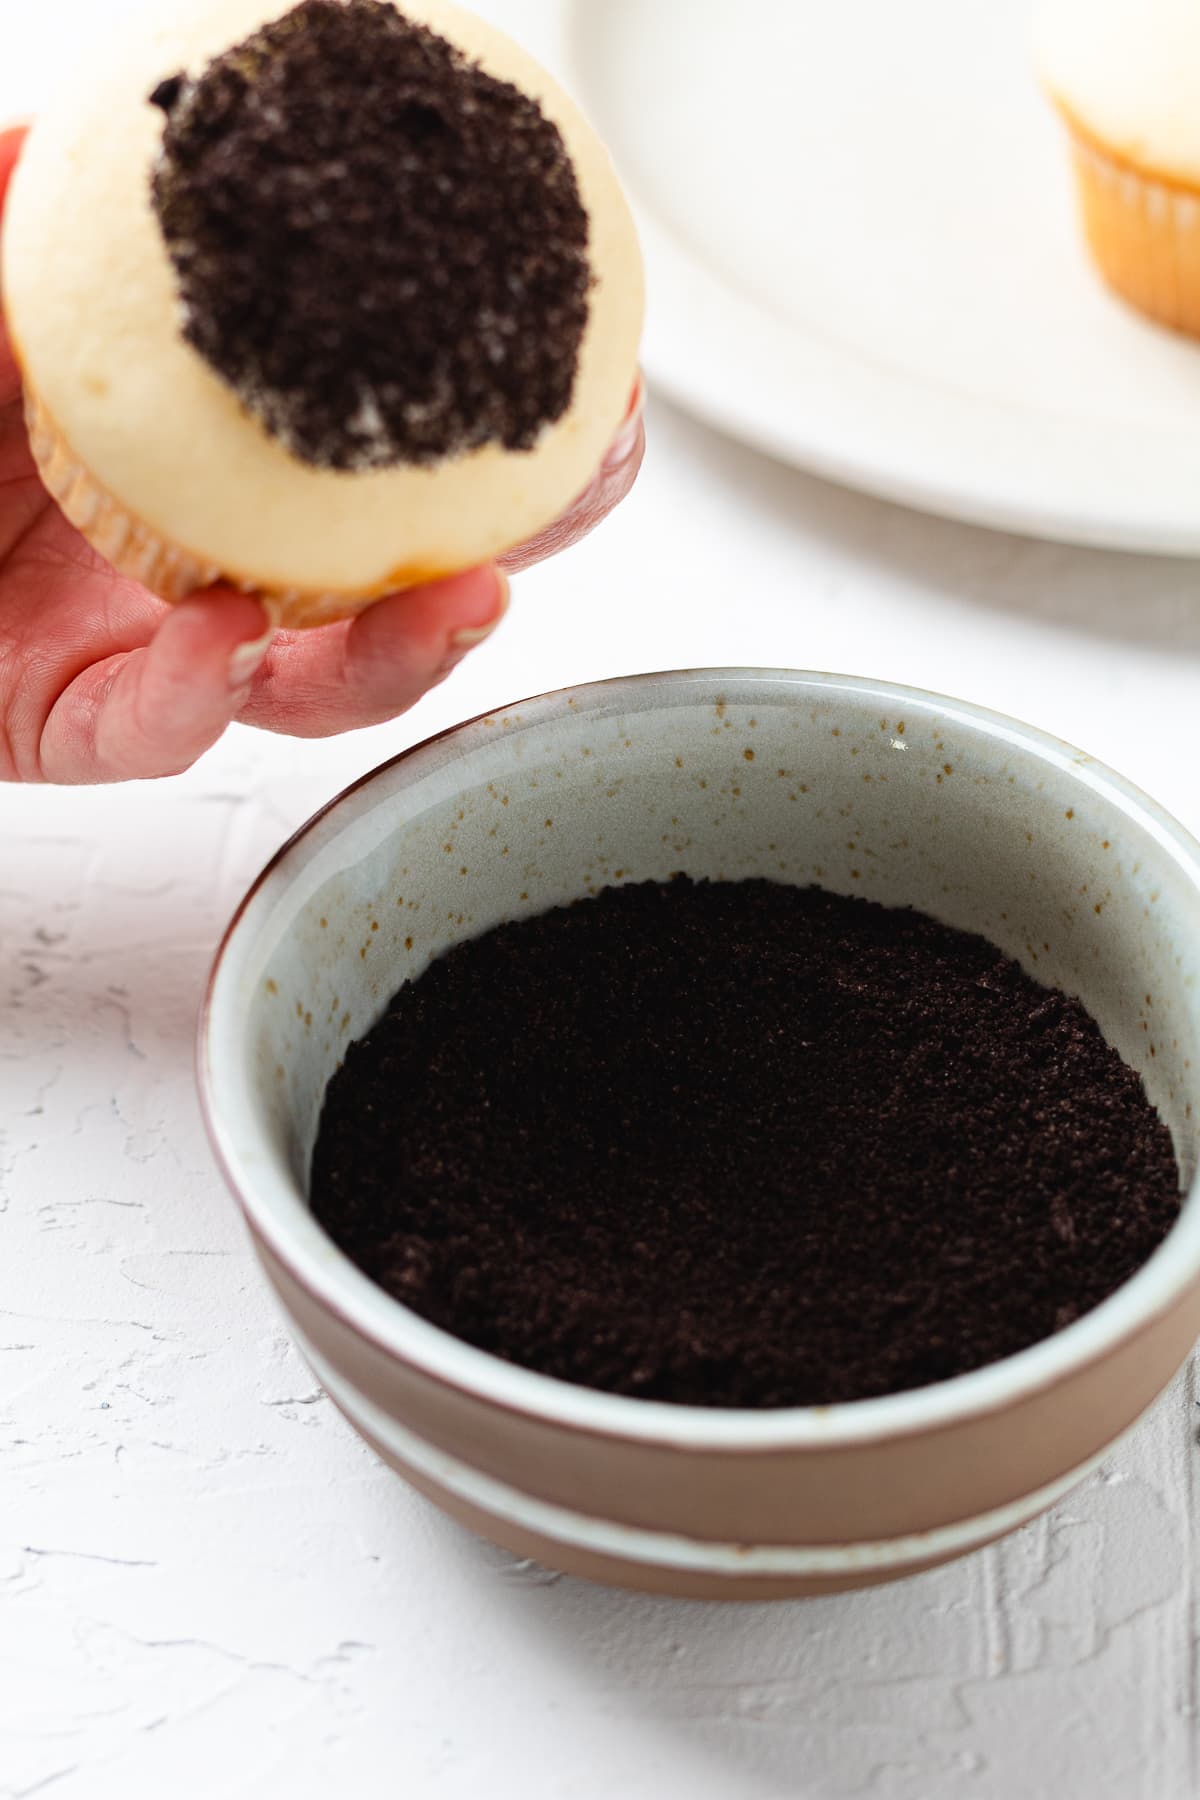
Add the crushed cookies to a bowl larger than the cupcakes. Set aside.
Pipe white frosting in the center of the cupcake and spread it slightly. Then dip it into the cookie crumbs.
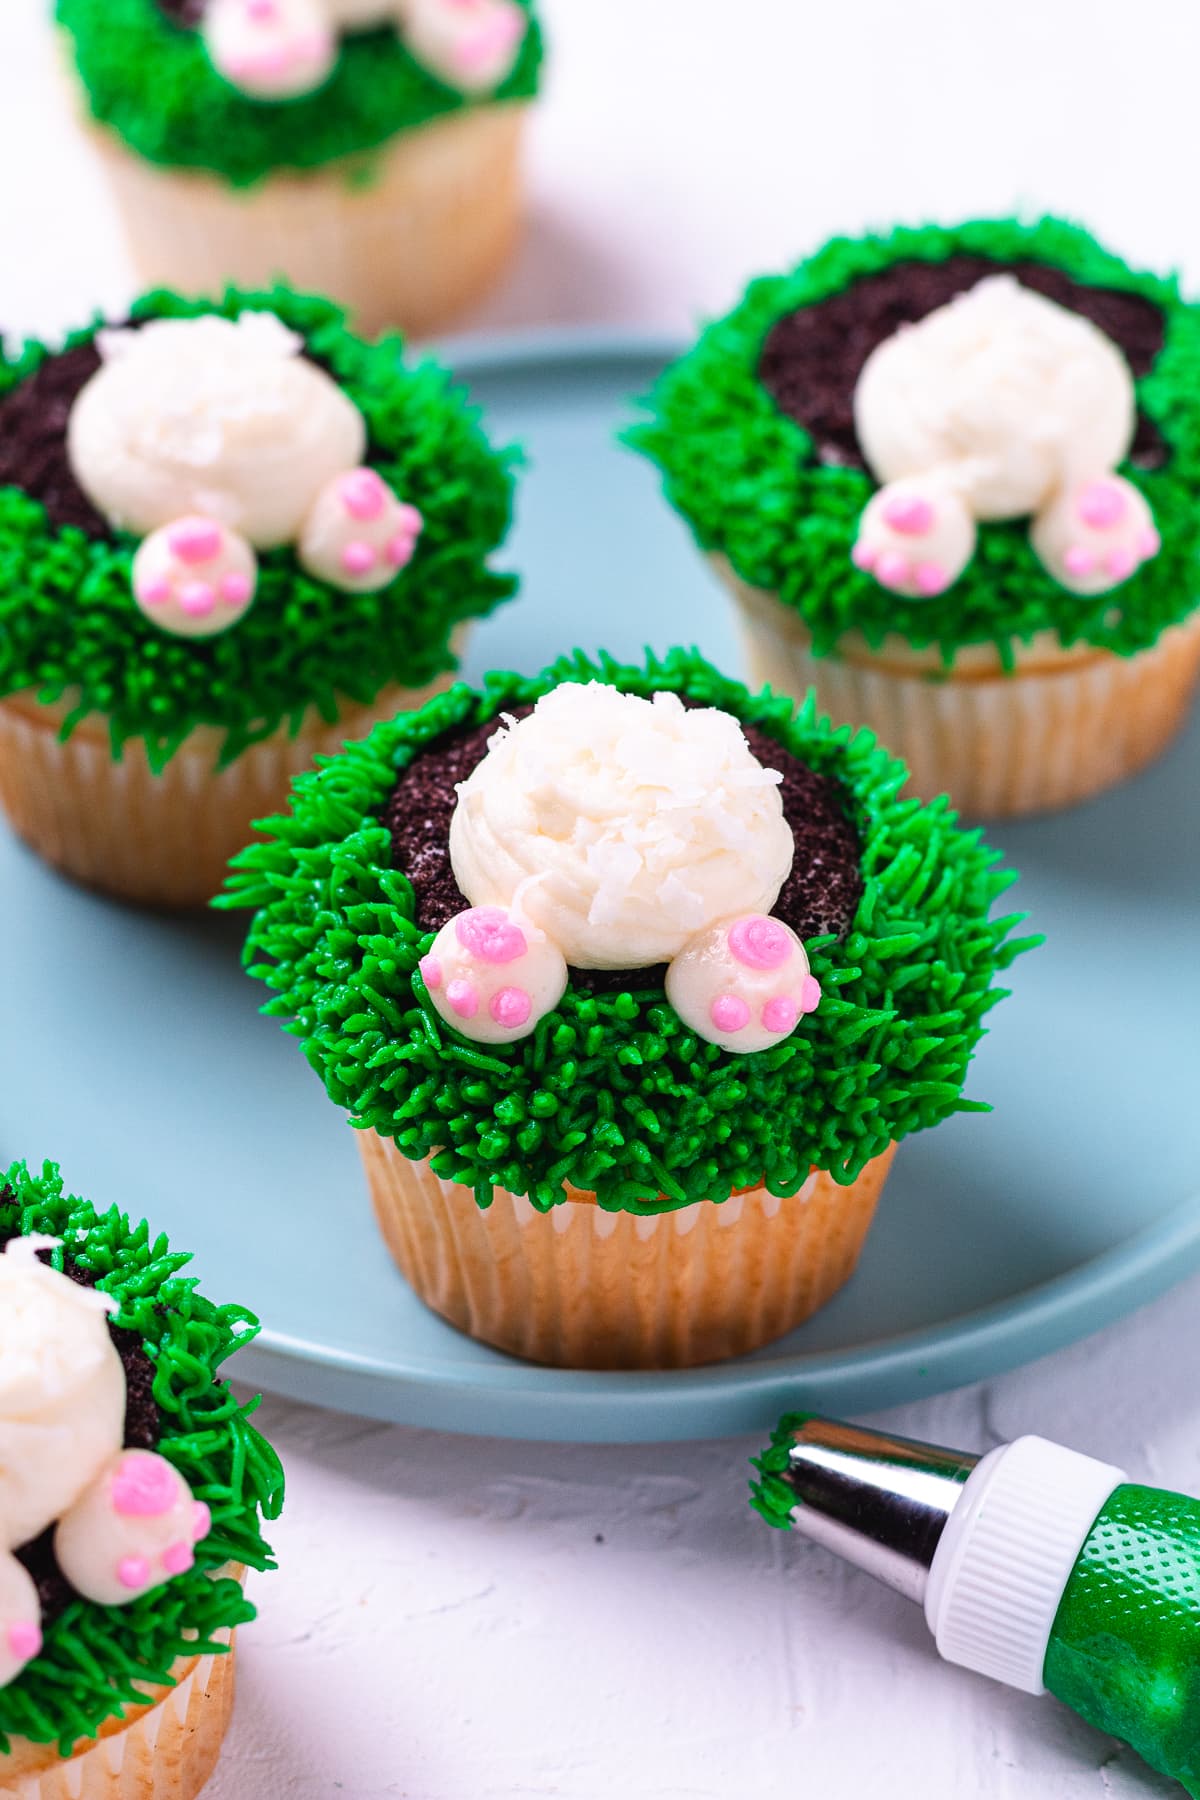
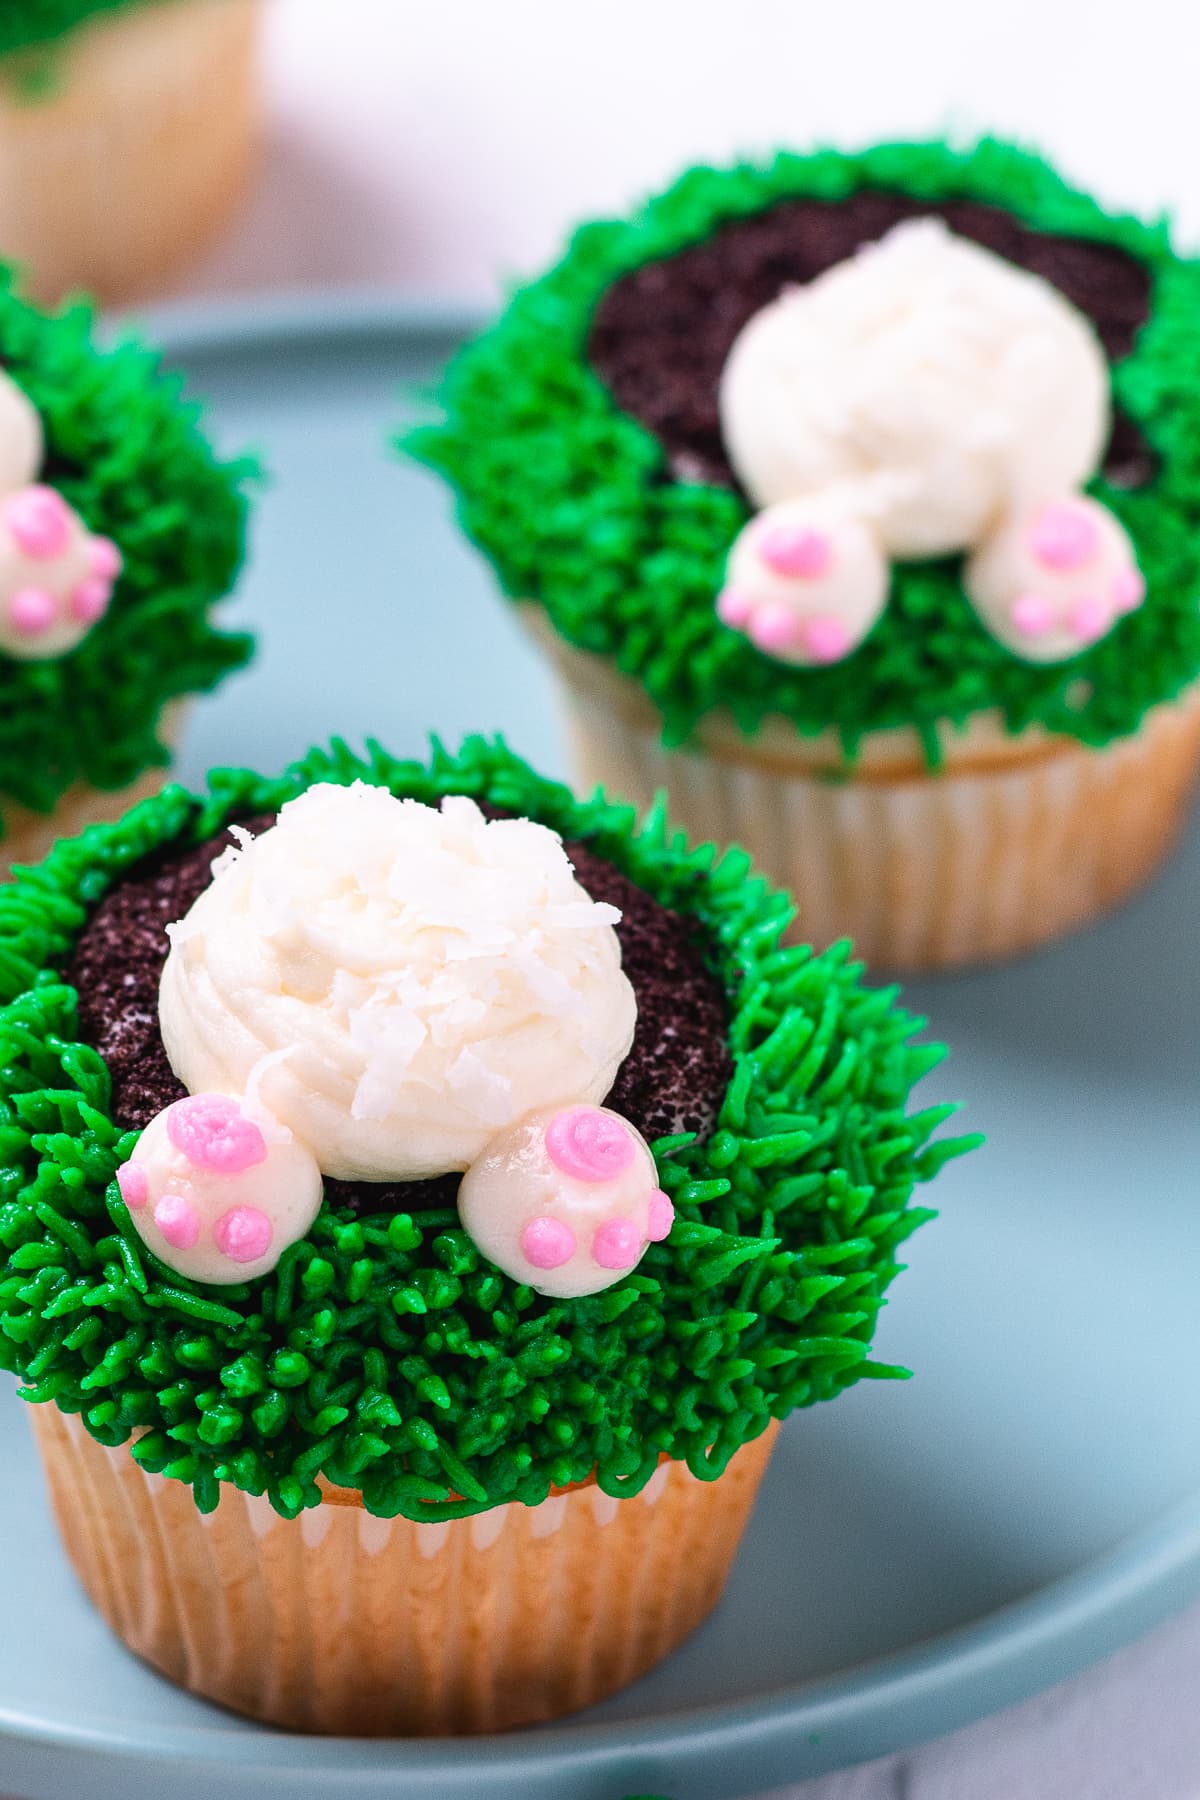
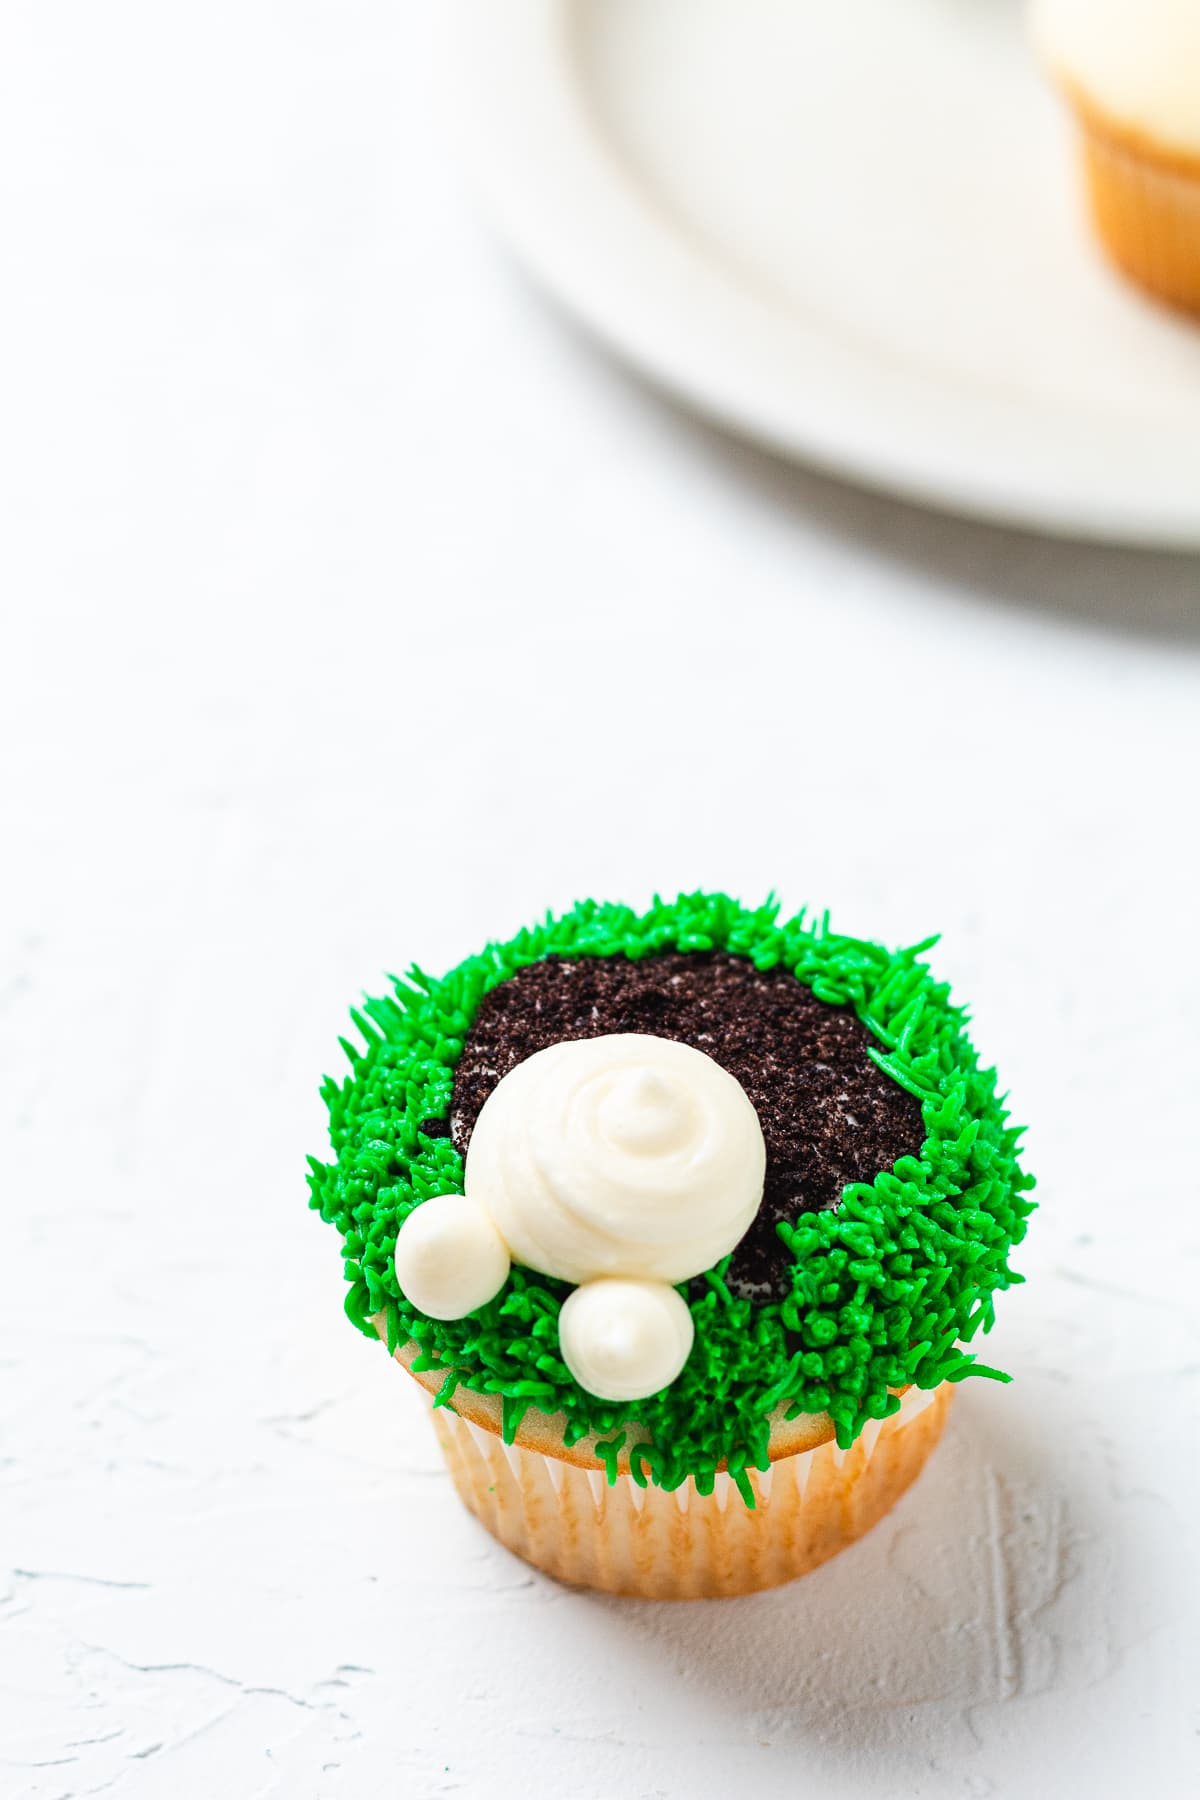
Then pipe green frosting around the edge of the cupcake to make the grass.

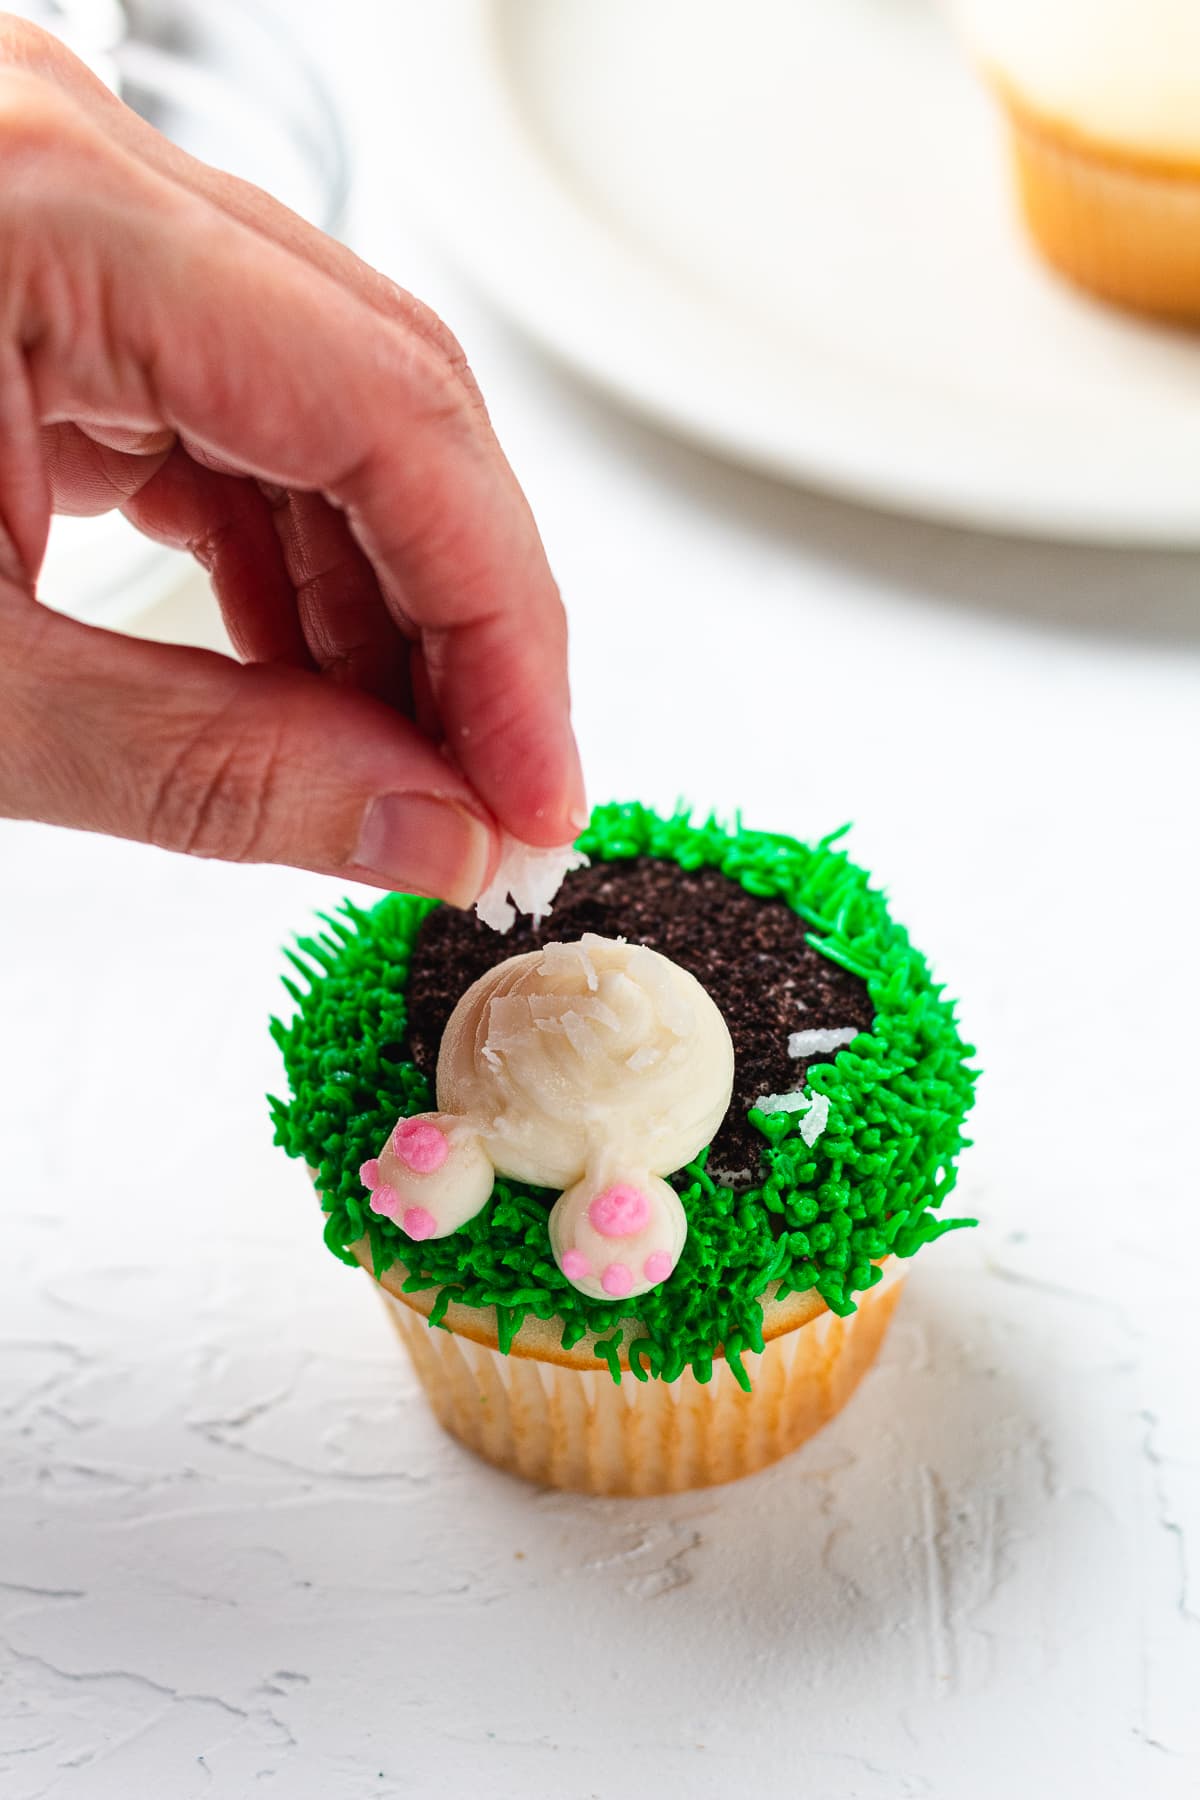
Pipe a mound of white frosting in the middle to create the bunny butt. Then pipe 2 small mounds to create the feet.

Take the pink frosting and pipe the toes and palm on the feet. Add shredded coconut to the largest mound of frosting.
Continue until all cupcakes are decorated. Enjoy!
Top Tip
Remove the cupcakes from the oven a few minutes before they’re done. Doing so will ensure they come out moist and fluffy.
Storage
Place your cupcakes in an airtight container and store them at room temperature for up to 2 days. If you used a frosting made with milk or butter, refrigerate the cupcakes for up to 5 days. Then, when you’re ready to serve, set them out for about 30 minutes so the frosting softens.
FAQs
Absolutely! To save time, I like to bake cupcakes 2 days ahead of time. Place them in an airtight container and keep them at room temperature.
Yes! A box of cake mix is the perfect way to save time when baking cupcakes. That way, all you need to do is decorate and serve.
Sure. You can store unfrosted cupcakes in an airtight container in the freezer for up to 3 months. When you want to serve, place them in the fridge overnight or set them out at room temperature an hour before serving.

Easter Bunny Butt Cupcake Recipe
Ingredients
- 16 White Cupcakes Homemade or Boxed
- 2 Cups Vanilla Frosting Homemade or Store Bought
- 10 Chocolate Sandwich Cookies Crushed
- Pink Gel Food Coloring
- Green Gel Food Coloring
Instructions
- Make the cupcakes according to the package instructions.
- Allow the cupcakes to cool in the pan for 5 minutes. Then transfer them to a wire rack to cool completely.
- Divide the vanilla frosting into three bowls, making sure the bowl for the white frosting has the largest amount. In the second bowl, add the pink gel food coloring and mix until you reach your desired color. In the third bowl, add the green gel food coloring and mix until you get the color you want.
- Transfer the green frosting into a piping bag fitted with a grass tip #233. Transfer the pink frosting to a piping bag fitted with a #2 tip. Transfer the white frosting to a piping bag fitted with a #12 tip. Set aside.
- Add the crushed cookies to a bowl larger than the cupcakes. Set aside.
- Pipe white frosting in the center of the cupcake and spread it slightly. Then dip it into the cookie crumbs.
- Then pipe green frosting around the edge of the cupcake to make the grass.
- Pipe a mound of white frosting in the middle to create the bunny butt. Then pipe 2 small mounds to create the feet.
- Take the pink frosting and pipe the toes and palm on the feet. Add shredded coconut to the largest mound of frosting.
- Continue until all cupcakes are decorated. Enjoy!

Leave a Reply