
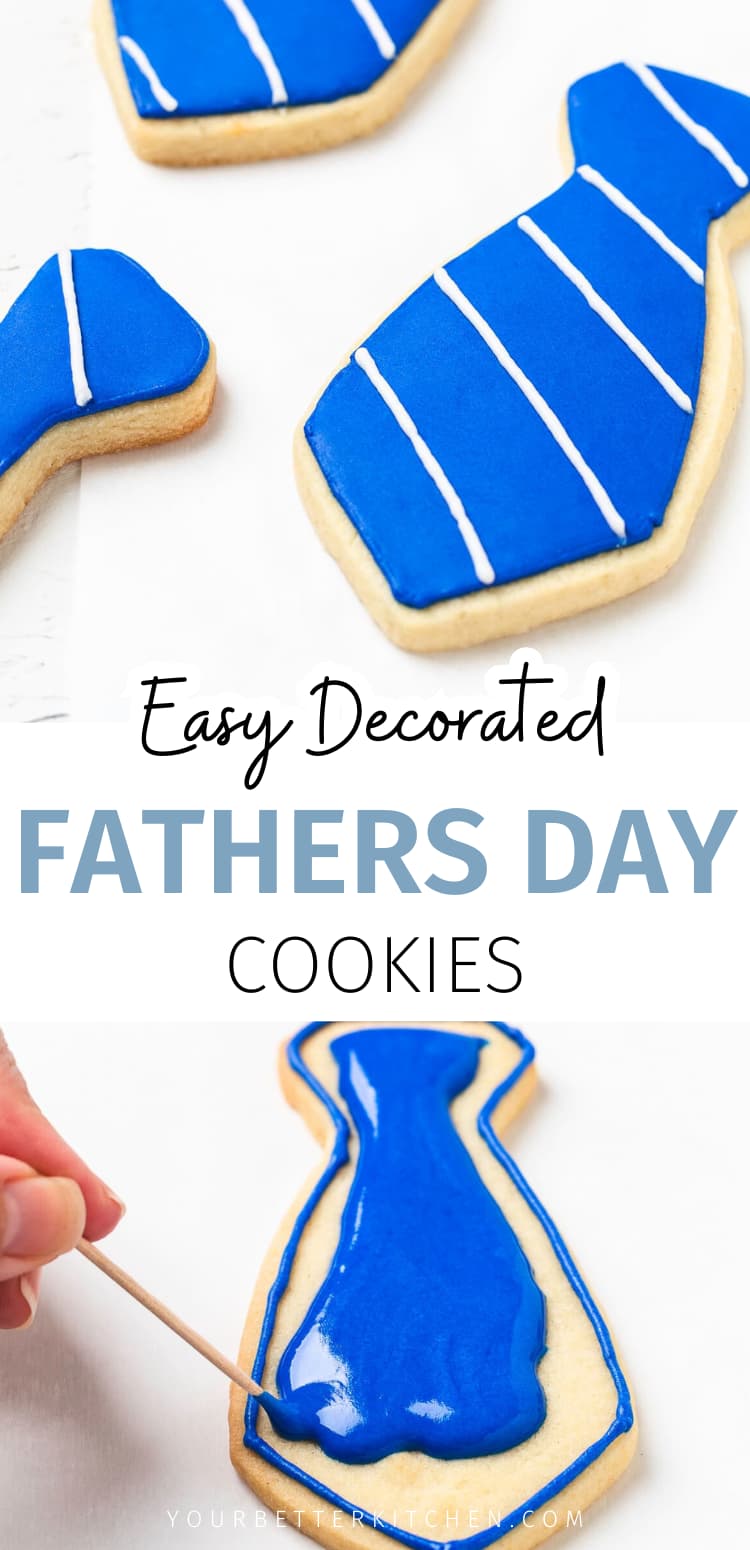
Show Dad some love with these Father’s Day Tie Cookies, decorated to resemble his favorite fashion accessory. They feature our favorite cutout sugar cookie recipe, which is slightly sweet, soft with a slight crisp on the edges, and topped with colorful royal icing for a smooth finish.
And if you’re interested in learning how to work with royal icing, this is a good entry as there aren’t any complicated patterns.

Father’s Day Tie Cookies are perfect for making at any time in early summer to show your appreciation to the guy who fixes everything (often with duct tape). And trust me, he’ll appreciate how much effort you put into them.
Looking for more royal icing practice? See our easy Halloween cookies and American flag cookies.
Pin to your best dessert board! ⤵️
Jump to:
Why You’ll Love This Recipe…
- This isn’t one of those treats that looks good but tastes, well, not so great. The cookie itself is DELICIOUS, buttery, perfectly sweet, and soft, with sweet royal icing.
- I’ll admit it, I was a bit intimidated the first time I worked with royal icing, but it’s easier than you think. After trying it a few times, you’ll catch on and become hooked.
- They’re one of the best make-ahead desserts! Bake and decorate them the day before you give them to Dad. Or you can make them weeks in advance, freeze them, then thaw and give them as a gift to all your favorite fathers.
- It’s such a fun hand’s on project for you an the kids. Seriously, it’s perfect for the kiddos because they’re isn’t a lot of intricate detail. Trust me, everyone will love playing with royal icing!
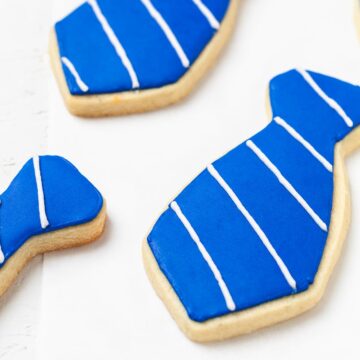
- Make them your way! We decorated our cookies with blue icing and white stripes so you can see how easy they can be. But you can choose Dad’s favorite color. Is it red, green, or orange? Add stripes. Or, how about a zigzag pattern?
Ingredients
Cutout Sugar Cookies
- Butter – unsalted.
- Flour
- Sugar
- Baking Powder
- Vanilla Extract
- Egg
- Salt
Royal Icing
- Meringue Powder
- Powdered Sugar
- Water
- Gel Food Coloring
See the recipe card for quantities.
How to Make Easy Father’s Day Tie Cookies
Pin to your best dessert board! ⤵️
Preheat your oven to 350°F. Line two baking sheets with parchment paper and set them aside.
In a medium bowl, mix together the flour, salt, and baking powder. Set that aside, too.
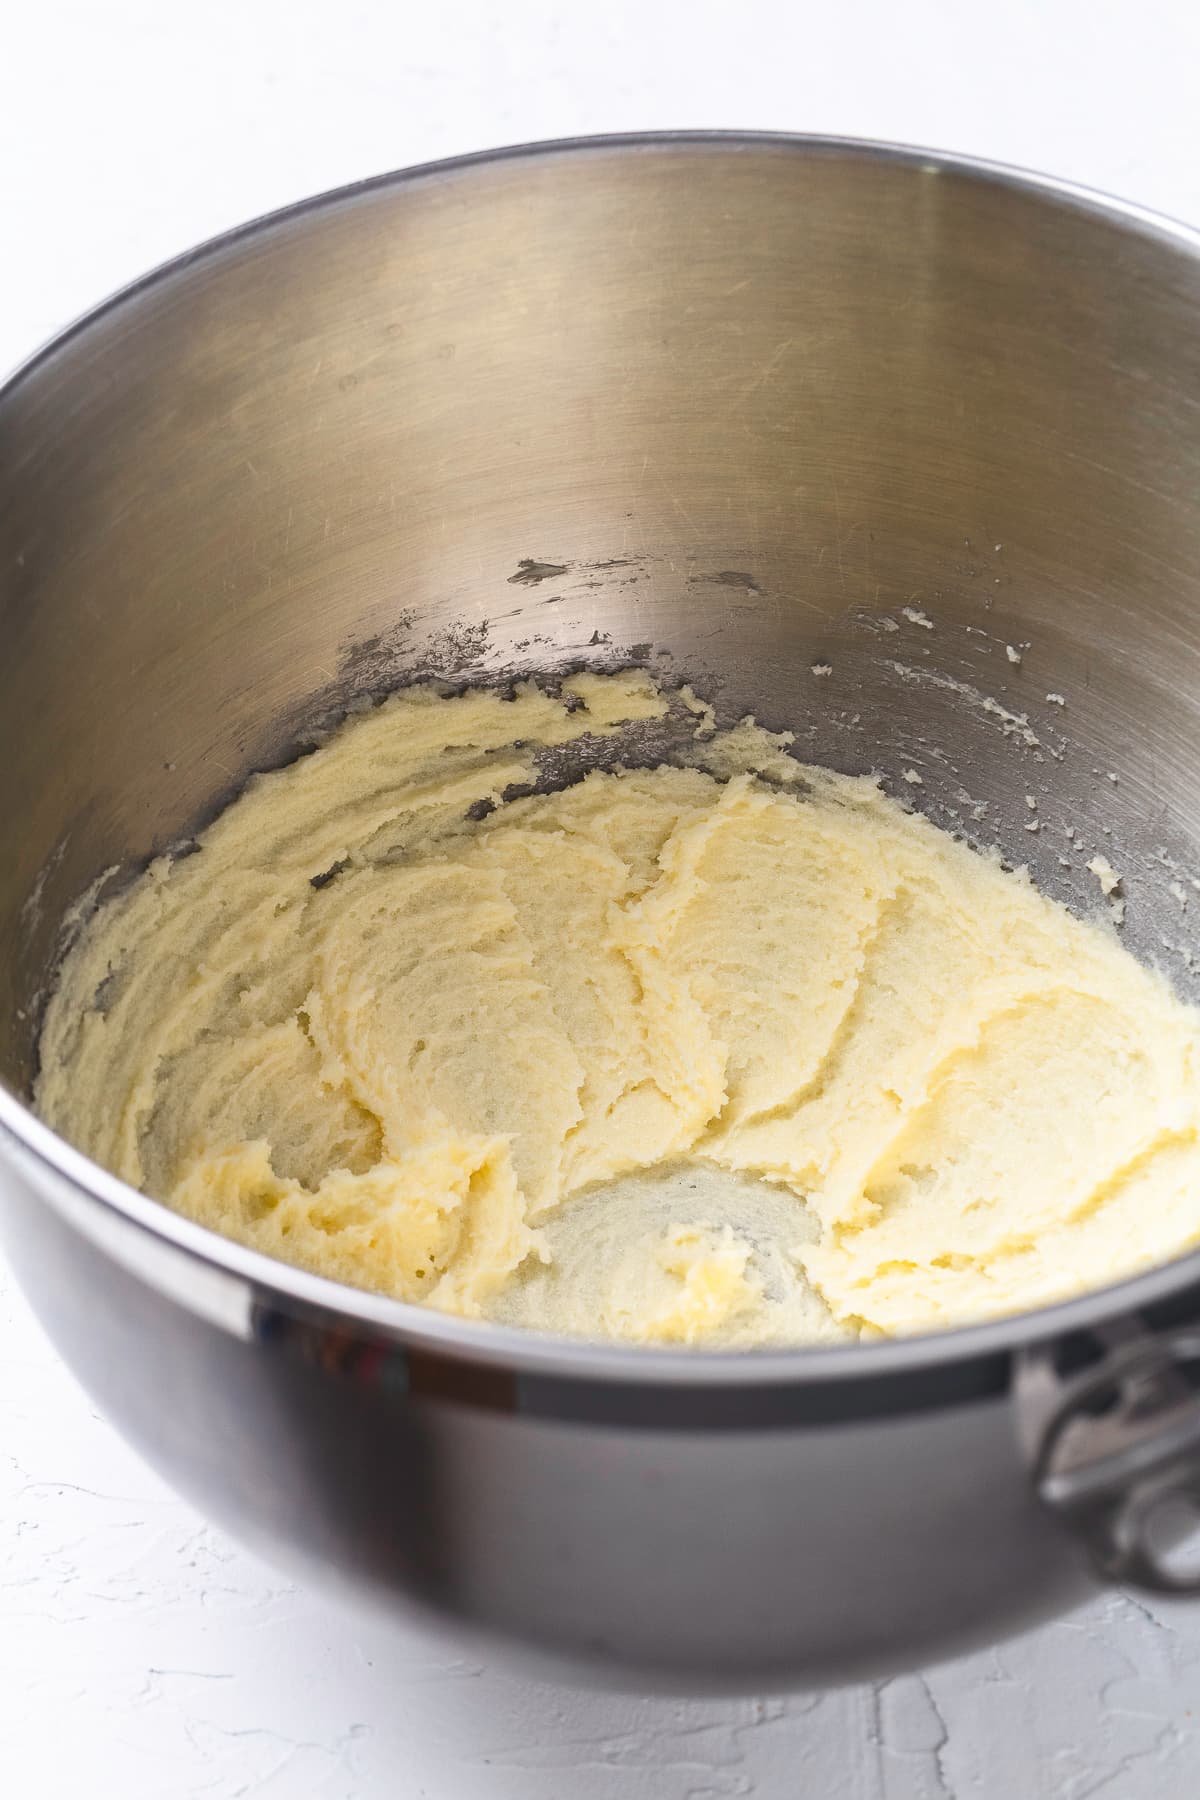
In a large bowl, use an electric mixer (or a stand mixer) on medium speed to beat the butter and sugar for about 2 minutes, until the mixture looks light and fluffy.
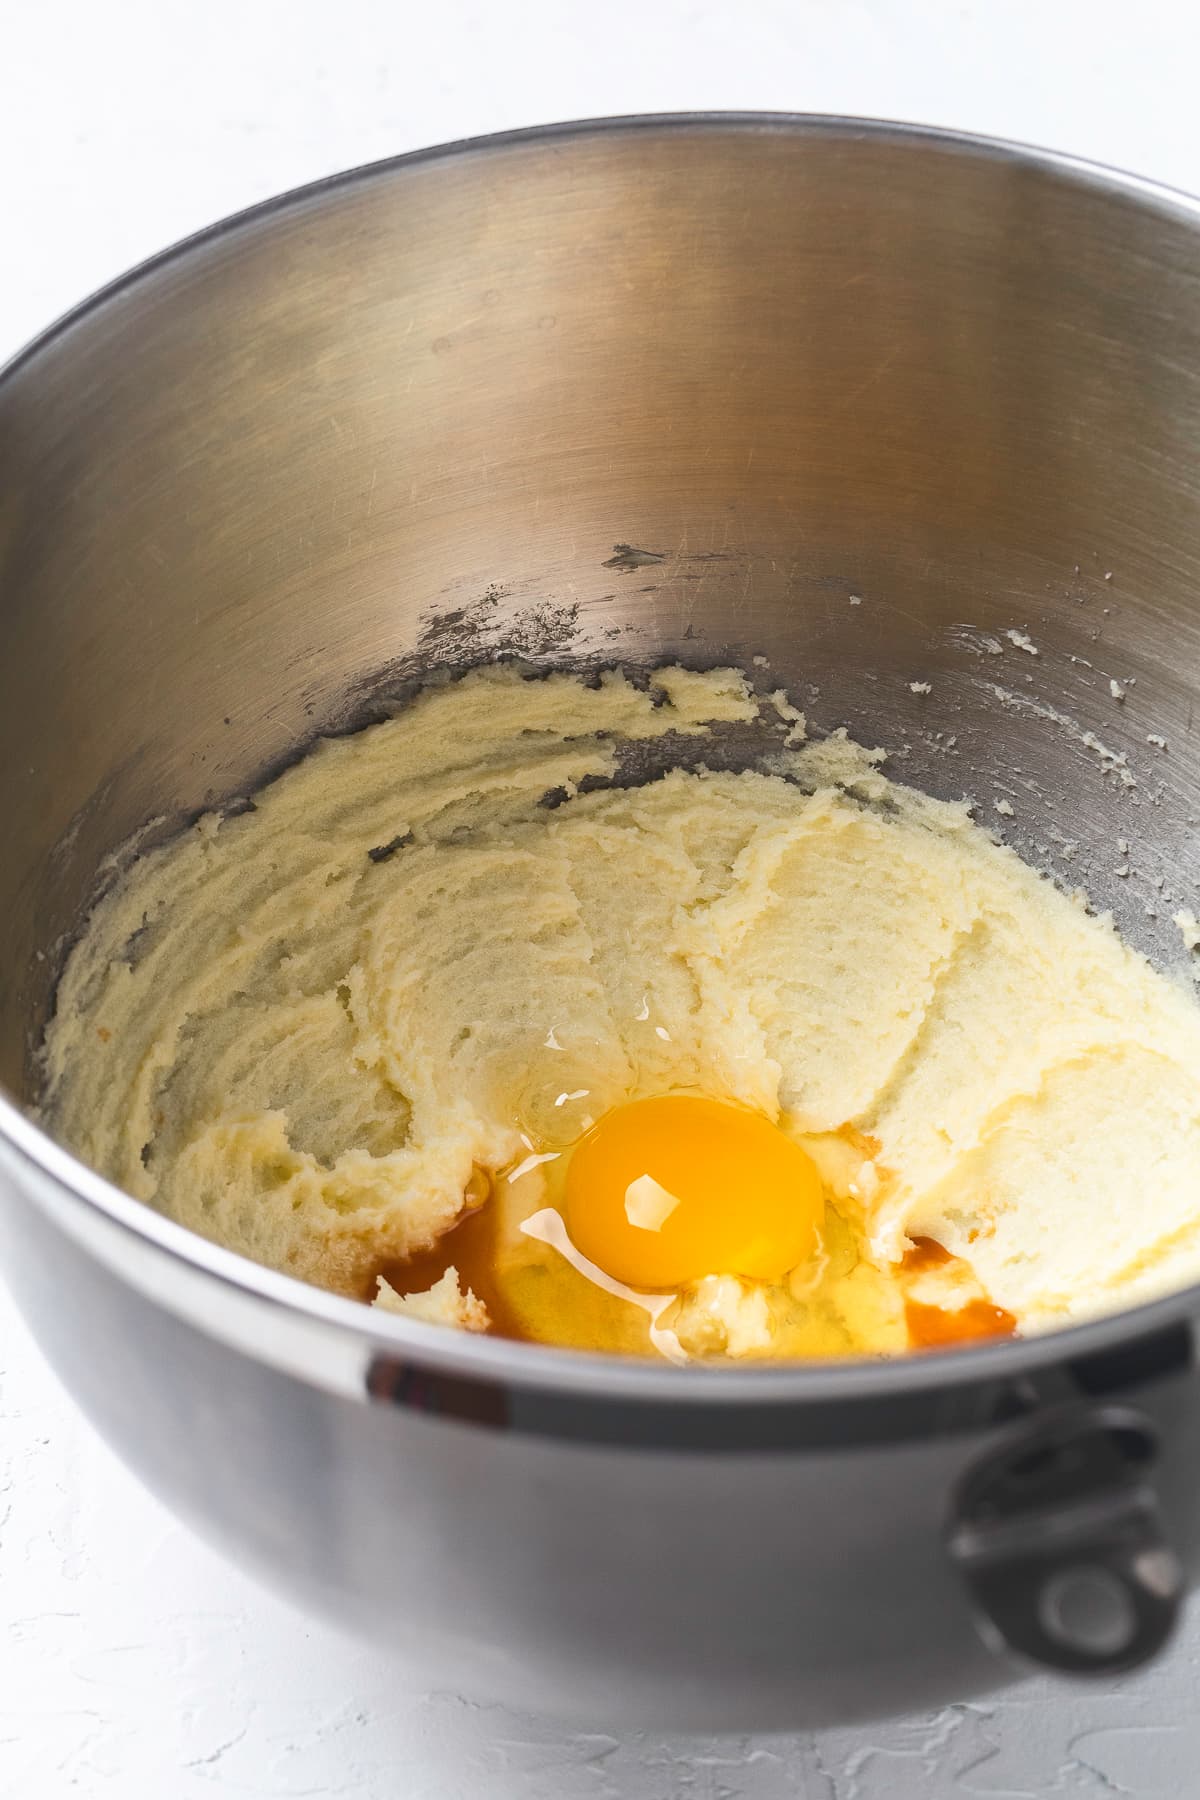
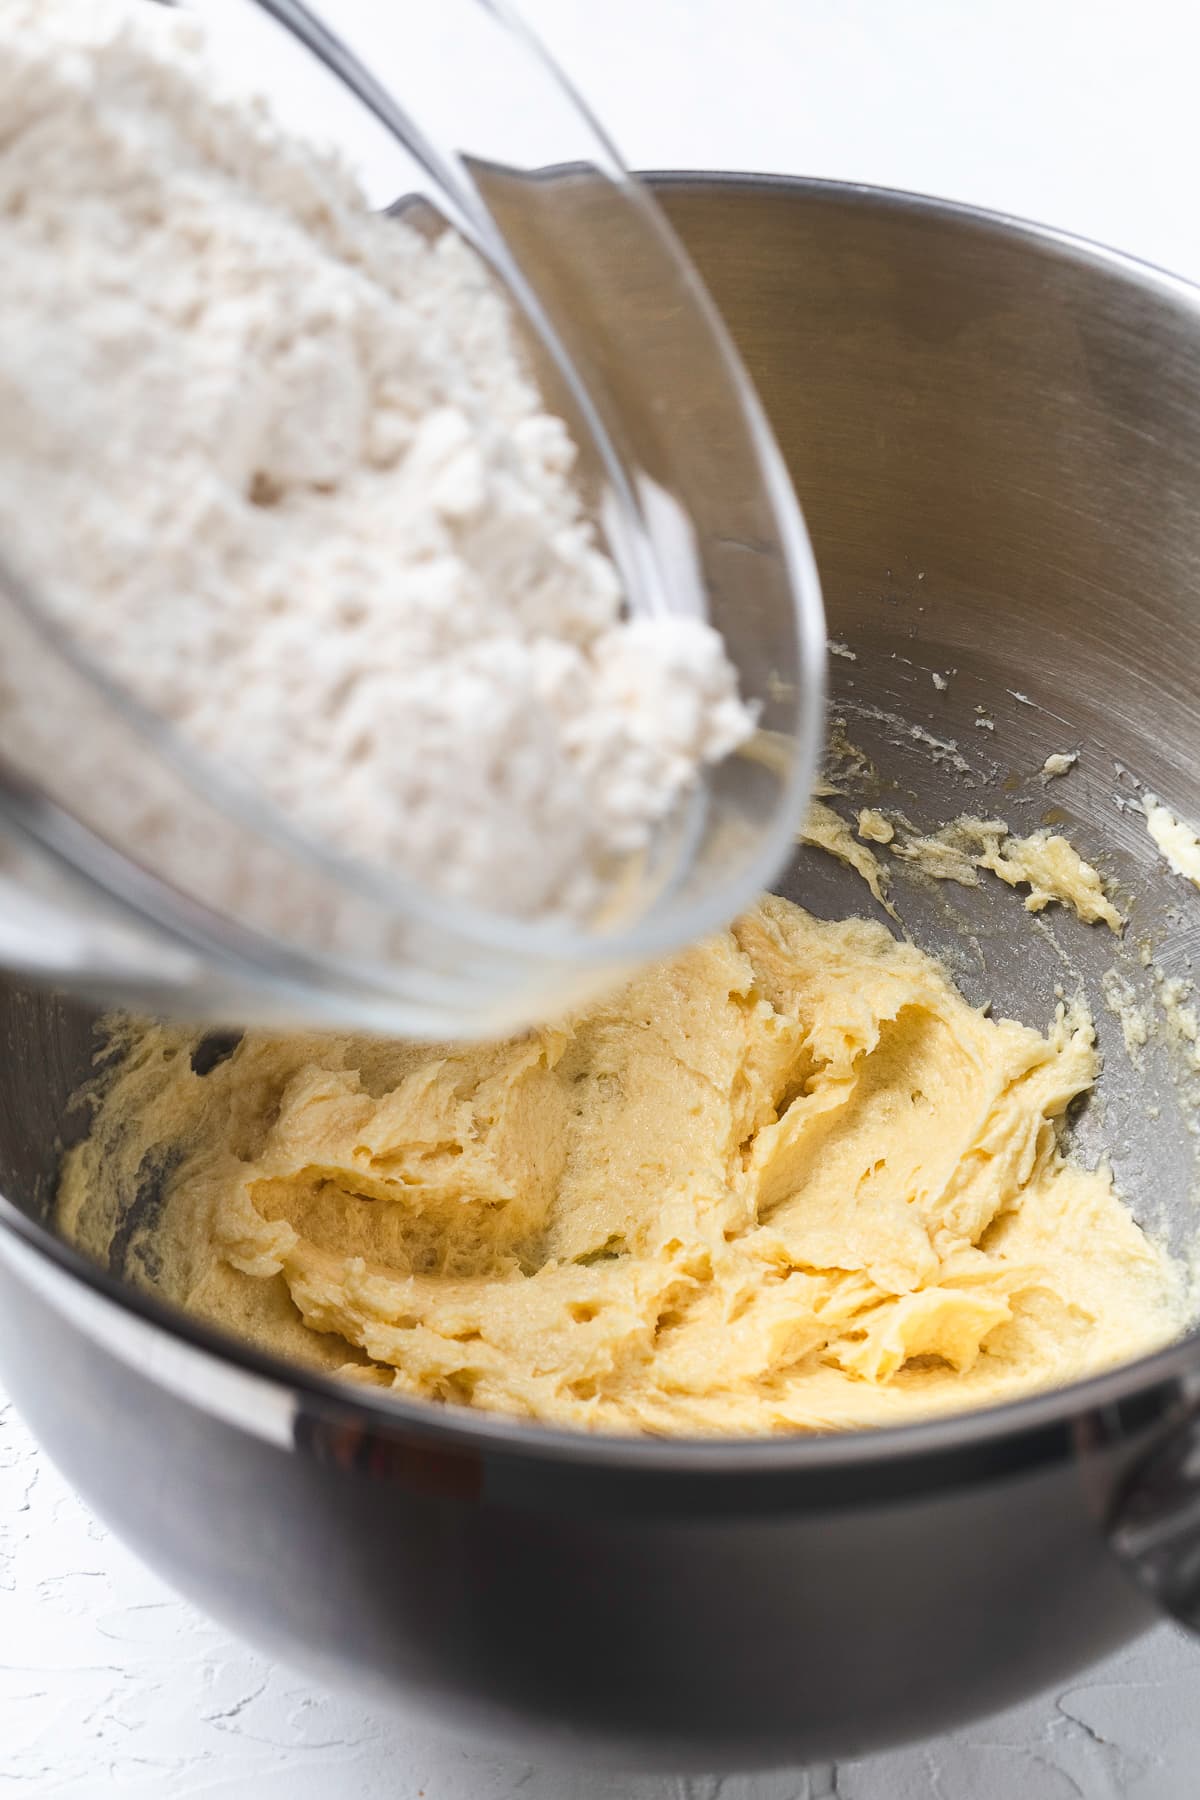
Add the egg and vanilla. Scrape down the sides of the bowl to ensure everything is well mixed.
Add the flour mixture and mix on low until the dough starts to form. Then, use a rubber spatula to gently fold and press the dough until all the flour is fully mixed in.
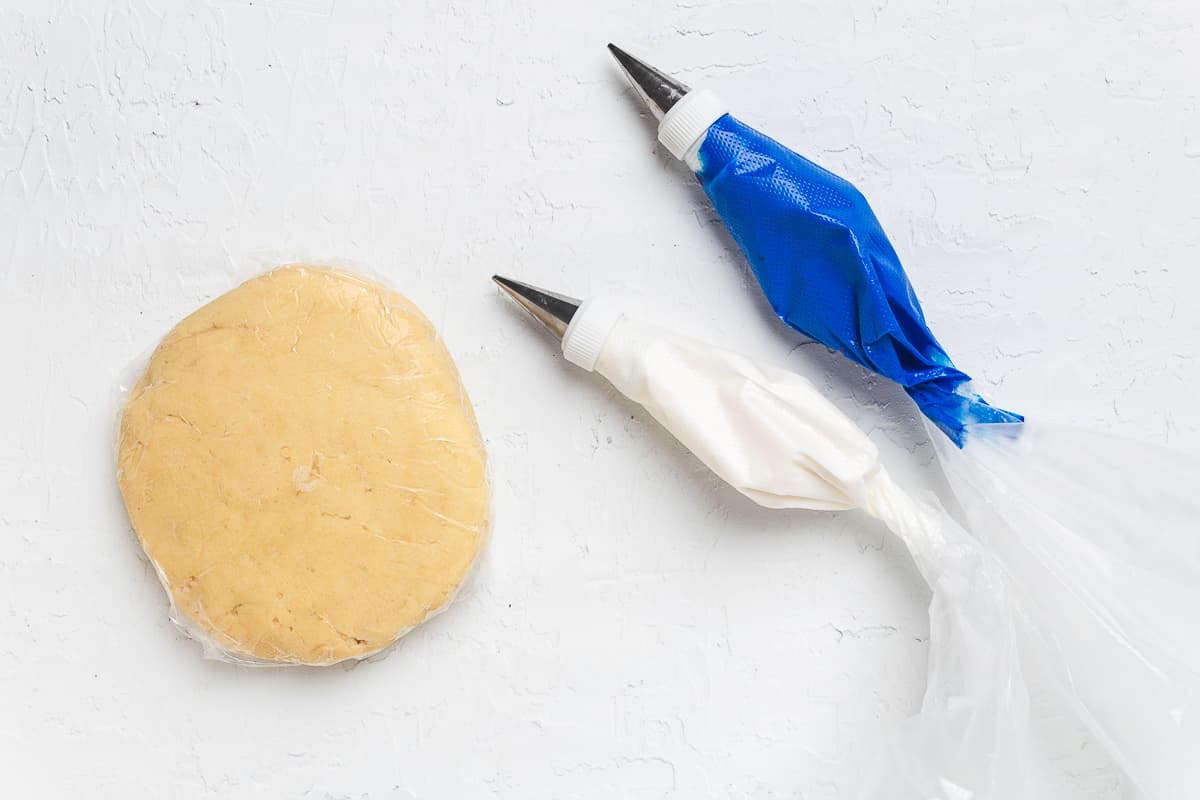
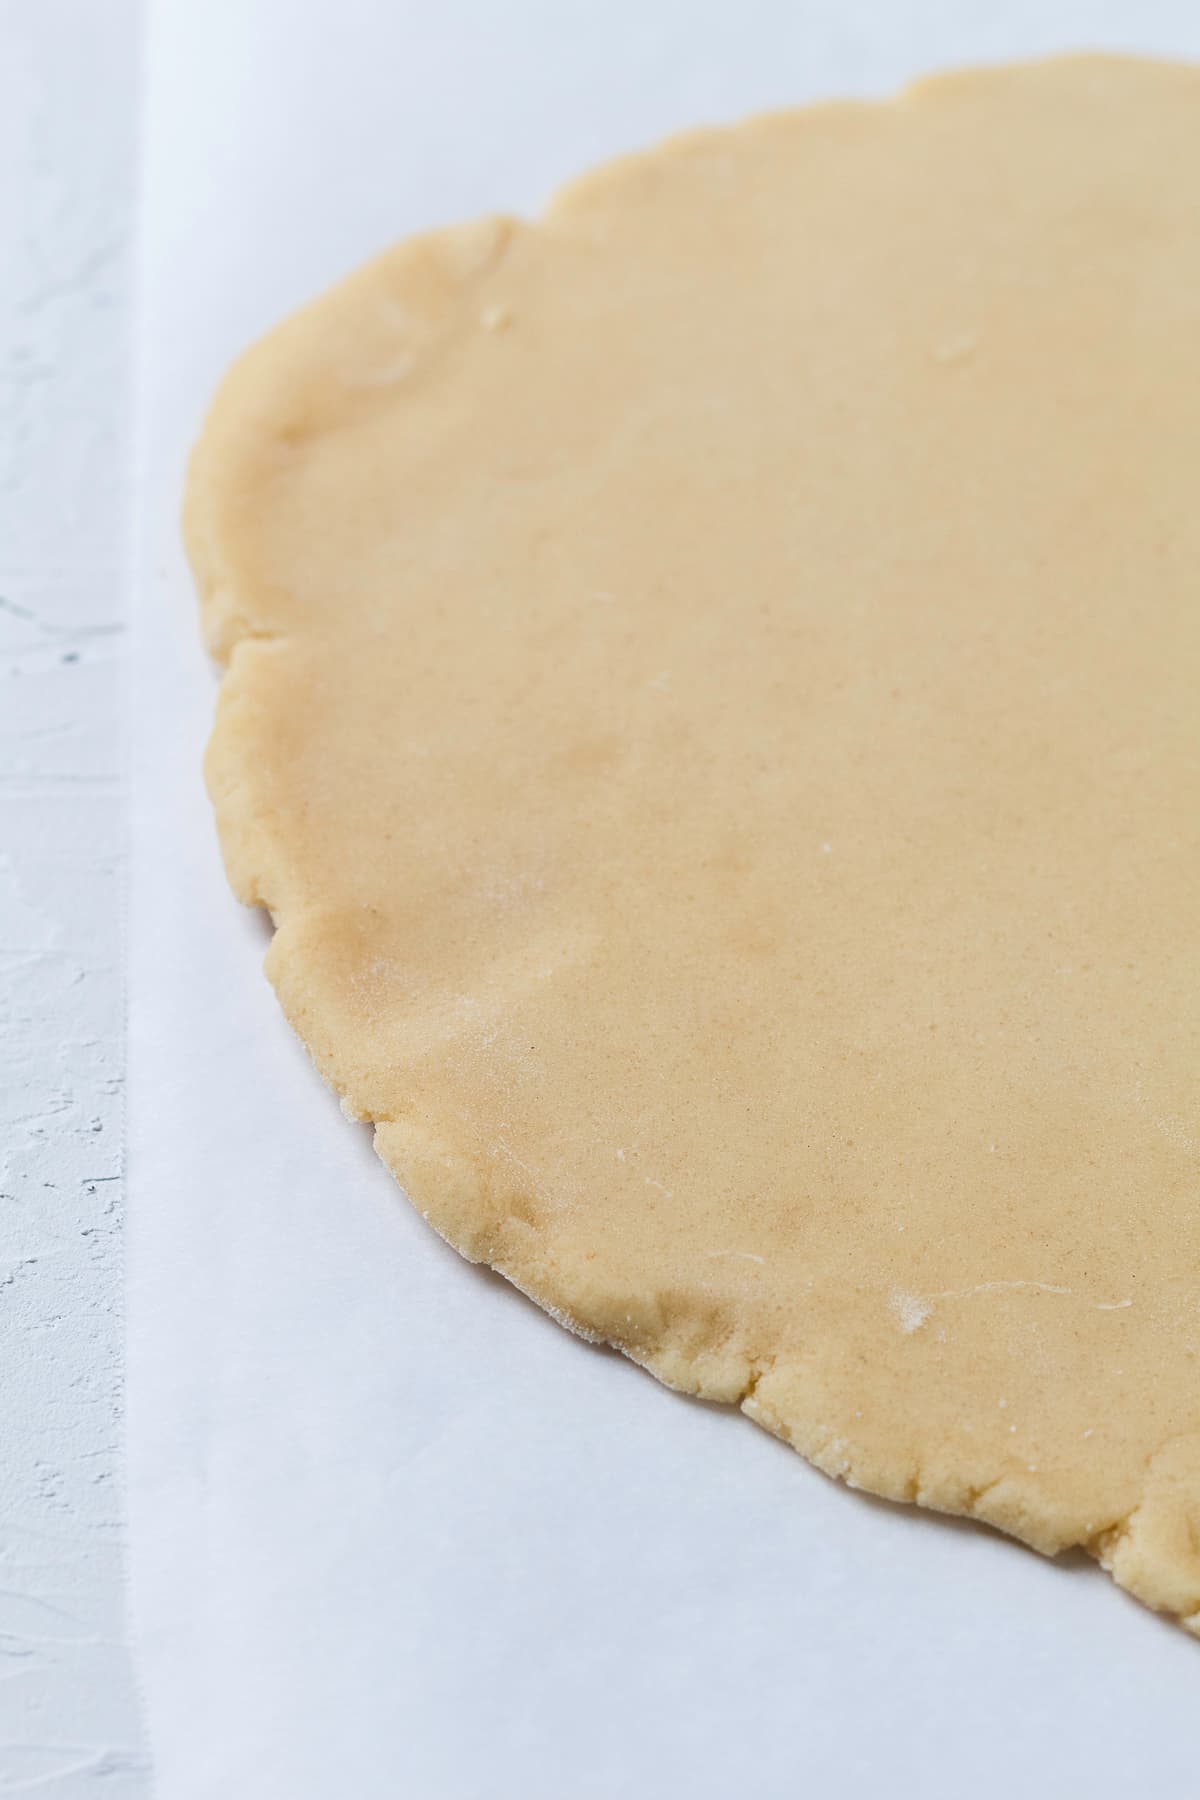
Divide the dough in half. Take one half and roll it out on parchment paper or a silicone mat until it’s about ¼ inch thick. Repeat this process with the second half.
Cover the dough sheets with plastic wrap and place them in the fridge for 2 hours to chill.
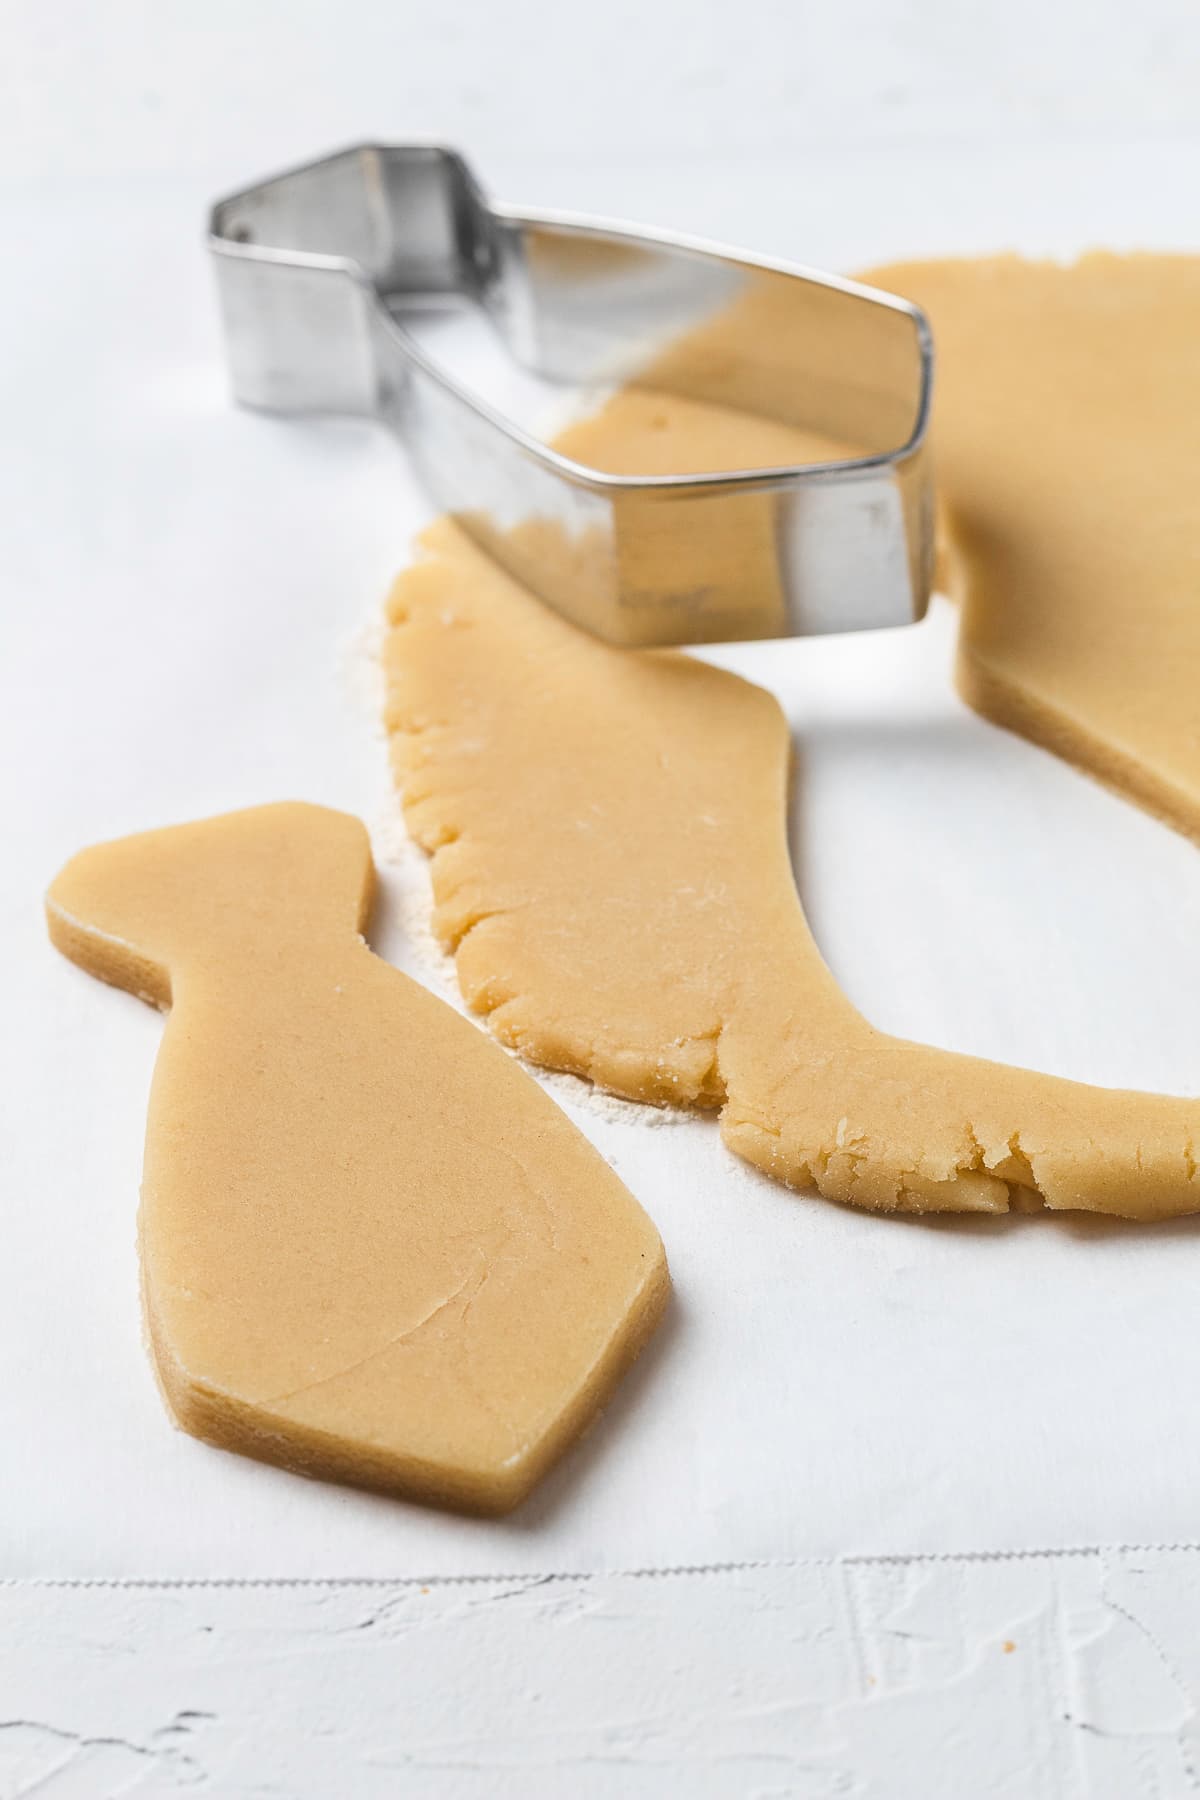
After chilling, use your favorite necktie or bowtie cookie cutters to cut out shapes. Place the cookies on your lined baking sheets, leaving about 1 inch of space between each one.
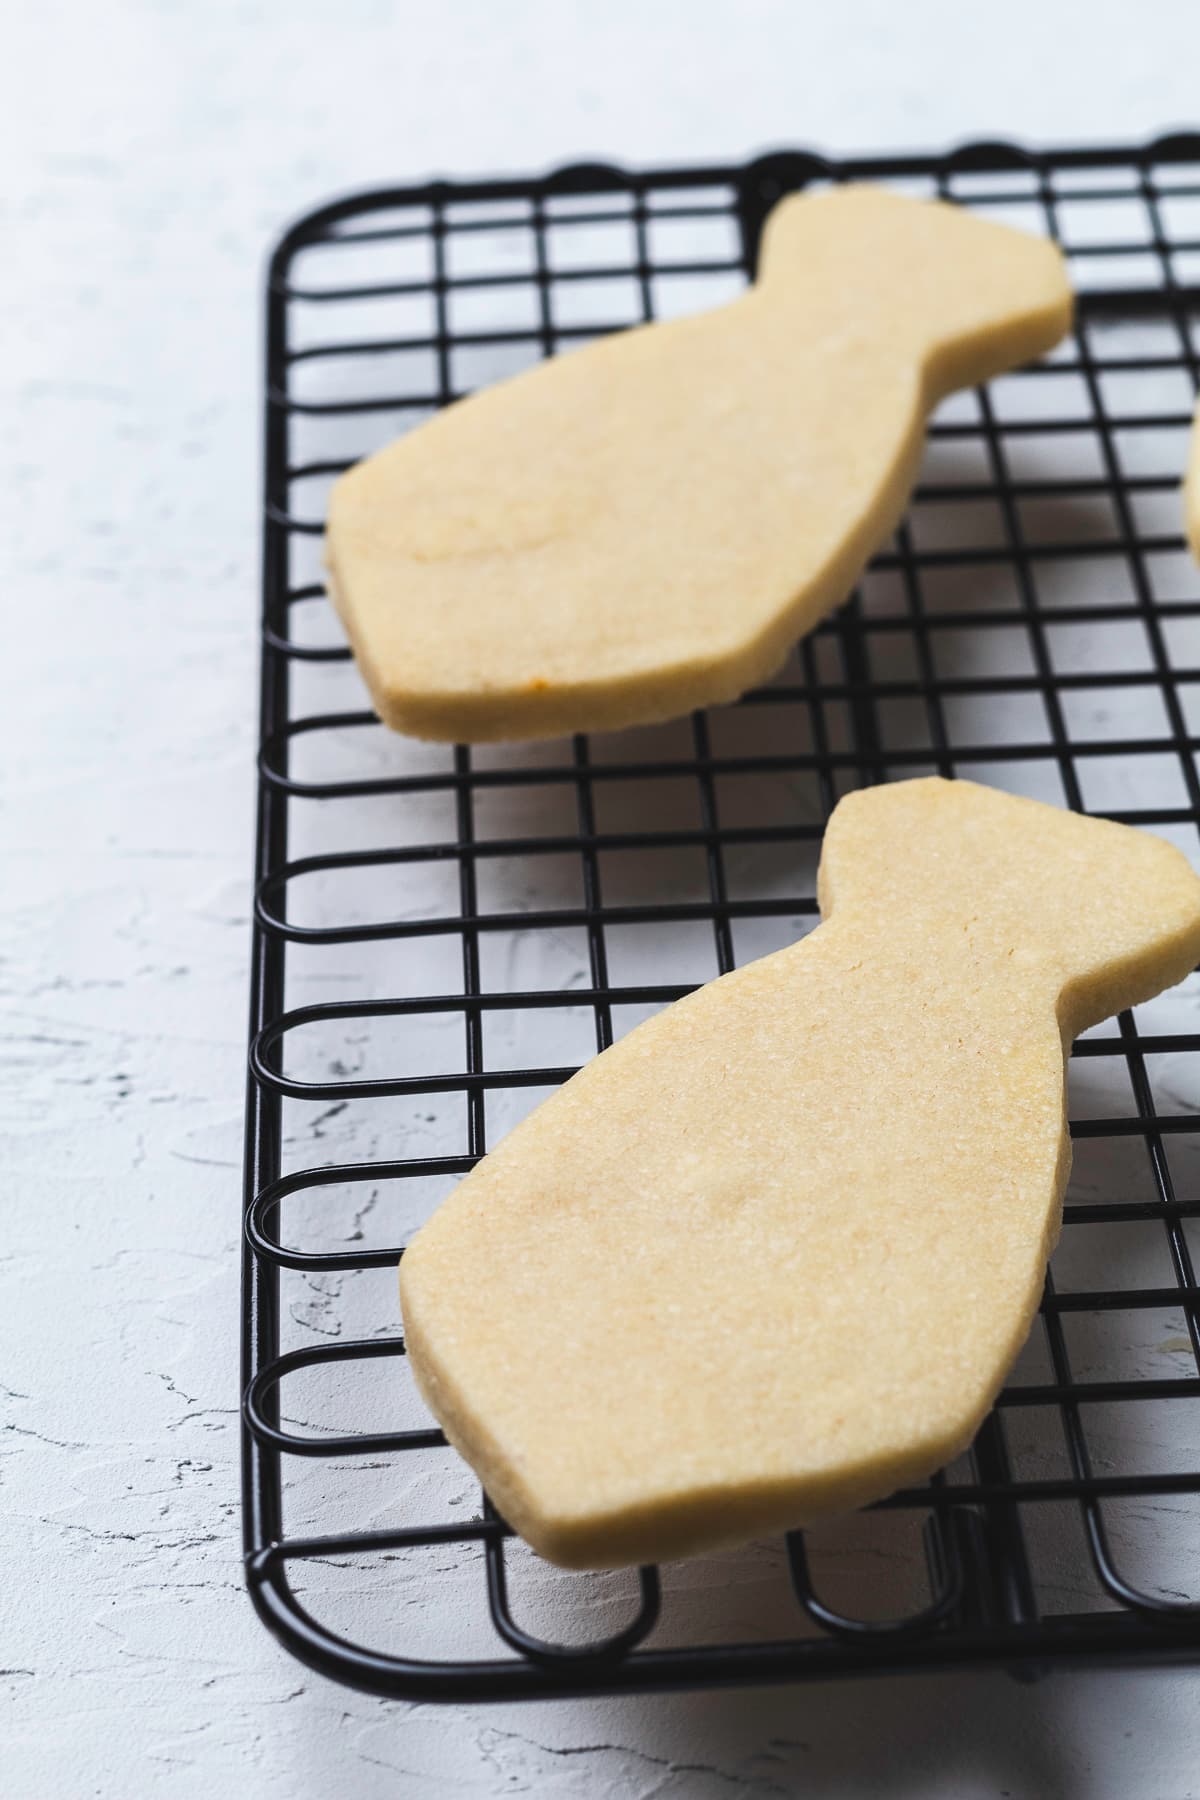
Bake for 10 to 12 minutes, or until lightly browned around the edges.
Let the cookies cool on the baking sheet for 5 minutes, then move them to a wire rack to cool completely.
Decorate the cooled cookies with royal icing and your favorite sprinkles.
For the neckties, we used blue royal icing for the primary color and white royal icing for the diagonal stripes.
Start by splitting the icing into two bowls. Leave the white icing in one bowl. In the second bowl, mix in the blue gel food coloring. You’ll need more blue icing than white, so make sure most of the icing goes into the blue bowl.
Spoon all of the white icing into a piping bag with a small #2 decorating tip. You also need to do this with a 3rd of the blue icing.
Put the rest of the blue icing into another piping bag, but this time just cut a small hole at the tip. Set aside.
Use the piping bag with the #2 tip to carefully outline the edges of the cookie with the blue icing.
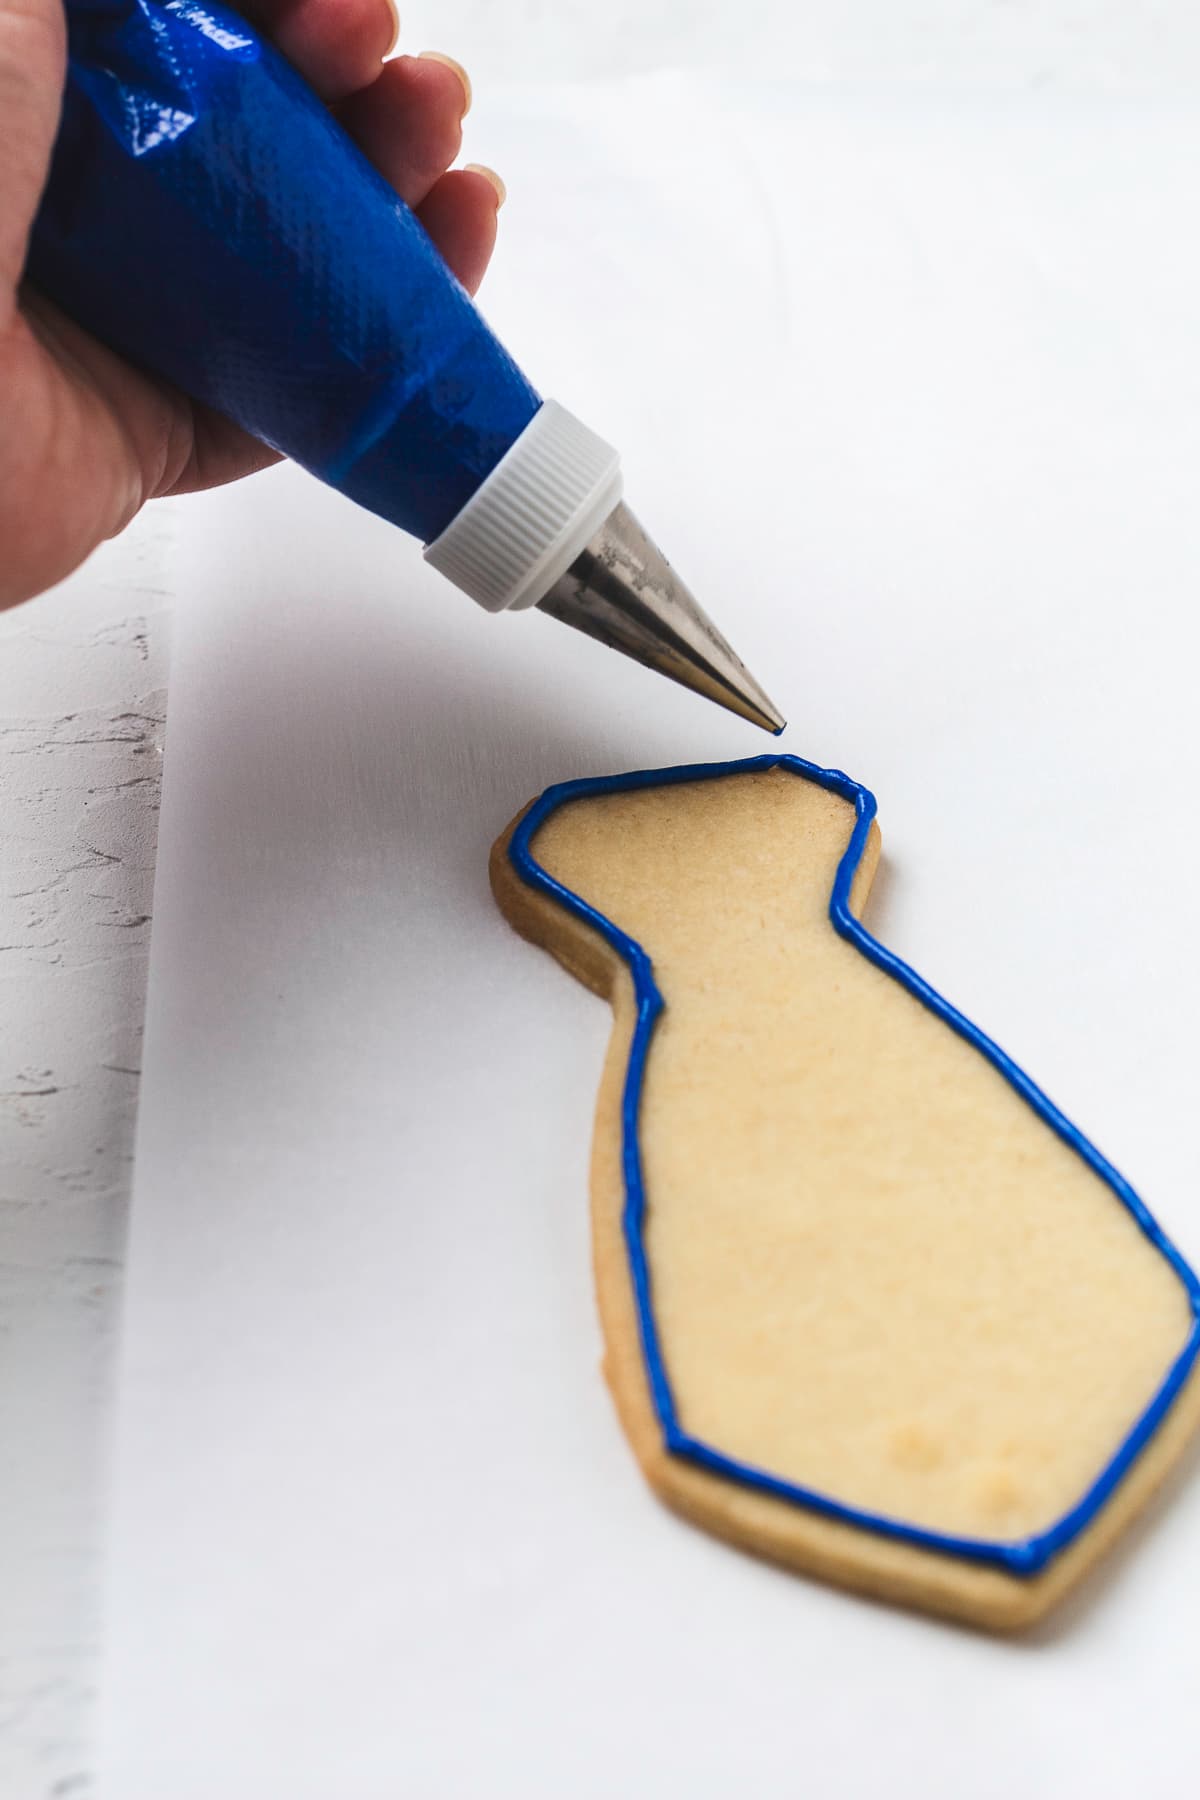
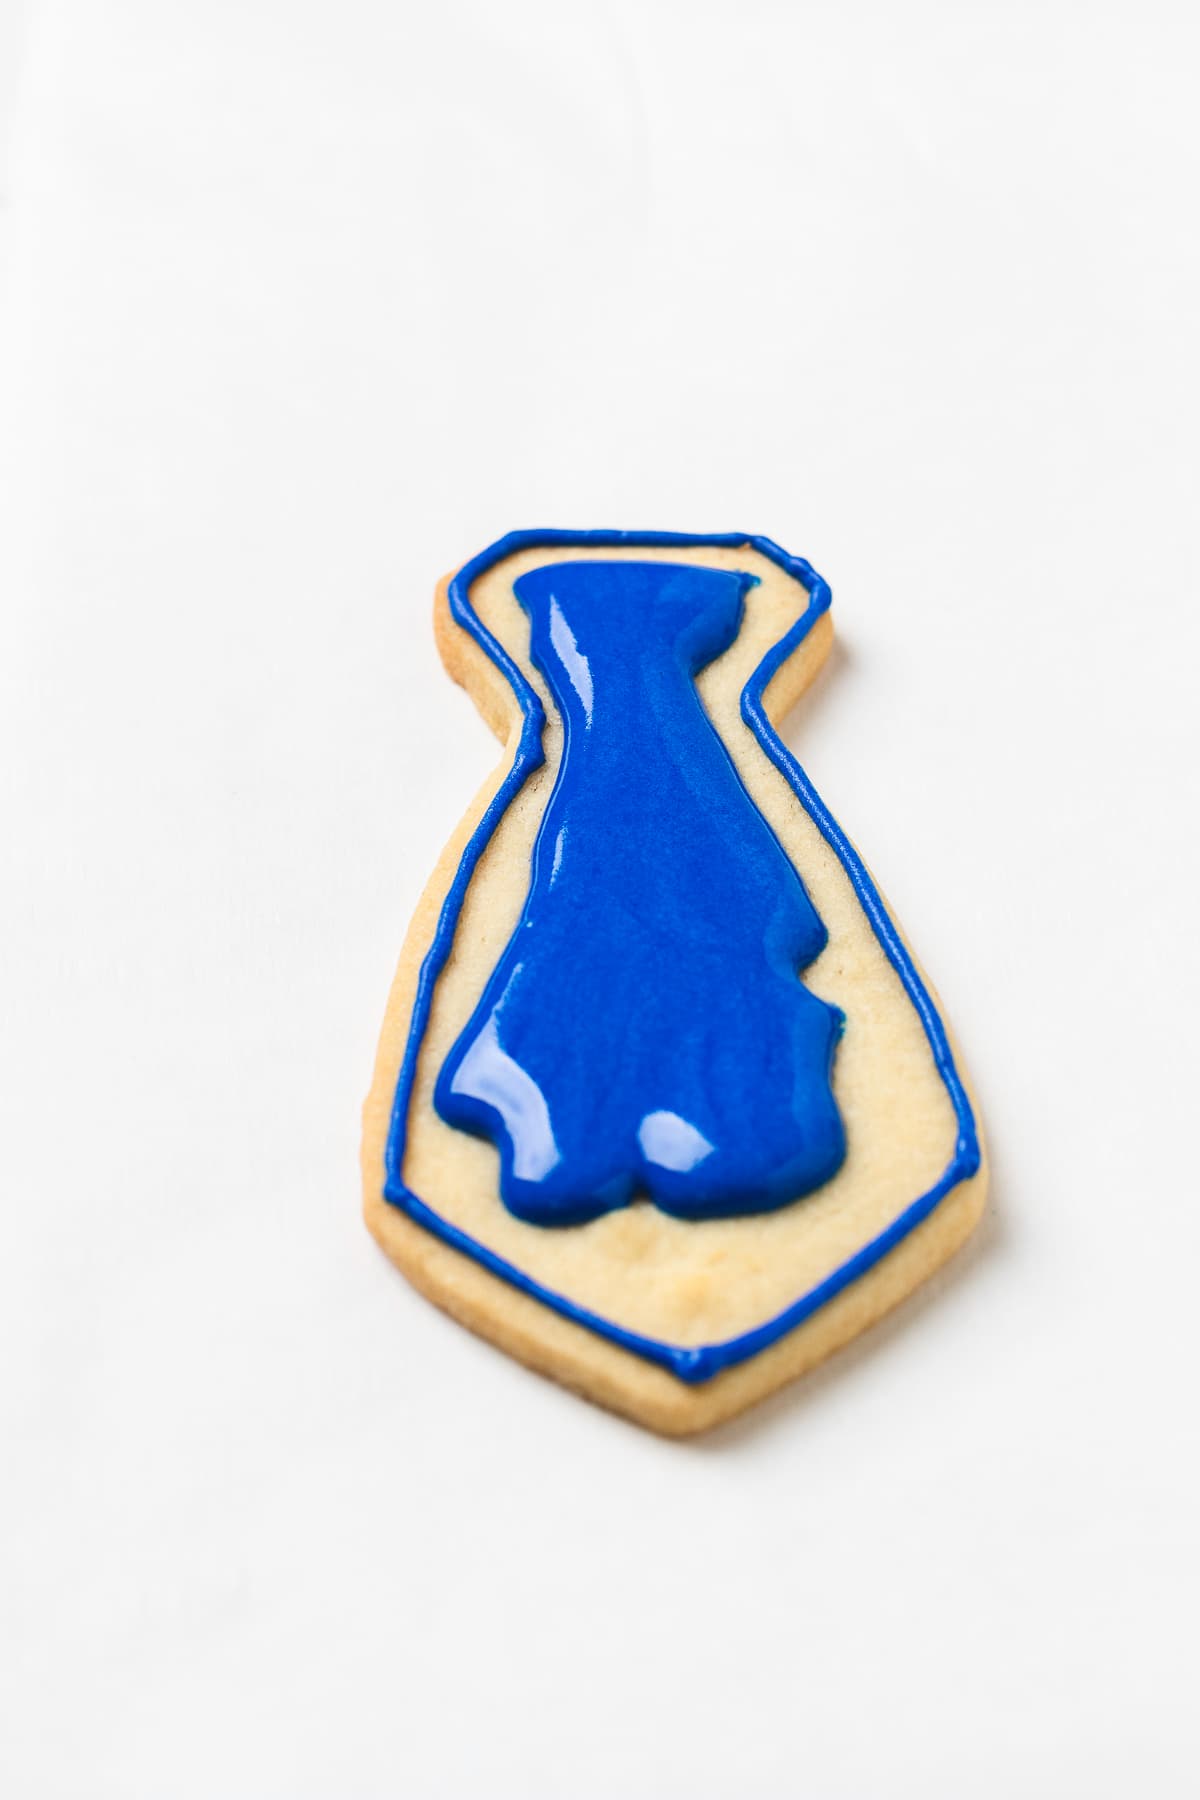
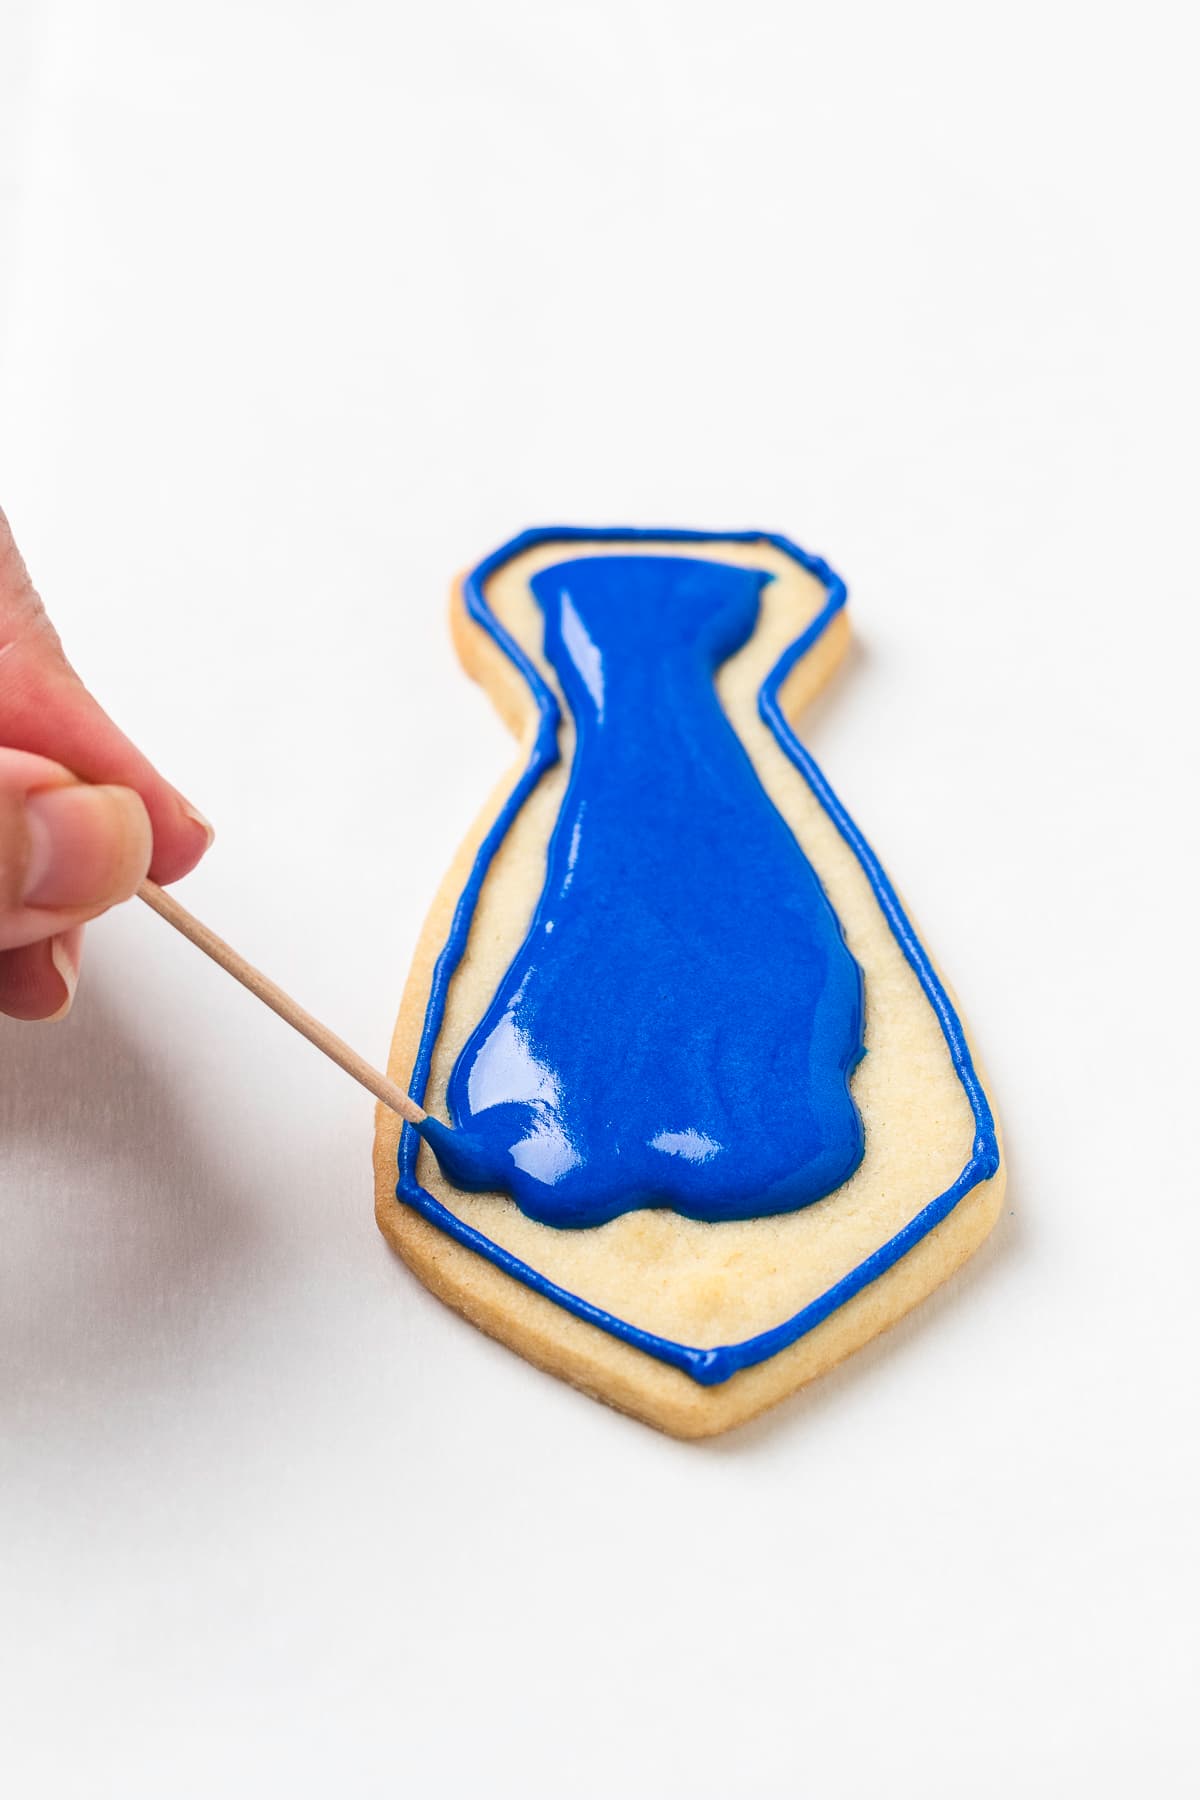
After you’ve outlined the cookie, use the second bag of blue icing to fill in the inside.
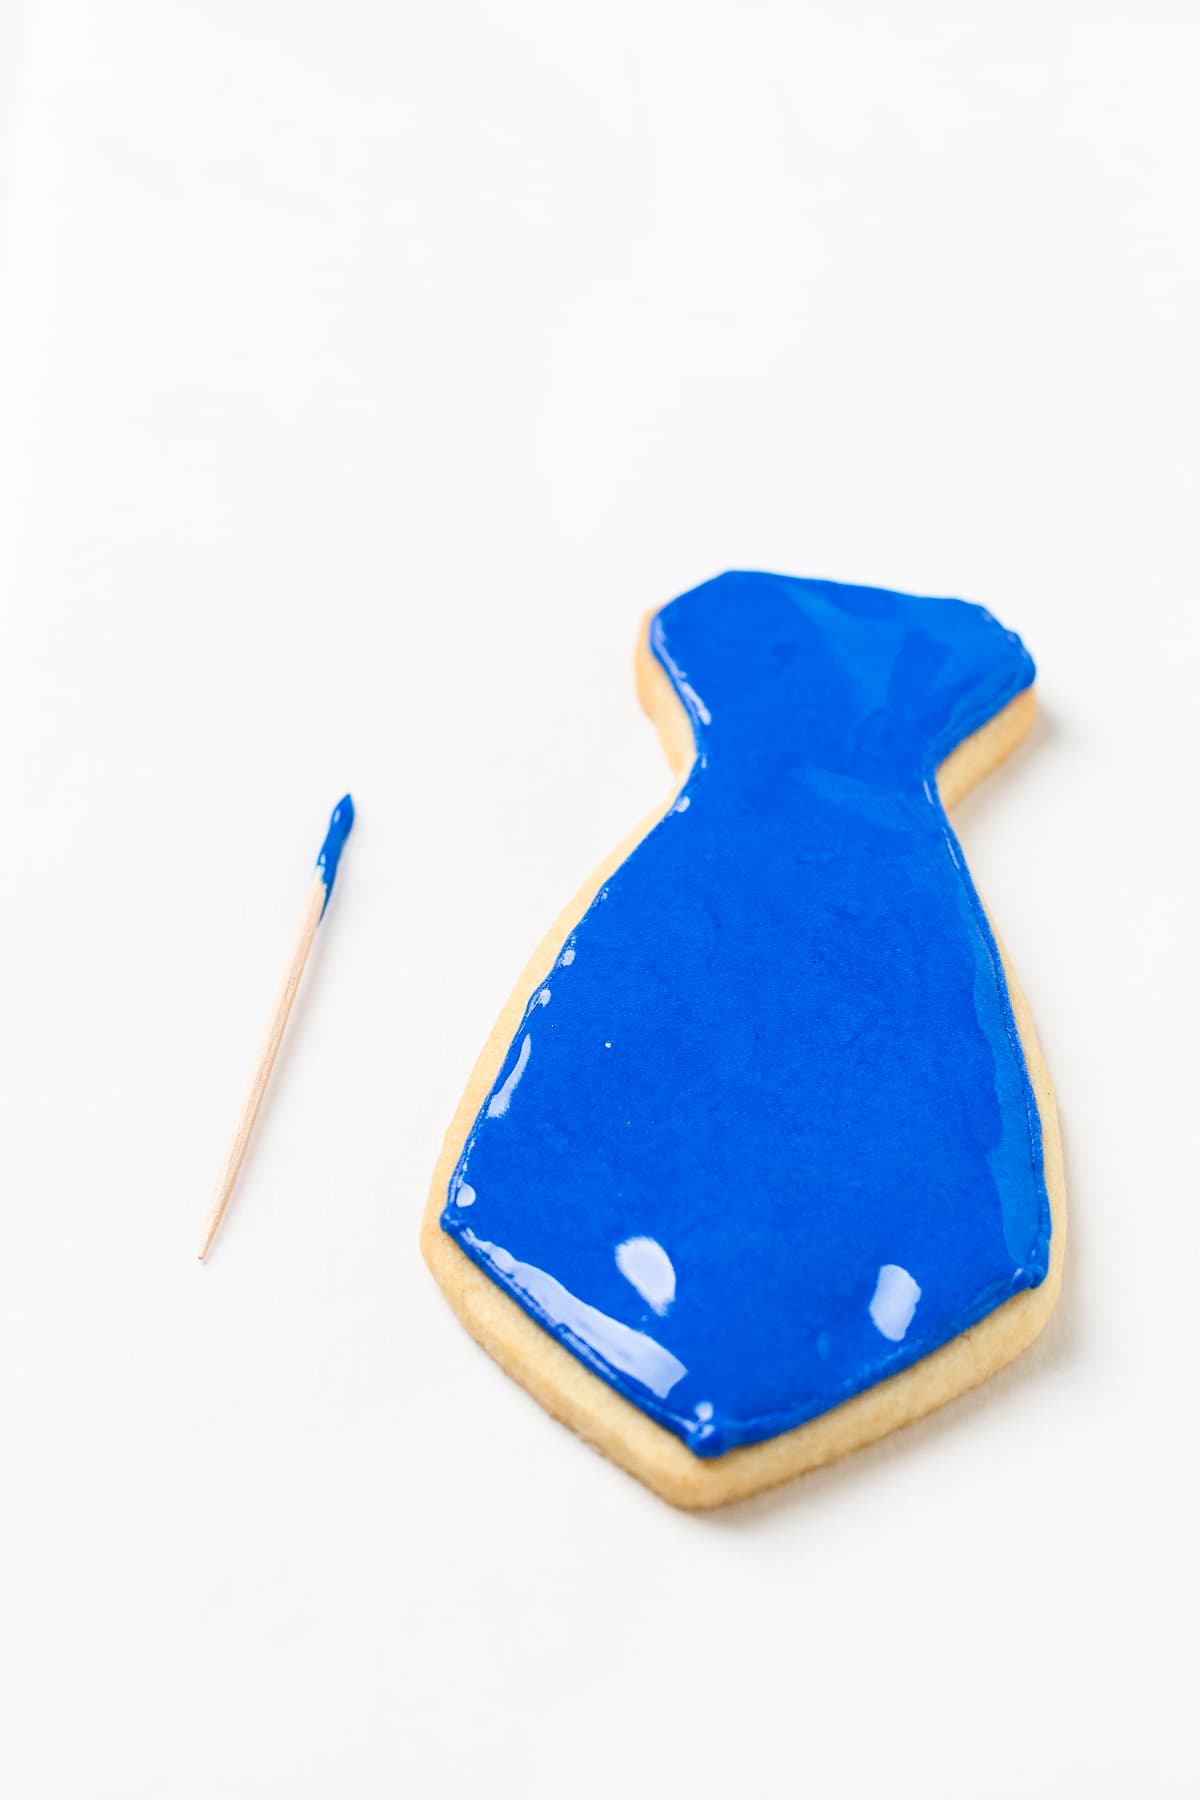
Using a toothpick, gently spread the icing to the edges to make it smooth. Allow the cookies to set for about 5 minutes.
Then take the white icing and create diagonal lines. Let the cookies sit for 2 hours so the icing can dry and harden. Enjoy!
Allow the cookies to sit at room temperature for 2 hours to allow the icing to harden. Have fun and enjoy!
Top Tips
I have two tips for you that can make or crumble your cookies:
Chill your cookie dough for at least two hours. This prevents the dough from spreading too much when you bake the cookies. Skipping this step will cause the ties to spread and lose their shape.
Also, allow your cookies to cool completely before decorating. If not, the frosting will melt and your icing won’t set.
Equipment
It’s easier to make cookies with an electric mixer, like our favorite handheld mixer by Hamilton Beach or the KitchenAid stand mixer.
We found necktie cookie cutters at a local hardware store, but you can find some Father’s Day cookie cutters here as well.
Storage
Here’s how to store your Father’s Day cookies and keep them fresh:
Using parchment paper between layers, store leftover cookies at room temperature in an airtight container for up to 7 days.
Freeze baked cookies in a single layer on a baking sheet. Then, transfer them to a freezer bag and store them in this manner for up to two months. You can also freeze decorated cookies; they thaw surprisingly well.
FAQ
No, unless you find a store-bought dough specifically for cutout cookies, I wouldn’t. They tend to have too much fat and spread too much to hold their shape.
Yes! Chilling the dough is an absolute must if you want your cookies to hold their shape.
Decorate your Father’s Day necktie cookies any way you like! Use your Dad’s favorite colors, stripes, polka dots, and other patterns.
Father’s Day Tie Cookie Recipe
Ingredients
- 1 Sugar Cookie Recipe
- Blue Royal Icing
- White Royal Icing
Instructions
- Follow the steps through number 7 on the sugar cookie recipe card.
- After chilling, use the tie-shaped cookie cutter to cut out the cookies. Place them on your lined baking sheets, leaving about 1 inch of space between each one.
- Bake for 10 to 12 minutes, or until lightly browned around the edges.
- Let the cookies cool on the baking sheet for 5 minutes, then move them to a wire rack to cool completely.
Decorating
- Start by splitting the icing into two bowls. Leave the white icing in one bowl. In the second bowl, mix in the blue gel food coloring. You’ll need more blue icing than white, so make sure most of the icing goes into the blue bowl.
- Spoon all of the white icing into a piping bag with a small #2 decorating tip. You also need to do this with a 3rd of the blue icing.
- Put the rest of the blue icing into another piping bag, but this time just cut a small hole at the tip. Set aside.
- Use the piping bag with the #2 tip to carefully outline the edges of the cookie with the blue icing. After you’ve outlined the cookie, use the second bag of blue icing to fill in the inside.
- Using a toothpick, gently spread the icing to the edges to make it smooth. Allow the cookies to set for about 5 minutes.
- Then take the white icing and create diagonal lines. Let the cookies sit for 2 hours so the icing can dry and harden. Enjoy!
Notes
- Ensure your cookies are completely cooled before adding any frosting or icing.
- Cookies can be stored at room temperature in an airtight container for up to 5 days or frozen for up to 2 months.
- When you re-roll the dough, place it back in the fridge while the other cookies are baking. This will ensure they don’t spread too much.
Leave a Reply