
You can’t help but smile when making these Christmas Tree Cake Pops. They’re ridiculously easy and just plain fun. We’re talking vanilla cake and buttercream frosting stuffed inside a sugar cone for a nostalgic treat you’ll make for years to come.

Christmas tree cake pops are perfect for the holiday season. Think classroom parties, office parties, cookie swaps, you name it, these cake pops will be a hit.
By the way, looking for more delicious Christmas treats? Don’t forget to explore our easy and fun Christmas Tree Cupcakes, Christmas cookies, or Christmas peanut butter balls.
Pin to your favorite Christmas board! ⤵️

Jump to:
Why You’ll Love This Recipe
- The holiday season is the Best time of year, but it’s also the most hectic. So take some of the pressure off with simple Christmas treats like this one. They’re quick and easy! You’ve got to get easy wins however you can.
- This is a dependable recipe because who doesn’t love the flavor of cake and frosting? It’s a dependable treat that’s not only pretty but also tastes good.
- Can you think of a more fitting festive treat for the holidays (aside from our Christmas tree cupcakes)? I mean, come on, they look like adorable little Christmas trees. Plus, you’ll have fun decorating them with green frosting, sprinkles, and candy stars.
- Kids from 1 to 92 will love them! That means baby Sam all the way to Grandma Francis! They are a simple yet fun way to capture the imaginations of your favorite folks this holiday season.
- Edible decor. They make great centerpieces or holiday decorations. Put them out for the little ones and watch their eyes light up when you tell them they can eat them!
Ingredients
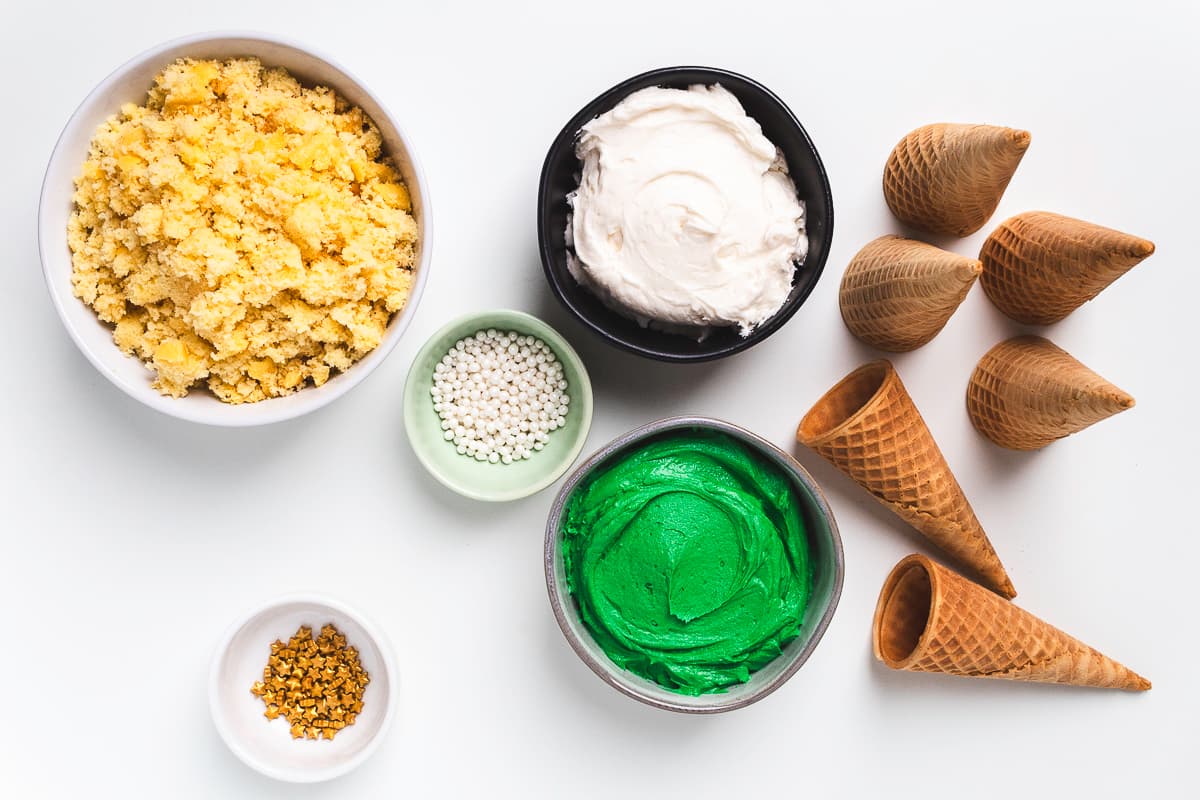
- Cake – Bake your favorite cake mix and crumble it. We chose yellow cake but you can choose whichever flavor you like best.
- Frosting – make homemade frosting or buy frosting and add food coloring to color it green for the Christmas trees. We used a 50/50mixture of butter and shortening for our American buttercream frosting. It holds up great.
- Sugar cones – this will hold the cake pop mixture and give the Christmas tree cake pops their shape.
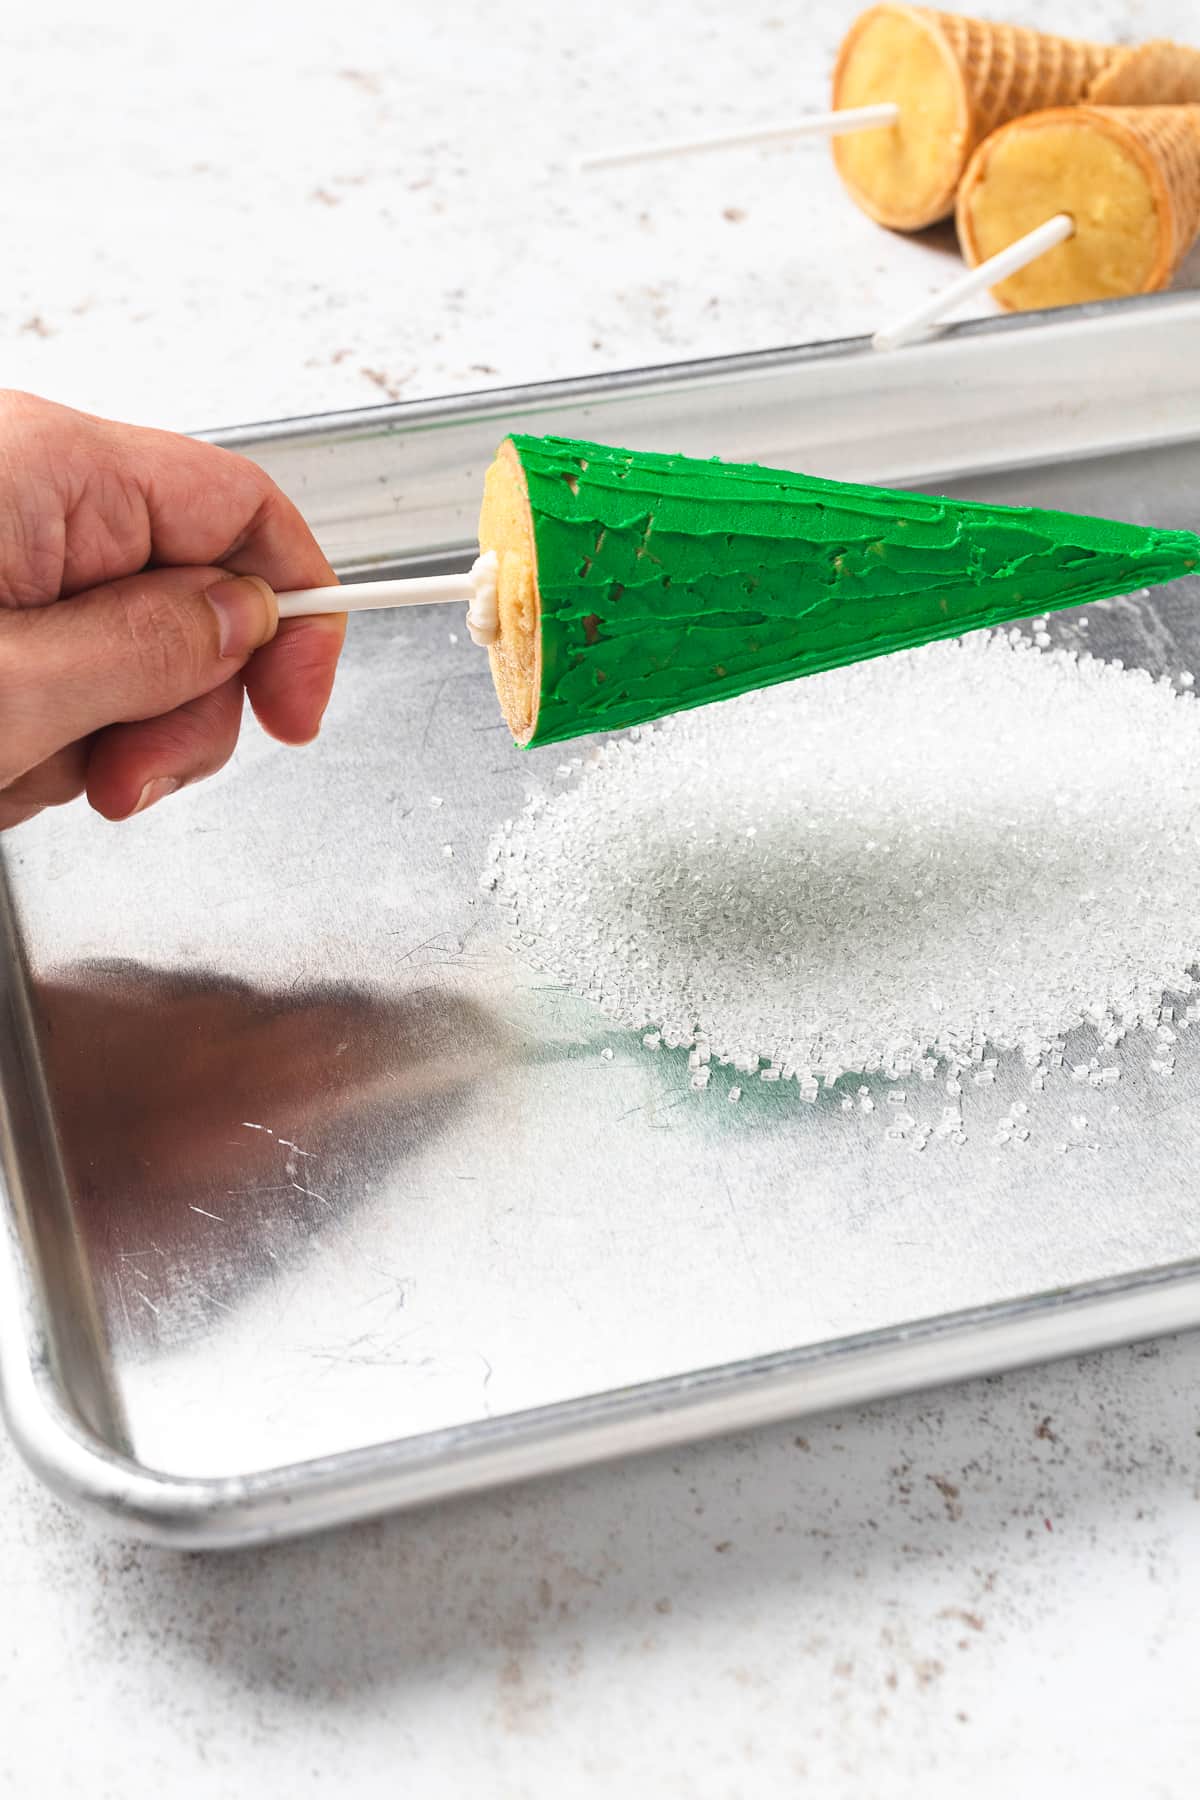
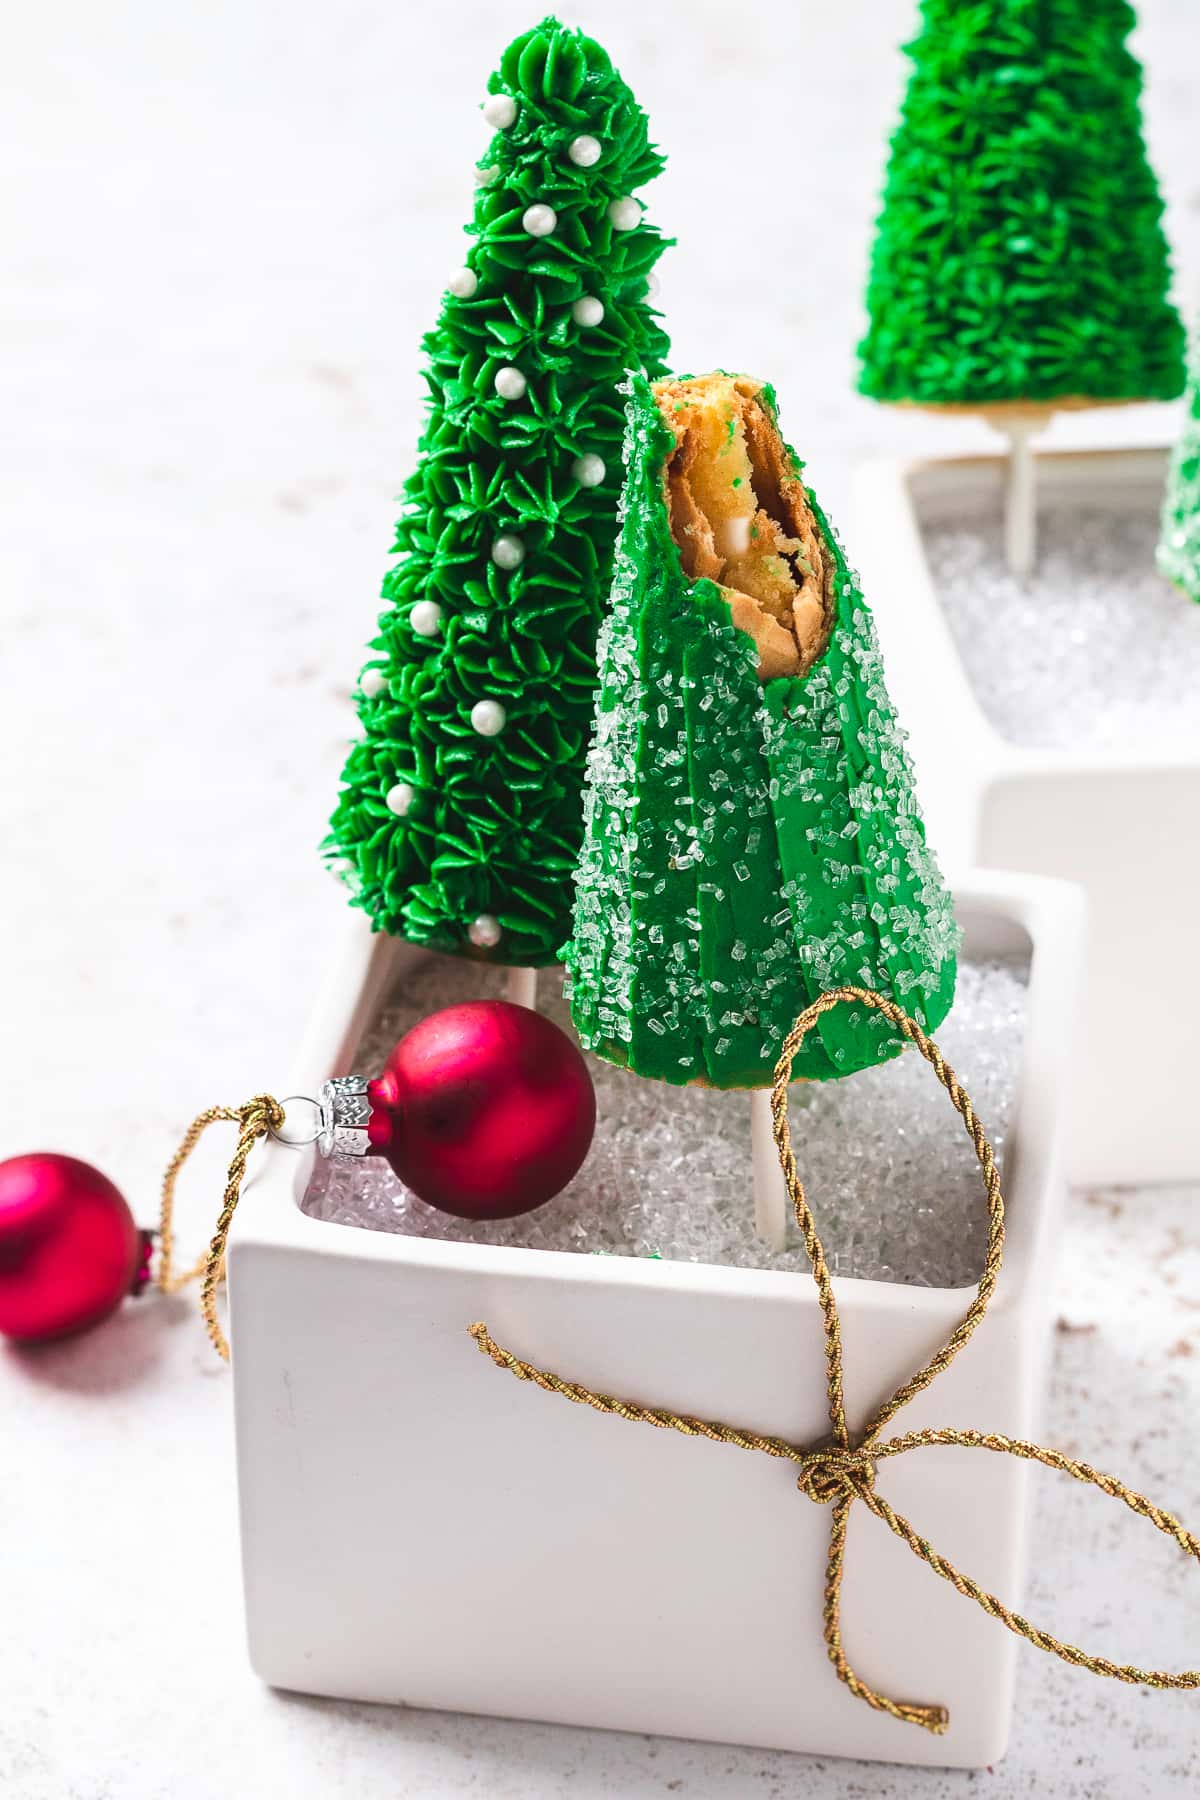
- Decorative sugar (optional) – for a simple decoration choice. Looks like snow on the “trees.”
See the recipe card for amounts.
How to Make Christmas Tree Cupcakes
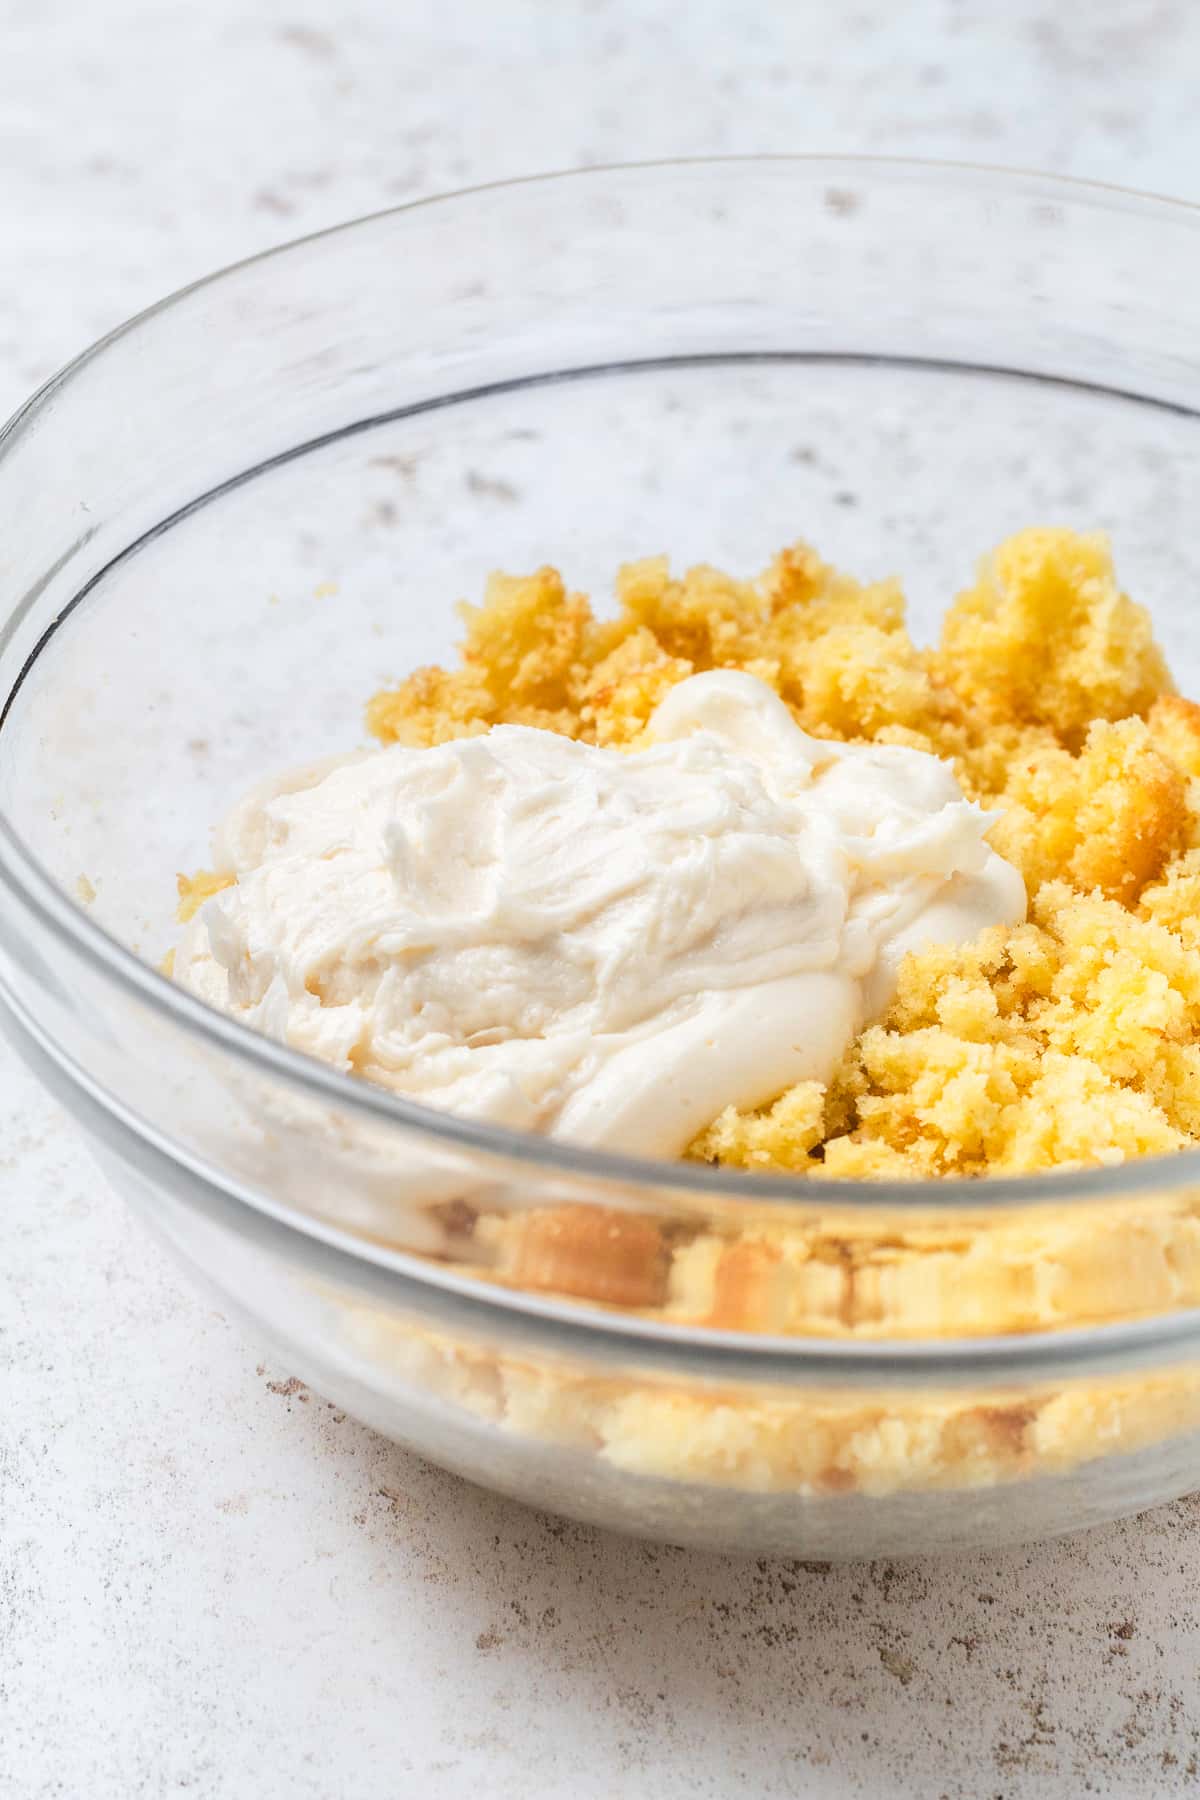
In a large bowl, break the cooled cake into small pieces. Keep crumbling it with your hands until it feels like sand. Make sure there are no big chunks left.
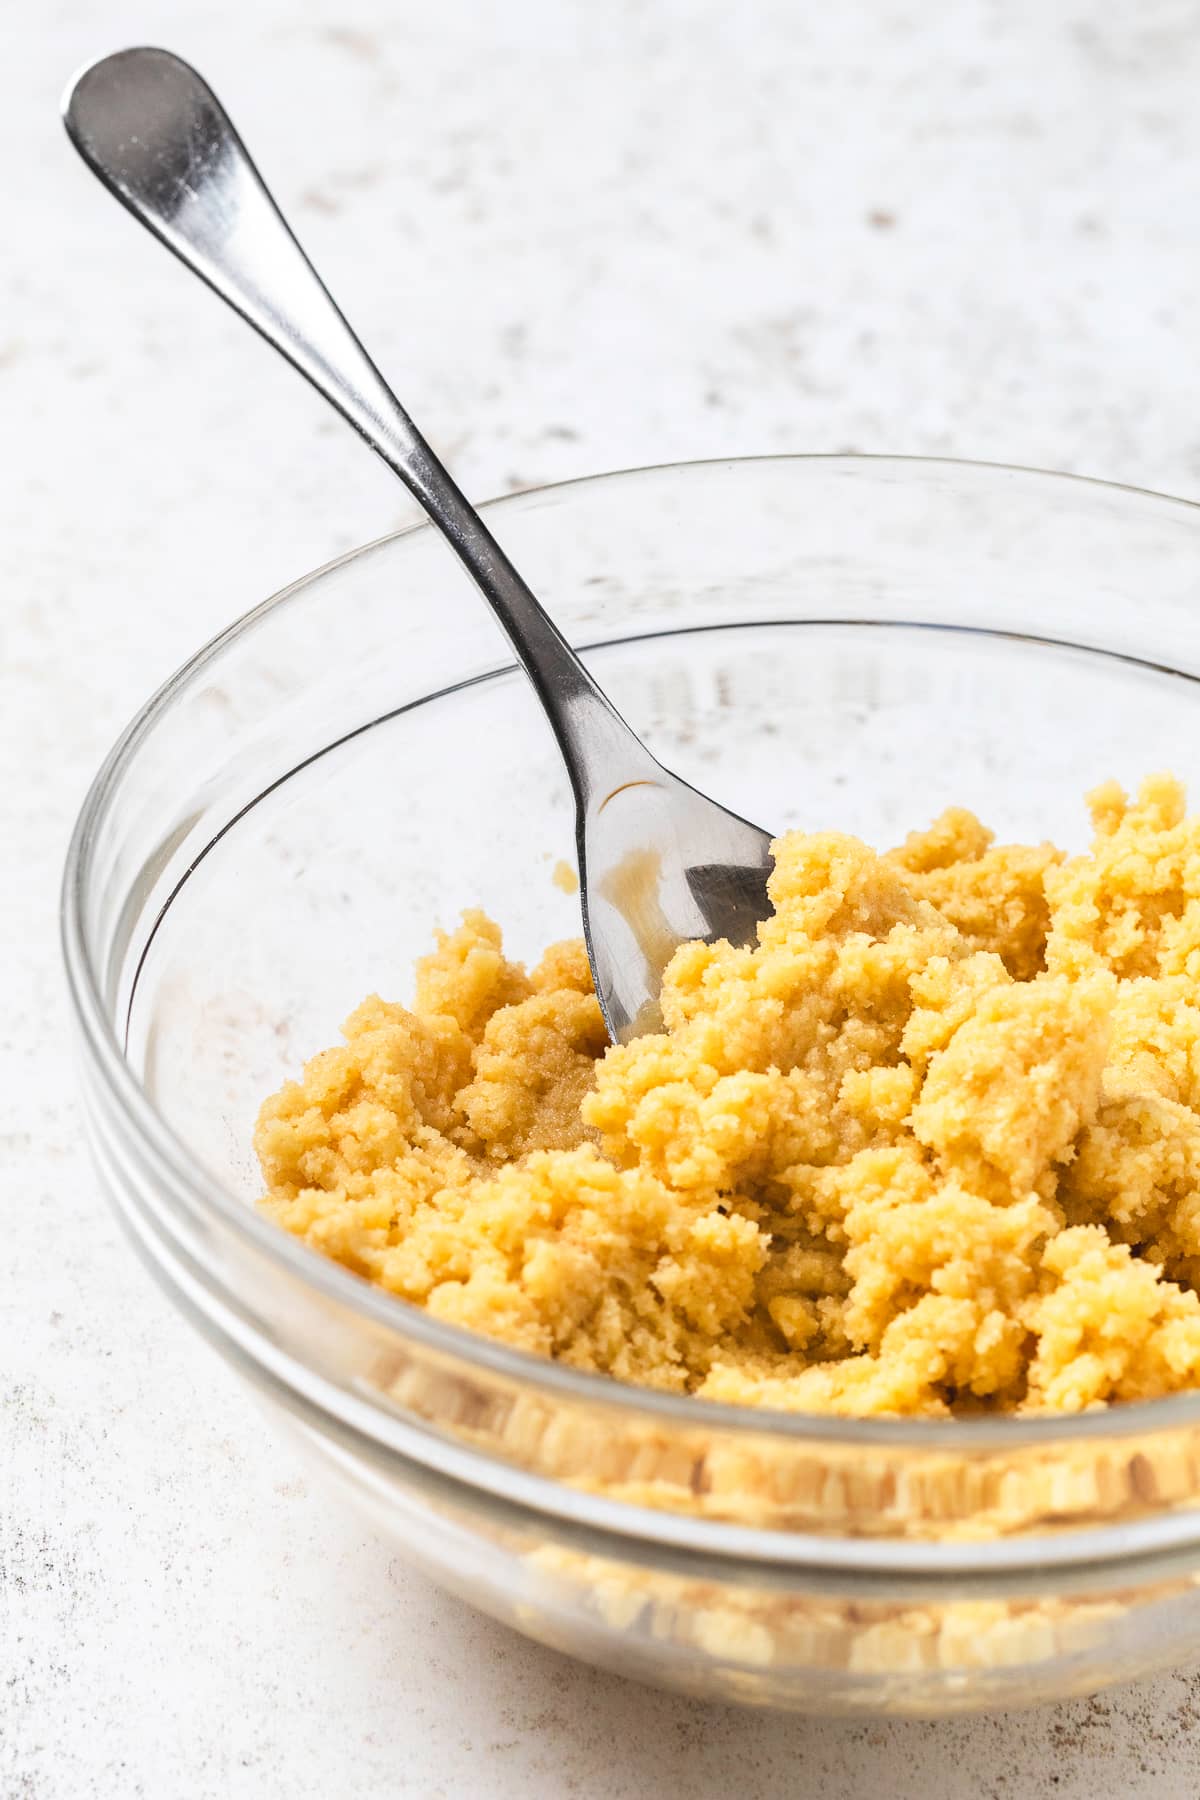
Add ⅓ cup of white frosting to the crumbled cake. Use a rubber spatula to thoroughly mix it in. If the mixture doesn’t stick together like dough, add a little more frosting, just one tablespoon at a time. Don’t add too much, or the cake pops might turn out too soft and fall apart.
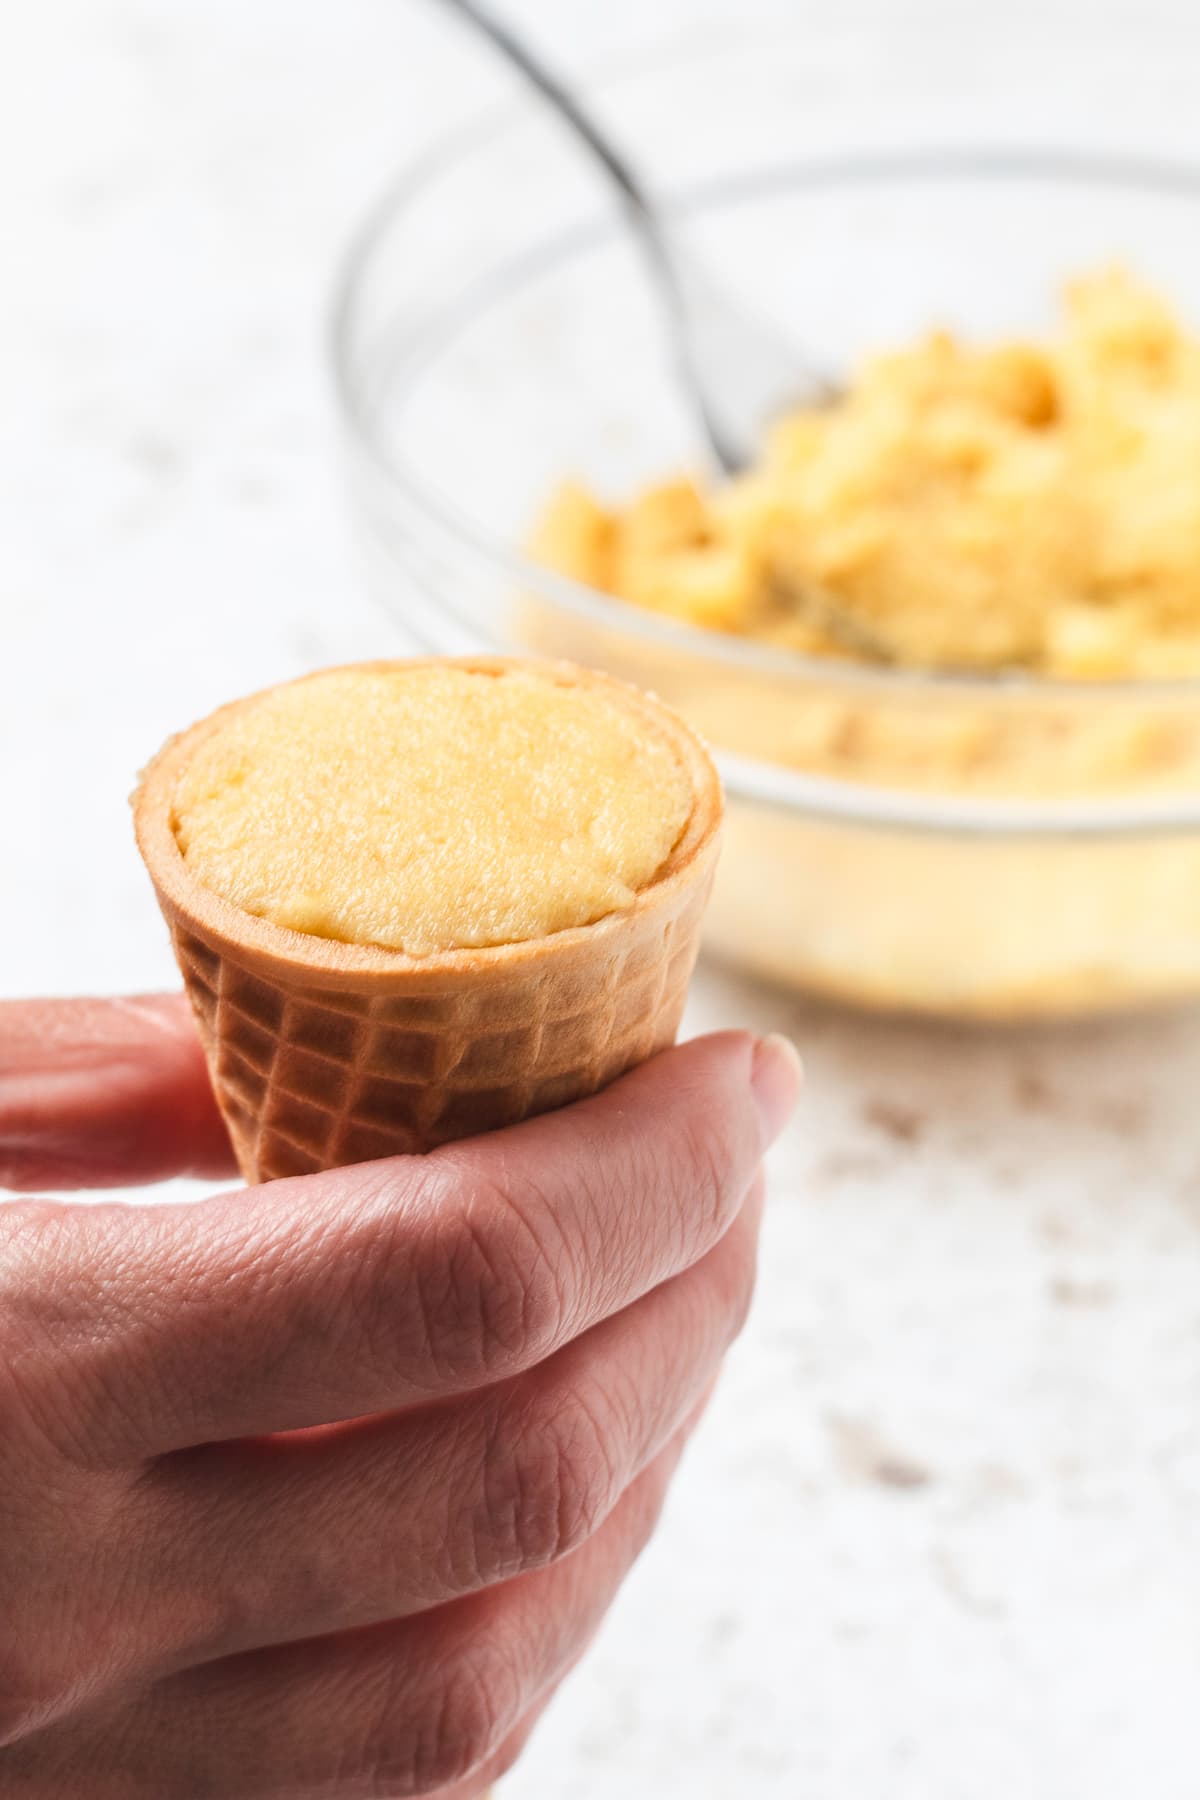
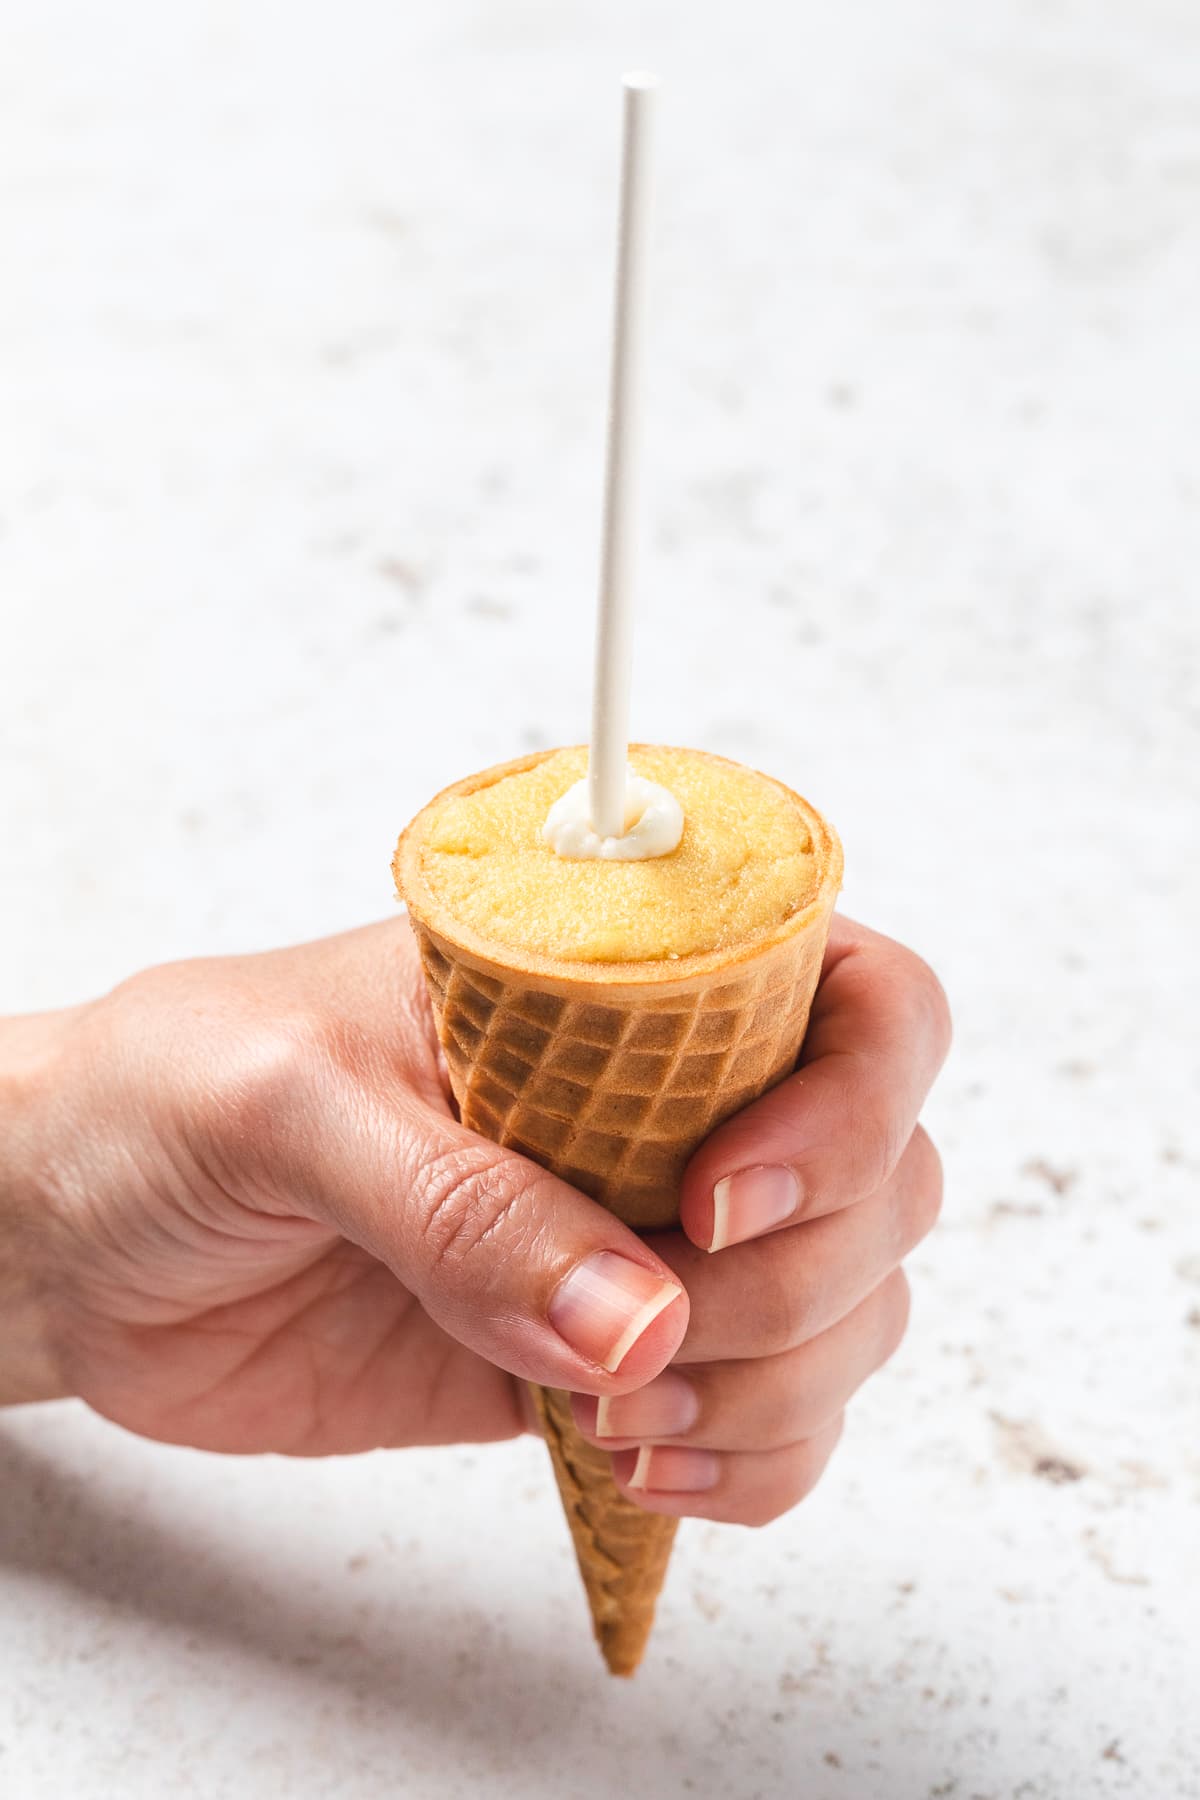
Scoop the cake mixture into each sugar cone. Gently press it down so the cone is completely filled.
Dip the end of a lollipop stick into a bit of frosting, then stick it into the center of each cone. Once all the cones are filled with cake and have sticks, put them in the fridge for about 30 minutes to firm up.
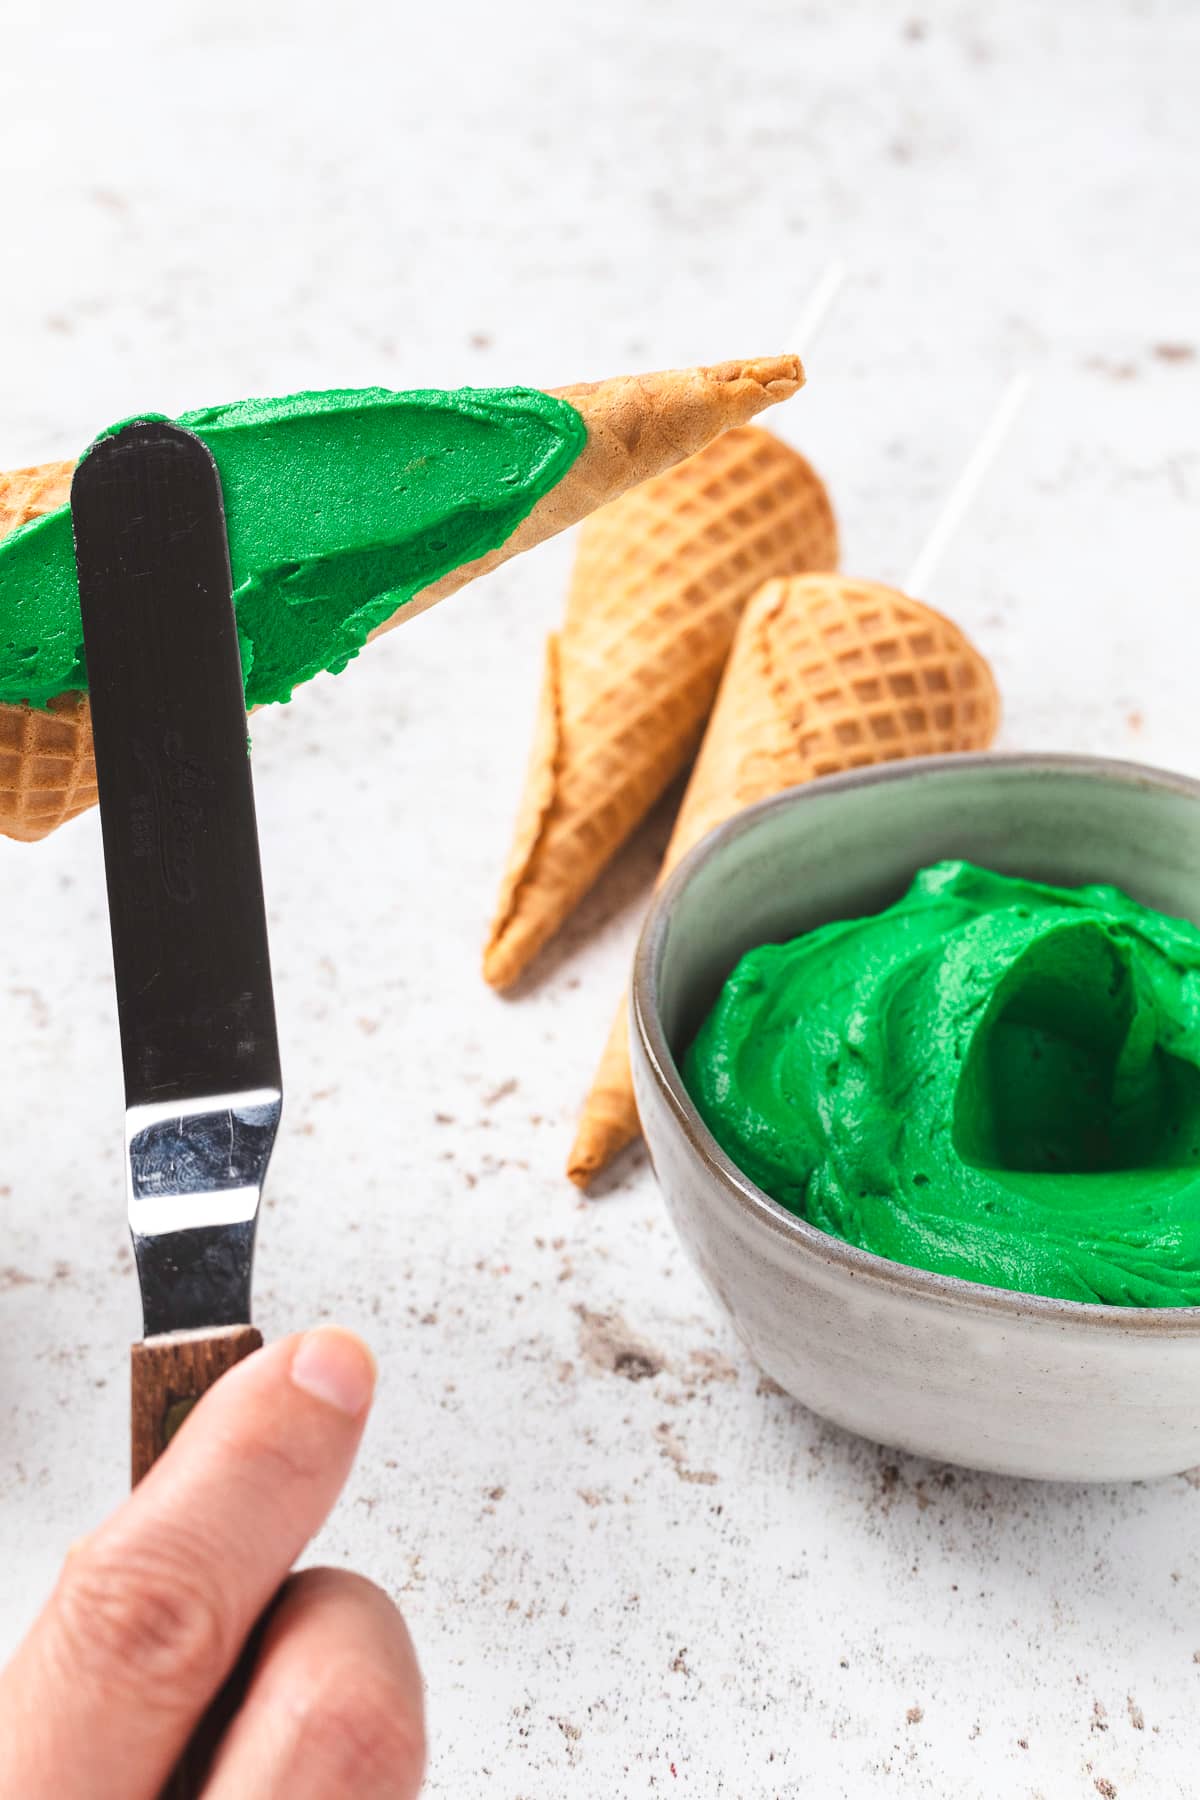
Fill a piping bag with green frosting fitted with a star tip. Set it aside.
After chilling, hold the lollipop stick and spread green frosting over the sugar cone using a butter knife or offset spatula, covering it completely.
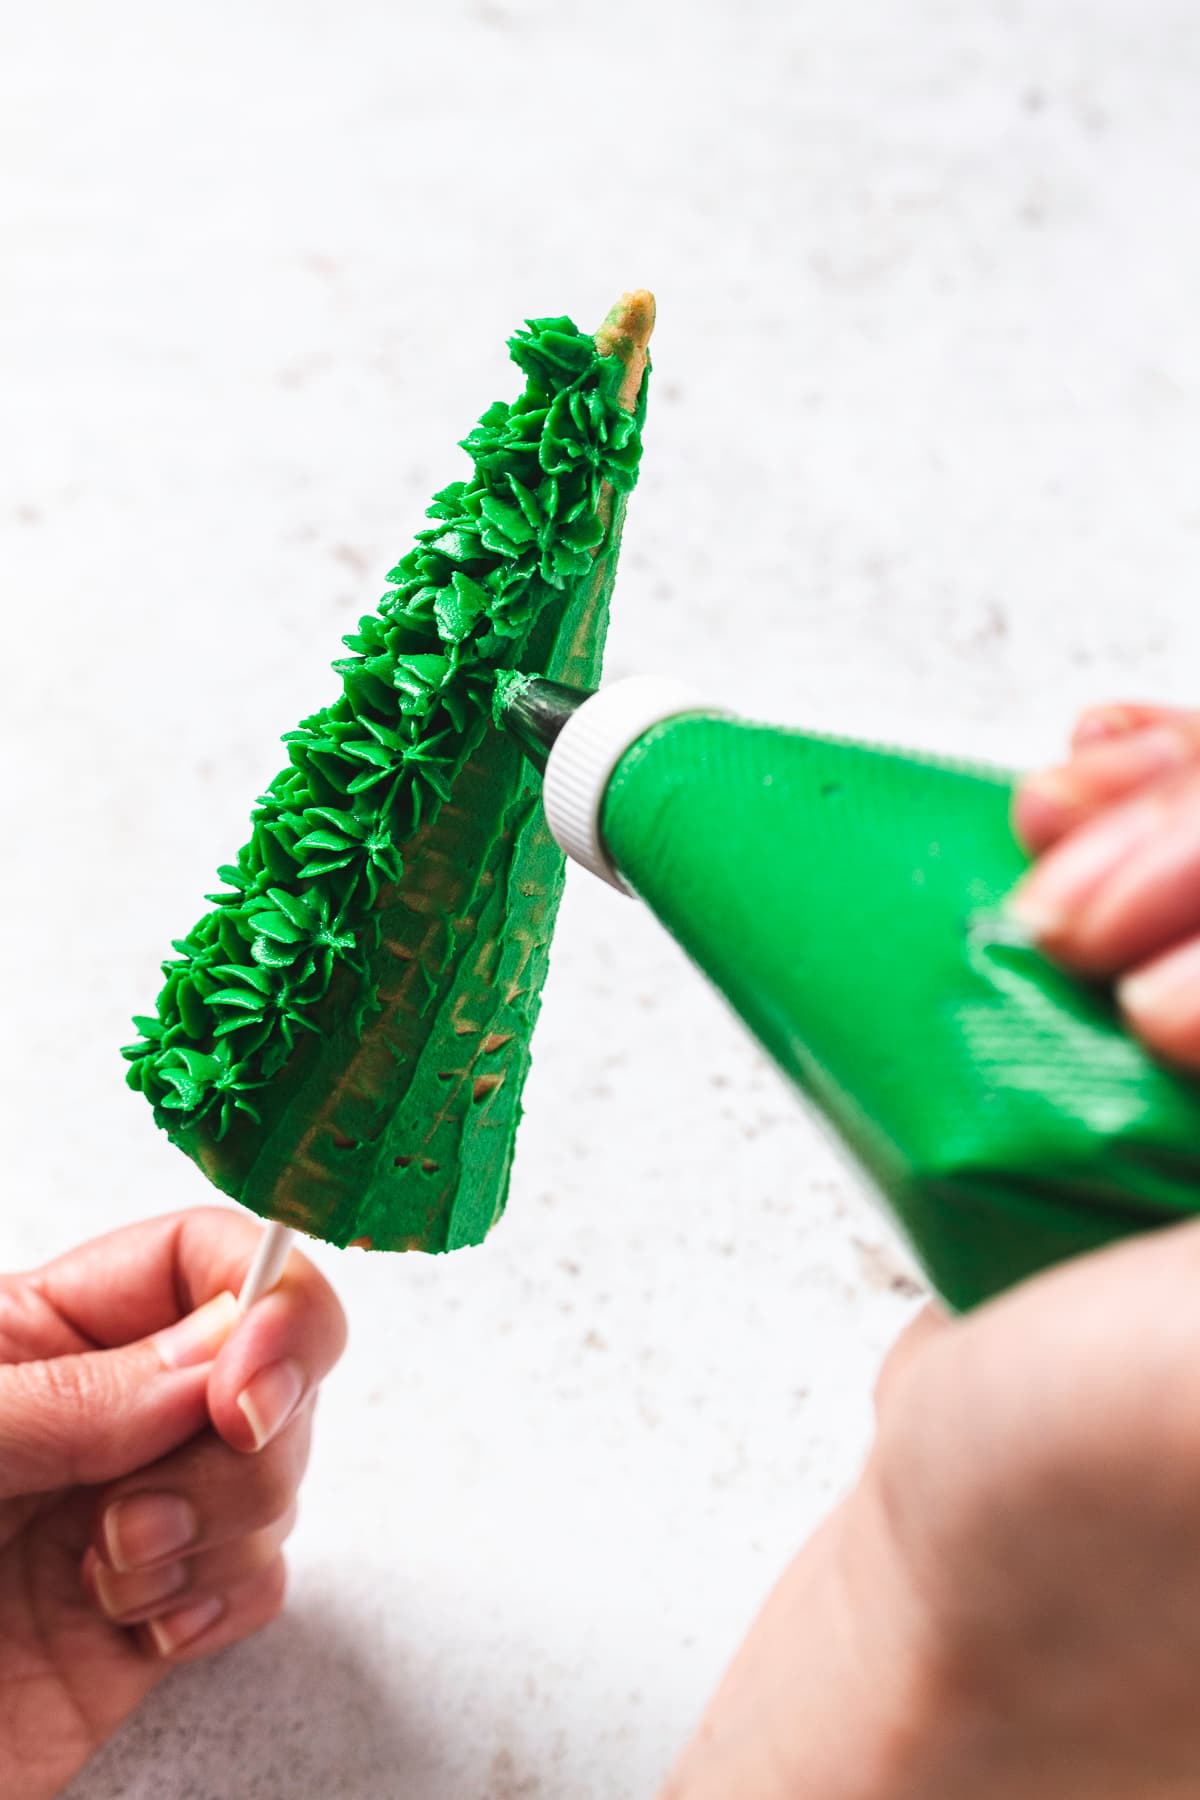
Pipe star shapes of the green frosting, starting at the top and working your way down in a single line. Then, slowly turn and do another line of star-shaped frosting. Continue until the sugar cone is covered.
Decorate. For example, add the pearl sprinkles and top with a gold star. Set aside and repeat for the rest of the trees. Time to enjoy!
How to Store Christmas Tree Cupcakes
Make the cake pops the same day you wish to serve them, then place them in a cake pop stand or container if you have one.
If you don’t have one, a piece of Styrofoam worked for us. Sometimes you have to get creative. I once saw someone stick theirs in a raw potato. And guess what? It worked!
Top tip
After adding the cake pop mix to the sugar cones, pop them in the refrigerator for 15-30 minutes. This will help firm it up.
FAQ
Hmmm! You can, but they’re best if you make them the day you plan to serve them for best taste and texture. If you make them too far in advance, the sugar cone will be soft.
Vanilla buttercream for the win! It is thick, which helps with forming the balls and maintaining their shape. Also, it adds just the right amount of moisture without making it too soft.

Christmas Tree Cake Pops Recipe
Ingredients
- 1 9×13 Yellow Cake Homemade or Cake Mix
- ⅓ Cup White Frosting Homemade or Store Bought
- 2 Cups Green Frosting
- Pearl Sprinkles
- Gold Star Sprinkles
- Lollipop Sticks
Instructions
- Break the cooled cake into small pieces in a large bowl. Keep crumbling it with your hands until it feels like sand. Make sure there are no big chunks left.
- Add ⅓ cup of white frosting to the crumbled cake. Use a rubber spatula to thoroughly mix it in. If the mixture doesn’t stick together like dough, add a little more frosting, just one tablespoon at a time. Don’t add too much, or the cake pops might turn out too soft and fall apart.
- Scoop the cake mixture into each sugar cone. Gently press it down so the cone is completely filled.
- Dip the end of a lollipop stick into a bit of frosting, then stick it into the center of each cone. Once all the cones are filled with cake and have sticks, put them in the fridge for about 30 minutes to firm up.
- Fill a piping bag with green frosting fitted with a star tip. Set it aside.
- After chilling, hold the lollipop stick and spread green frosting over the sugar cone using a butter knife or offset spatula, covering it completely.
- Pipe star shapes of the green frosting, starting at the top and working your way down in a single line. Then, slowly turn and do another line of star-shaped frosting. Continue until the sugar cone is covered.
- Add the pearl sprinkles and top with a gold star. Set aside and repeat for the rest of the trees. Time to enjoy!
Notes
- These are best eaten the same day to prevent the cones from getting soggy.
- You can freeze the leftover cake pop mixture for up to 2 months, or make some cake pops for later.
Nutrition
Leave a Reply